Power Apps and Power Automate 2020 License Updates

Power Platform

We have been waiting for the work flow product we knew as Ms Flow to get the Power title like Power BI and Power Apps for a long time. It recently joined the Power Platform family with the name of Power Automate (Flow) as expected.

Power Apps and Power Automate (Flow) is a team that increases efficiency and speeds up the work right from the beginning. While end users are working on their Power Apps mobile apps, Power Automate quietly sustains the work flow and verification process in the background.

You can click here for the articles about Power Automate.

Can I use Power Platform for free?

If you have any type of Office365 license, yes!

If you have one of the Office365 licenses below, you can use the Power Platform products for free.
2020 Licensing Updates for Power Apps and Power Automate

The increase of Premium connectors and features was foreshadowing the licensing changes that would happen in Flow.

With the Flow joining the Power family, Power Apps & Power Automate came to the top of the agenda.

If you don’t have Office 365

With the licensing method based on layered quote becoming definite, the prices are still valid since December 1, 2019.

You can use Power Apps and Power Automate as Add-on with monthly payment.

Licensing is separated into two ways: based on the number of users or based on the number of applications you will use.

1st Payment Model

To use 2 mobile apps as Company/Person

It is priced as 56 TLs (in Turkey) per user and the costs increase as the application number increases.


2nd Payment Model

To use limitless number of mobile apps as Company/Person

It is priced as 224,20 TLs (in Turkey) per user and there are no extra costs.

Take a look at here for details.


Take a look at here for the document about licensing.

Explore the skills of Go To Special!

The function that allows you to detect all cells that contain special data like comments, formula, space, and data validation in your Excel list is the Go To Special function.

With this formula, you can select the cells with formulas at once and encrypt them with a formula; select the blank cells at once and highlight them; select the cells that contain numbers, text, or conditional formatting all together and execute the action you need.

This function is located in the Find&Select button in the Editing group in Home tab.

You can also press F5 (you might need to press the fn key as well) and choose Go To Special in the window that pops up.

Explore the skills of the Go To Special window and facilitate your work!

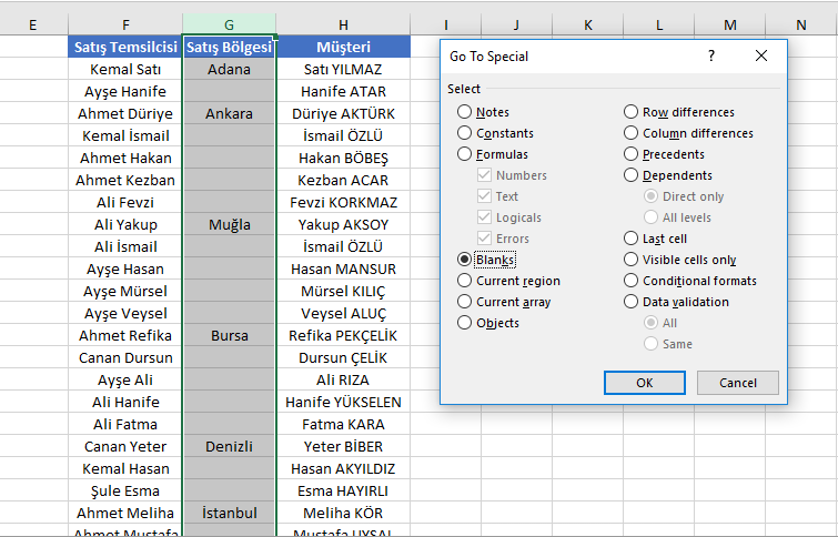
Let’s think about a scenario where we will fill the blanks in the Satış Bölgesi (Sales Region) column with the correct data like shown above.

First, we need to select the blank cells and then fill in the correct the quickest way possible!

How can we fill these cells easily without having to type into each of them one-by-one?

We will execute this action by using two features together.

Action Steps

  1. First, select the column that has the blank cells.
  2. The F5 shortcut (You might need to press the fn key) –> Go To Special
  3. Select Blanks in the window that pops open and click OK.

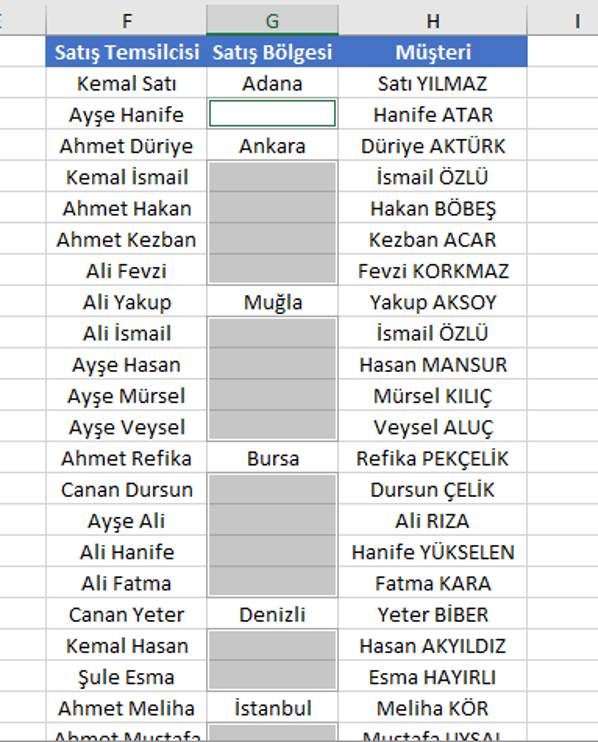
Then, we get the look below

You will see that the selected cells are gray and the cell on top is white. You can write into this cell directly. Which means that you don’t have to click to cell to be able to write. The reason why we focus on this is because the areas you want to work on are already selected, so no mouse click is needed. When you click a selected area with the mouse, it cancels the selection so you should be careful about it.

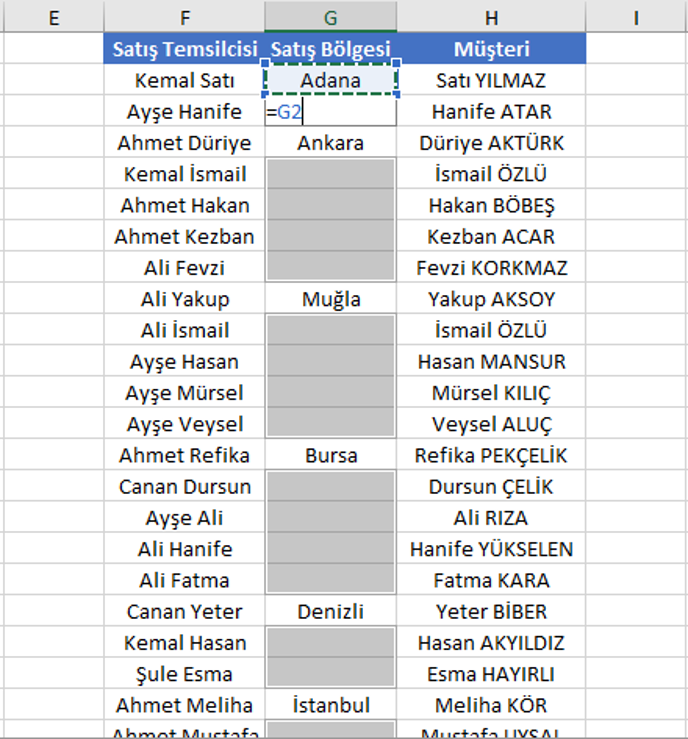
  1. We will write =G2 (the address of the cell right above it) through the keyboard directly. This way we get to say that we will use the data above to Excel. The most important point: Yes, we will write the data above but how is this formula work in the whole column?

    We move onto the fifth and last step for this action.
  2. For the =G2 action to work in all the selected areas of the column, we should press the CTRL and ENTER keys at the same time. After these steps, the Sales Region column will be filled completely.

    Other Go To Special Articles

    Take a look at this article to detect and encrypt the cells with formula by using the Go To Special window. And take a look at this article to learn which action to take to convert Blank Cells to a fixed text.

The CONCATENATE function

The Concatenate function concatenates texts in different cells and allows you to write them in one single cell. Texts can be edited in a very flexible way with the Concatenate formula.

In this manner, you can freely change any field you want in the formula and get the desired result.

The arguments of the formula consist of successive textual expressions.

=Concatenate(text1, text2,…)

You can select the texts to be concatenated from the related cells one-by-one.

In the example bellow, the address is created by concatenating the Strict, Street and Number. When the A2, B2, and C2 cells are concatenated directly, it created the MerkezAyazma37 result.

To see a more familiar result like Merkez Strict Ayazma Street Number:37 (this is the Turkish way of writing an address), what can we do?

You can write textual expressions like “Street”, “Strict” into the formula with the long method.


*When you need to write a text with the keyboard into the formula, you need to write it into a double-quote (“ ”). Using texts in ” ” in Excel is pretty strict.

A more efficient method for it to be reusable, editable and controlled centrally is to write strict, street, number information into a cell and use that cell as a reference.

Click here to take a look the the details of the Concatenate formula.

In addition, it to possible to concatenate without using a function. You can use the & symbol as a concatenation operator. It works similar to the concatenate function and allows you to concatenate the texts directly.

We have learned how to concatenate texts above. In addition to this, we might want to separate concatenated texts as well.

You can separate texts written in one cell into separate cells with the Convert Text to Columns function. So, it works the opposite way of the Concatenate function. Click here to read our article about Convert Text to Columns.

Introduction to Digital Forms with MS Forms

Communication with your employees and customers, and tracking and analyzing it  play an important role in determining your strategies. You can quickly prepare and share e-form with MS Form while digitalizing. You can take a look at this article to read business scenarios with MS Forms and practical examples in detail.

Your forms that you work on by logging it with your user information are stored in a secure environment. Since you keep your forms in a digital environment, every action you take is saved immediately. For this reasons, your forms don’t get lost or deleted.

10 Outstanding Skills of MS Forms:

  1. The form can be previewed on the mobile phone or computer.
  2. You can receive an e-mail notification when your form is responded.
  3. You can add rules to your form. With these rules, you can change the questions according to the answers given to the questions. Thus, the question displayed by the user changes according to the answer given by the user.
  4. Answers can be analyzed by question-based or person-based custom charts.
  5. Responds can be viewed on the Excel list.
  6. The background color or picture of the form can be customized.
  7. When you delete a form, it goes to the recycle bin. Thus, you can activate the form for reuse whenever you want.
  8. You can make forms with points. You do not have to show the scores to the person who answered the form. When you want to show it, you can show it as soon as the form is answered.
  9. The user can be allowed to respond the form multiple times.
  10. The questions can be mixed within themselves. The options of the questions can be mixed within themselves.

MS Forms Screen

You can start creating your own form by click the New Form button here. The forms shared with you or group forms can be viewed in this screen.

Create a Form

We can divide a created form into 6 main topic.

  1. Questions
  2. Answers
  3. Preview
  4. Theme (Design)
  5. Share
  6. Setting

We can start by naming the Form first. You can add your company’s logo or an image suitable for you company’s concept through the add image button right next to the name of your Form.

Add Form Elements
The questions type you will add to your poll with the Add new button look like this:

There are 4 standard question types.

  1. Option
  2. Text
  3. Rating
  4. Date

You can view more question types by clicking the arrow button on the right corner. These are other question types like Ranking, and Likert.

You can add an image for the form element you have added.

The buttons in the upper right corner are:

  1. Make a duplicate of the question (default)
  2. Delete the question (default)
  3. Change the order of the questions (default)

In the lower right corner:

  1. For questions with options; allows markings multiple options
  2. Requires the question to be responded (default)

If you think that you have completed the form when you are done adding the questions, you are ready to share it.

It is enough for you to click the Share button on top right and copy your form’s link  and then send this link to the people you want.

Even if you share your form, any change you make is active all the time. People who you shared it with always see the latest version of your Form.


Excel Shortcuts1

It is possible for you to get to your destination the fastest way when you use shortcuts. But when you get support from the Navigation, it is probable that you will taking the fastest and traffic-free way.

We, as Office lecturers, offer you the most special and functional Excel shortcuts below for you to get to the result you want faster and in an optimum way.

Move Cells Between Pages

The Alt Shortcut:
It is enough to drag and leave while pressing the Alt key to move cells. This way, you can move cells to the page or location you want.

Create a New Line in the Cell

Alt & Enter Shortcut:
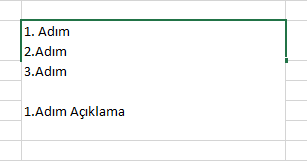
You can write texts one under the other or create articles in a cell in Excel just like in Word. It is enough to press the ALT and ENTER keys to move onto the next line in the cell.

Fastest Way to Create a Chart

Alt & F1 Shortcut:
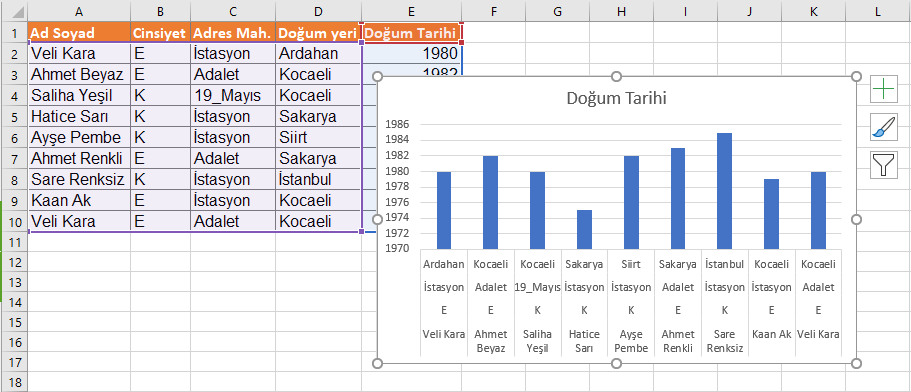
It is the shortcut that allows you to create a chart the fastest way possible.
Select a field in the list you want to create a chart from and then press the Alt and F1 keys. A chart like the one below will be created quickly.

Navigate in the Page Fast

Ctrl & Arrow Keys:
You can quickly navigate in your list with the Ctrl & Arrow keys. You can reach the last full cell in your list. You can change the direction with the arrow key you want while pressing the Ctrl key.
*This is a general shortcut, you can even use it to navigate between texts while writing a text on your device.

Select Step by Step in the Page

Shift & Arrow Keys:
Allows you to select the cells in your list one by one. You can change your selection with the arrow key you want while pressing the Shift key.
*This is a general shortcut. You can even use it to select texts while writing a text on your device.

Bulk Selection in the Page

Ctrl & Shift & Arrow Keys:
You can select one by one with the Shift key, and if you want to make this action faster you can add the CTRL key. This way you can select way faster!
*This is a general shortcut. You can even use it to select texts while writing a text on your device.

Experience the easiness of adding and deleting a column/row quickly.

Ctrl & –  Shortcut and Ctrl & + Shortcut

You can delete columns/rows with the Ctrl & – keys,  and add columns/rows with the Ctrl & + keys.

Make the Cells Writable

F2 Shortcut:
We usually double-click the cell in order to write something in it. But it is enough to use the F2 shortcut instead of this.
*This is a general shortcut. You can even use it to change the name of a file on your device.

Enter Data to All Selected Cells

Select the cells you want to enter the data to.
Don’t click anything else once you are done selecting. Write the text you want directly.
Press the Ctrl & Enter keys for the text to be distributed to all cells.

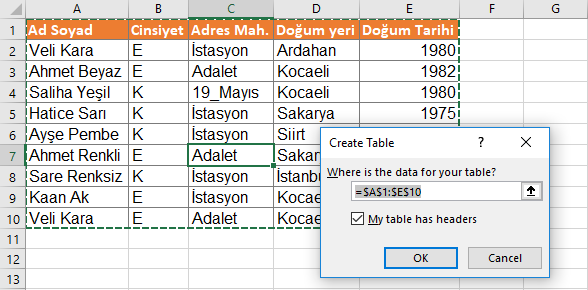
The Fastest Way to Create a Table in Excel

Ctrl & L Shortcut:

Repeat the last action!

F4 Shortcut:
Allows you to repeat your last action.

For example, highlight the A1 cell with green and press the F4 key after clicking the B1 cell. You will see that the B1 cell will be highlighted with green as well! Since the previous action is repeated every time, you can just keep doing this with F4 forever!

It allows you to pin a cell while writing a formula. There are 4 different ways ($A$1 , A$1 , $A1, A1) to use this feature which is also known as Cell Reference Styles.

*Note: You might need to use the fn key (depending on your computer) to use the function keys with F like F1 and F2.


A combination of little clicks and keys can accomplish great things!

Create Poll Rules with MS Forms

Polls play an important role in enabling communication with your employees and customers, tracking and analyzing or determining business strategies. You can easily and quickly prepare and share e-forms with MS Form during your digitalization process.

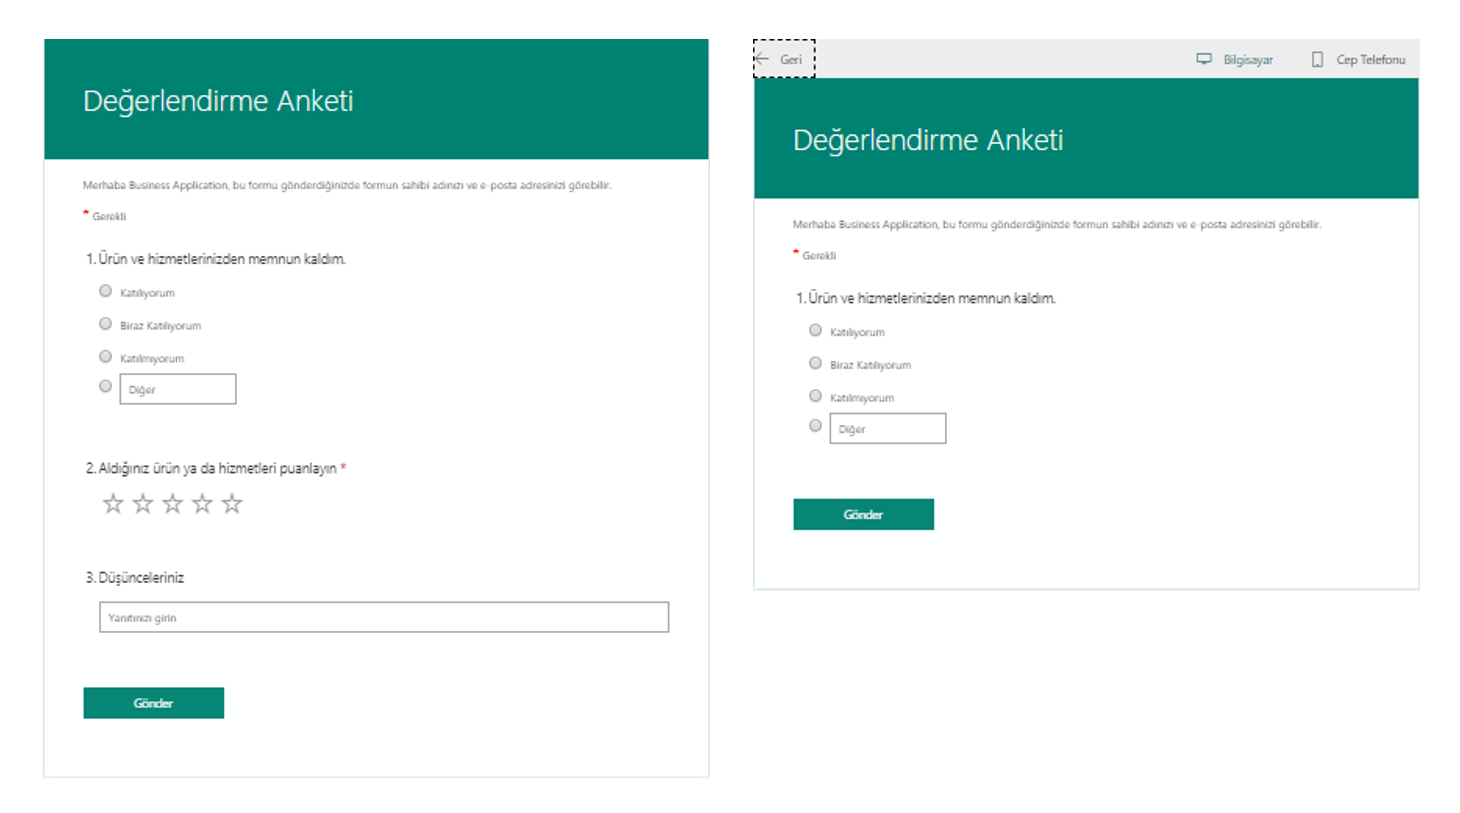
In this article, we will be talking about adding rules to the Forms polls. You can manage polls based on questions by adding rules. You will be able to manage the next question that will be displayed depending on the answer user gave to the questions.

How Does It Work?

For example, while collecting personal information of the employees:

  • The What is your license class? question can be displayed if Yes is chosen from the Yes/No options of the Do you have driving license? question.
  • Detailed questions like the Ages of the children, Number of children can be displayed to the user when the Married option is chosen from Married/Single of the What is your marital status? question.

Thanks to the feature, user will not see all the questions while collecting information from them and polls will be answered more quickly and consistently and interactive work will be executed.

How Is It Done?

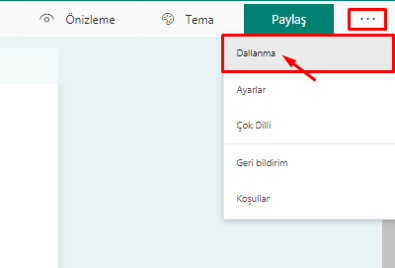
First, you need to create the poll questions. After you create the poll questions, choose Branching within … that is next to the Share button on top right.


We have created the first question with 4 options.
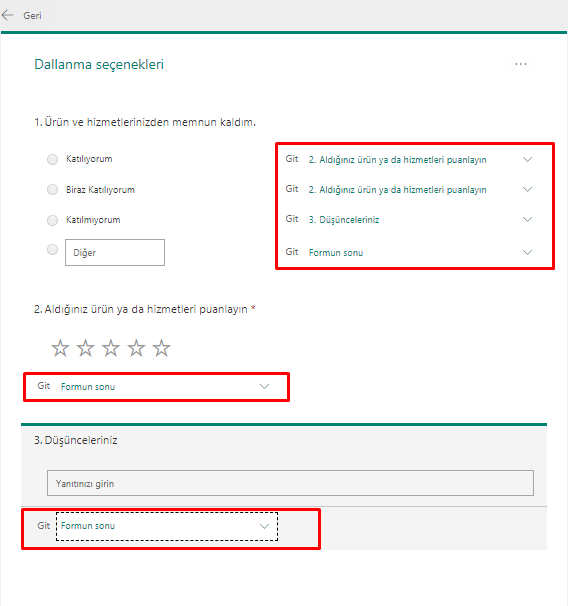
The directing action is complete by choosing the next question that you want to be asked for each option from the list that pops open.

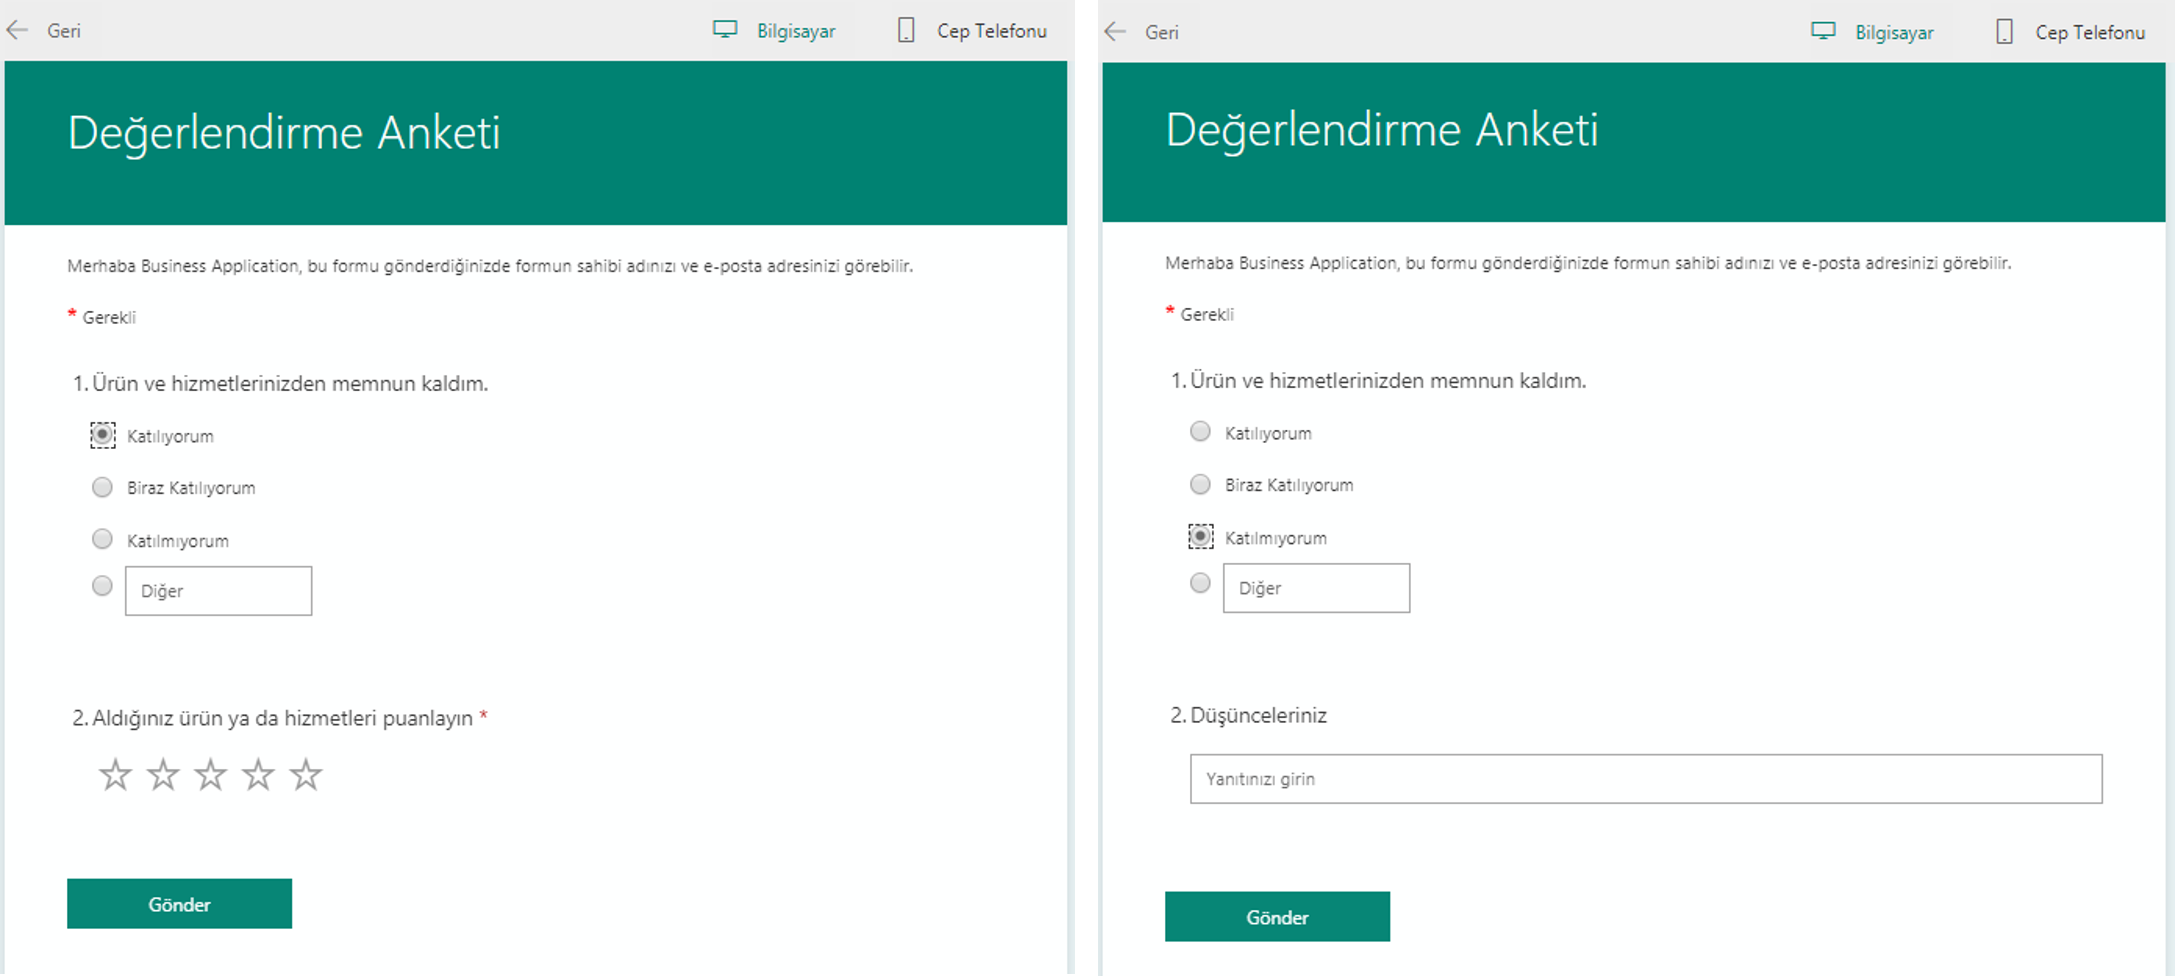
Your actions will be saved that moment and you will be able to test your scenario whenever you want with the preview feature.

Let’s analyze the scenario below.

For the 1st question
If the 1st option is chosen –> It will lead to the 2nd question
The 2nd question will be answered –> the form will be complete

For the 1st question
If the 2nd option is chosen –> It will lead to the 2nd question
The 2nd question will be answered –> the form will be complete

For the 1st question
If the 3rd option is chosen –> It will lead to the 3rd question
The 3rd question will be answered –> form will be complete

For the 1st question
If the 4th option is chosen –> It will be waited for the user to write a text into the Other field.

We have analyzed that the form questions can be connected to rules and the sort of the questions can be changed.

When you want to cancel the actions you have executed, you can reset your document by clicking Reset withing … that is on the top right of the same screen.


Give a Magic Touch to Your Office Programs with Add-ins

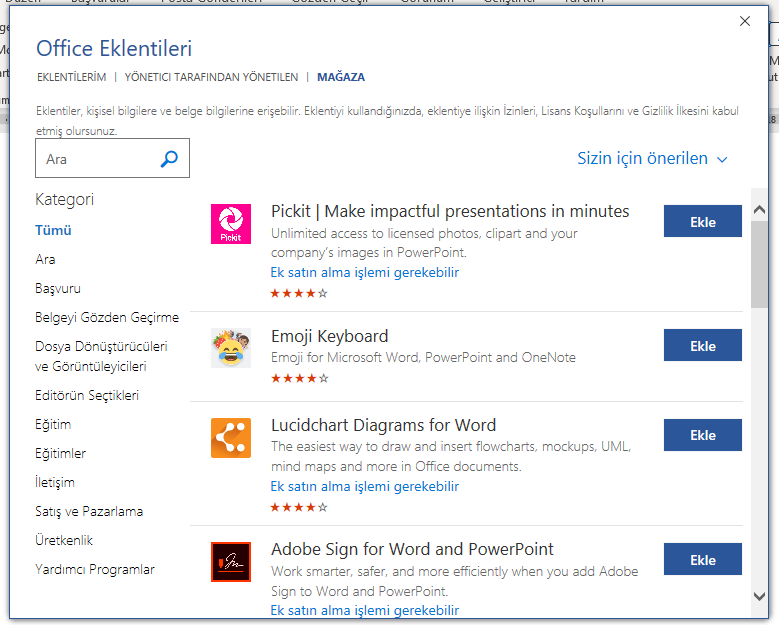
You customize you Office products like Excel and PowerPoint by adding features that are not standard.

There are a lot of add-ins like map graphs, Power BI extensions, Forms polls, Emoji and Stickers.

You can find the Add-ins in the Insert tab.

You can choose and use useful and interactive add-ins from various stores.

Excel – Bing Maps Add-in

Allows you to show data like Latitude, Longitude, City and Country in your Excel lists with points on Bing Maps.

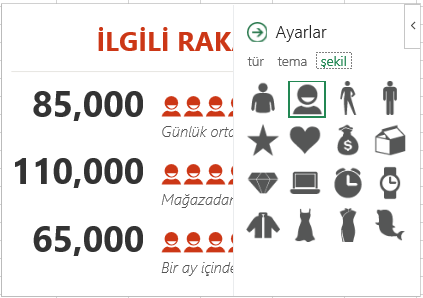
Excel – People Graph Add-in

How about using symbols instead of using standard Doughnut or Column charts?

With this add-in, you can express your numeral data with symbols.

You can customize the theme, symbol and chart view and use them the way you want.

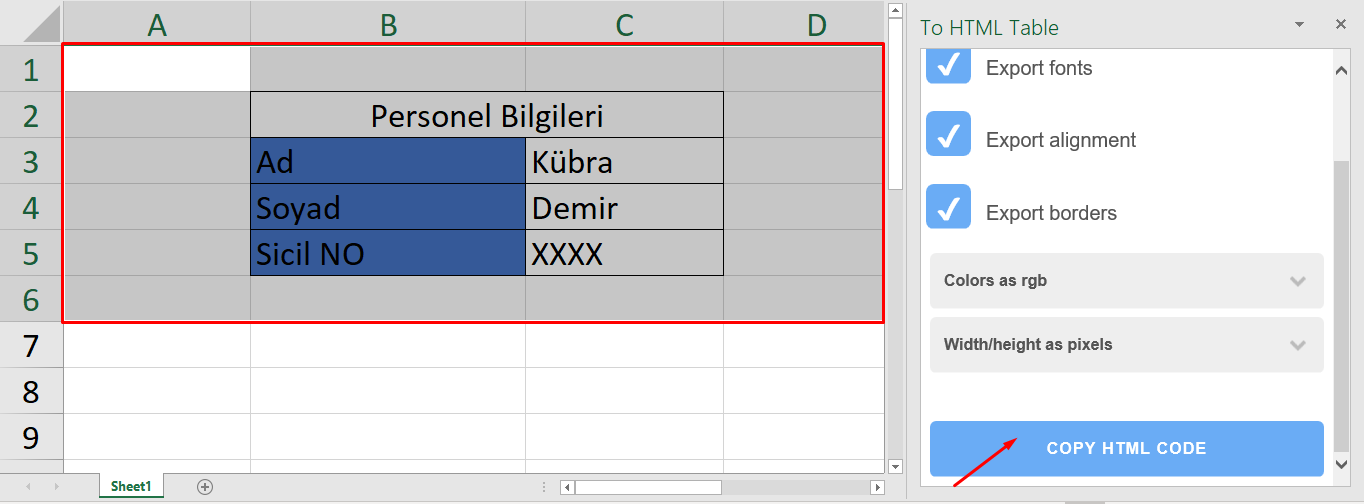
Excel – Selection to HTML Add-in

What do you say about an assistant that writes the HTML codes for you?

You can turn all the data in your Excel list -including tables and text- into HTML text directly.

All you need to do is to choose the list range that you want to turn and then press the COPY HTML CODE button that is located in the window of the add-in.

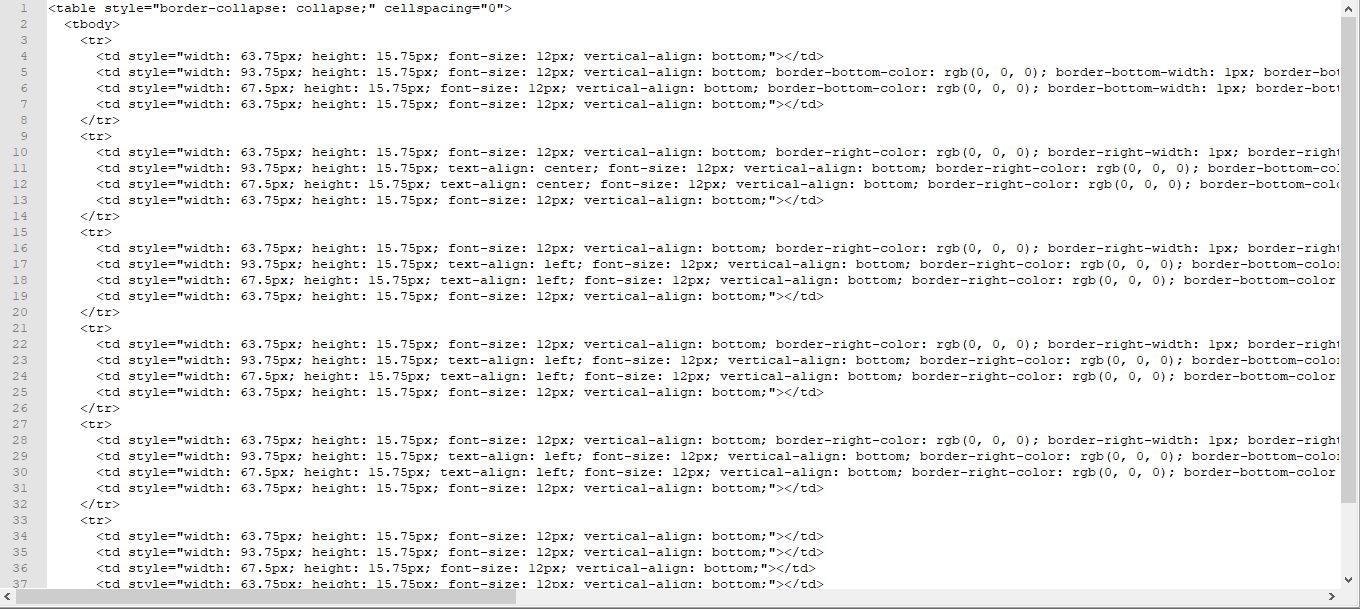
HTML codes have been created and copied in the background instantly, now you can paste them anywhere you want and use them.

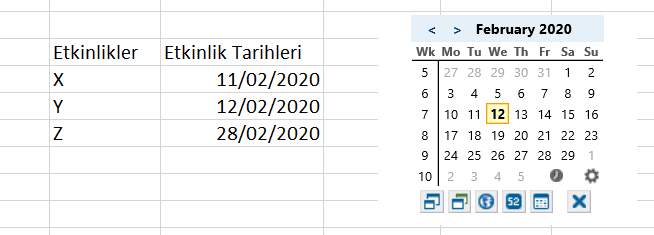
Excel – Mini Calendar and Date Picker Add-in

You can quickly plan with the dates you choose from the calendar.

You can customize the features like the week number, the first of the day and color.

PowerPoint – Forms

You can respond the electronic forms during the presentation.

You can add and use any form you want to the presentation with the Forms feature.

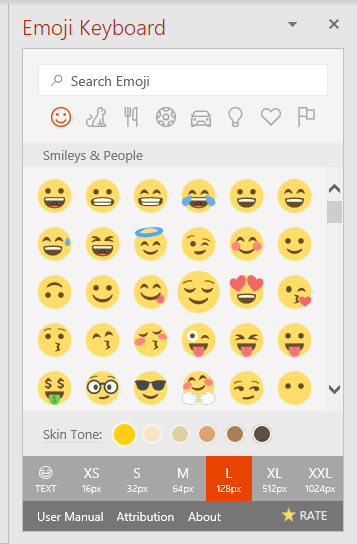
Word/PowerPoint/Outlook – Emoji Keyboard Add-in

You can use the emojis you use on your phone in your PowerPoint presentations as well.

PowerPoint – To Do List Pro Add-in

Do you need To-Do lists during a presentation?

You can keep your action steps as a To-Do list while preparing a presentation.

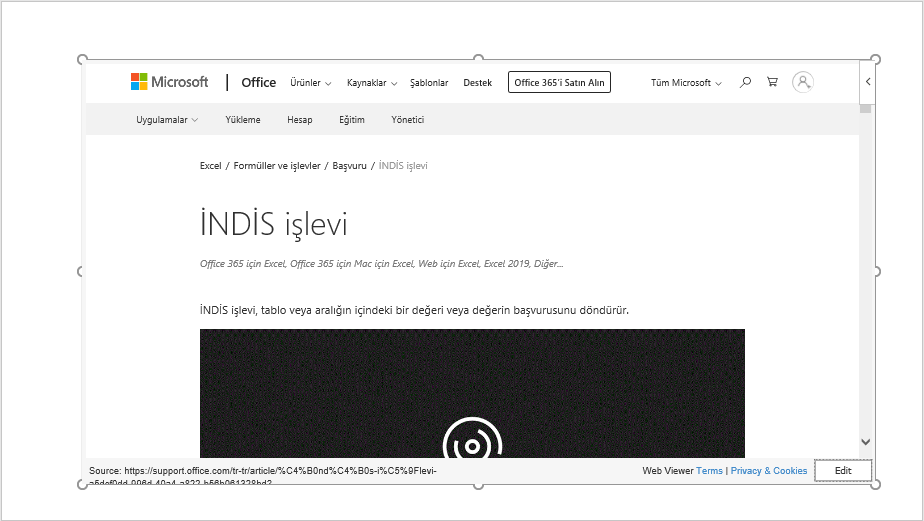
PowerPoint – Web Viewer Add-in

Would you like to show the preview of any website you want while presenting.

You can preview the website without having to stop your presentation and open the browser.

PowerPoint – Pixton Comic Characters Add-in
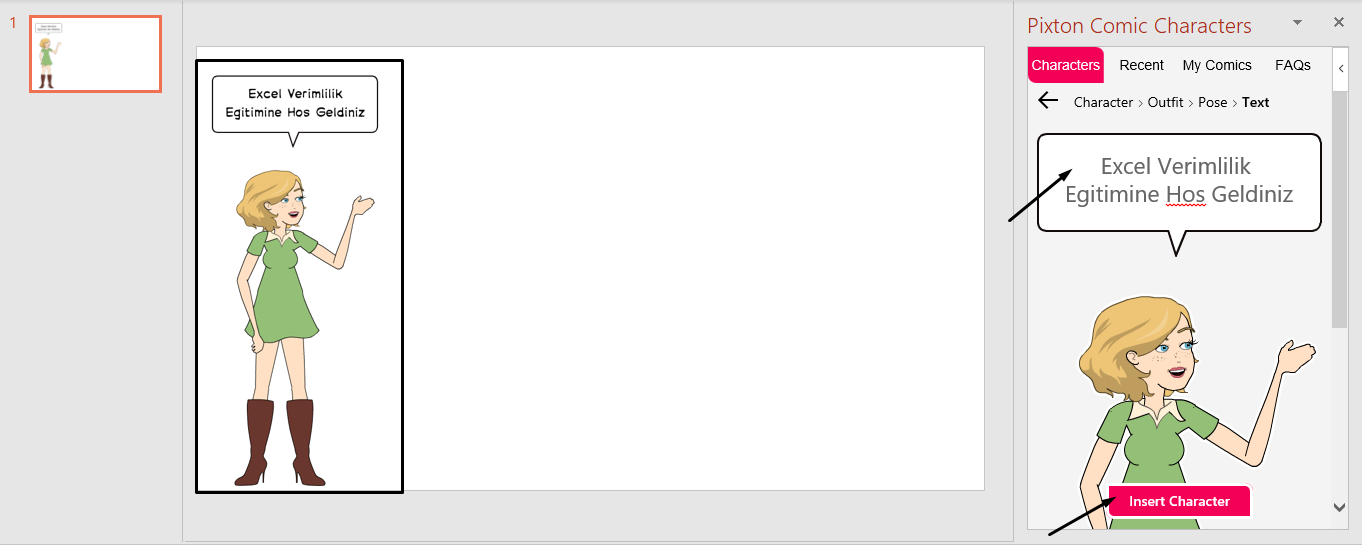
Make your presentations fun!

You can customize the look, clothes and stance of cartoon characters.

You can make your characters more impressive with speech balloons. Now your presentations are more colorful.

Word – To Do Add-in

You can use To-Do to make your work more planned.

Add information like hour and minute to the tasks and then press the Add Task button. You get to check the task duration with the countdown timer.

Page Redirect Actions

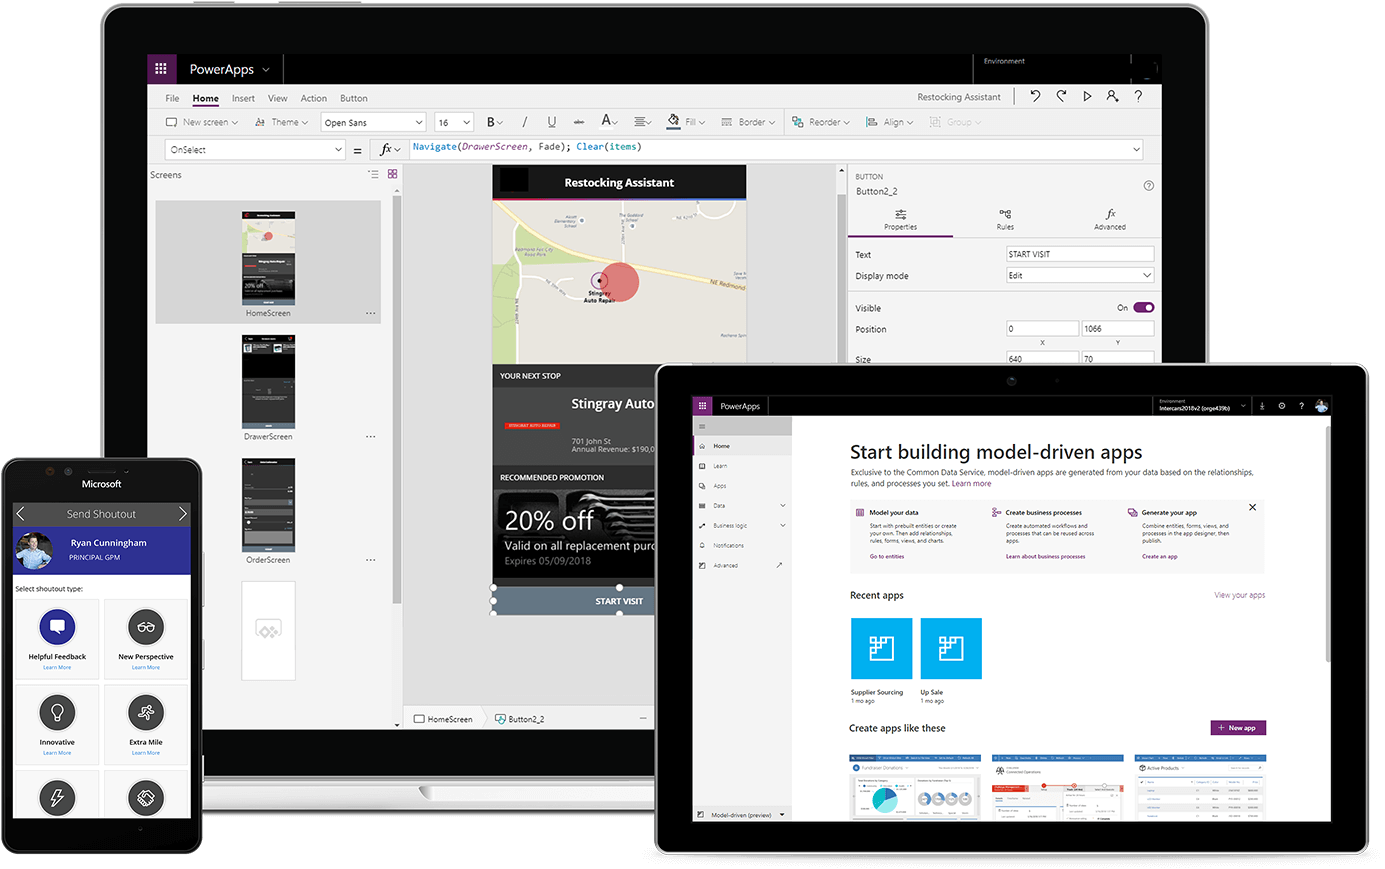
The Navigate function is used to switch between screens in PowerApps mobile applications.

How do you switch between pages?

By touching/clicking the items on the screen (with the user trigger)
Or automatically after a certain period of time (with a timer).

Usually the OnSelect property is used for all the actions that wanted to be executed the moment we “click”.

As an example, let’s take a look at how we switch to the next page when we click the next button on the page.

The page redirection action for the next button:

Navigate (target page, transition effect) will be written into the OnSelect property of this item.

You of course don’t have to write the Navigate formula to OnSelect all the time. We mentioned that different items have different properties. In this sense, properties like OnCheck, OnVisible, OnChange are used when necessary as well.

The OnCheck property can be used for a check box if you want it to work “the moment it is marked”.