Sending Out Professional Emails? This is the guide you need

As much as we may try to downplay the significance of an email signature, it can actually play a significant role in shaping how others perceive us in professional communication. Your e-mail signature is essentially your virtual business card, representing not only yourself but also the company or organization you represent. A well-designed signature can not only convey a sense of professionalism and credibility but can also promote your personal brand and make it easier for others to connect with you.


So, if you’re looking to make a great first impression in your e-mail communications, you’ll want to pay close attention to the design of your signature. In this article, we’ll provide you with a comprehensive guide to creating the perfect email signature. We’ll cover everything from the essential elements to include, such as your name, job title, and contact information, to more advanced design tips, like choosing the right font and color scheme. Plus, we’ll introduce you to SIGNandGO, a user-friendly email signature generator that can help you create a professional-looking signature in minutes. So, let’s get started!

e-mail signature

  1. Start with Your Name

    Your e-mail signature should always start with your name. This can be your first and last name or just your first name if you prefer. Consider using a larger font size and bolding your name to make it stand out.

  2. Include Your Title

    If you have a specific job title or position within your organization, include it in your email signature. This can give your emails more context and help establish your authority in your field.

  3. Add Your Company Name and Logo

    If you are representing a company, make sure to include the name and logo in your email signature. This can help promote your company and create brand recognition.

  4. Provide Contact Information

    Your signature should also include your contact information, such as your phone number and email address. This can make it easier for people to reach you and can save time in the back-and-forth of communication.

  5. Consider Adding a Professional Photo

    Adding a professional headshot to your e-mail signature can help put a face to the name and create a more personal connection with your recipients.

  6. Choose a Legible Font

    When choosing a font for your e-mail signature, opt for something that is clear and easy to read. Avoid using fancy or decorative fonts that can be difficult to read or distracting.

  7. Keep it Simple

    Your email signature should be simple and clean, without too many distracting elements or graphics. This can help maintain a professional appearance and prevent your signature from looking cluttered.

  8. Use Consistent Formatting

    Make sure to use consistent formatting throughout your email signature. This can help create a cohesive look and make your signature appear more polished and professional.

  9. Follow Brand Guidelines

    If your company has specific brand guidelines or standards, make sure to follow them when creating your email signature. This can help maintain consistency and promote brand recognition.

  10. Keep it Short

    Your email signature should be concise and to the point. Avoid including unnecessary information or lengthy quotes, as this can make your signature appear cluttered and unprofessional.

  11. Consider Including a Call-to-Action

    Including a call-to-action in your email signature can encourage recipients to take action, whether it’s visiting your website or scheduling a call with you.

  12. Add Social Media Links

    If you are active on social media, consider including links to your profiles in your email signature. This can help promote your personal brand and make it easier for people to connect with you on other platforms.

  13. Be Mindful of Colors

    When choosing colors for your email signature, keep in mind that certain colors can evoke specific emotions or have different meanings in different cultures. Stick to neutral colors or colors that align with your company’s branding.

  14. Use Separators to Organize Information

    Using separators such as lines or bullet points can help organize the information in your email signature and make it easier to read.

  15. Test Your Signature on Different Devices

    Make sure to test your email signature on different devices and email clients to ensure that it appears correctly and is legible on all platforms.

  16. Include Legal Disclaimers if Necessary

    If you work in a regulated industry or need to include legal disclaimers in your emails, make sure to include them in your email signature.

  17. Optimize for Mobile Devices

    With more and more people accessing their emails on mobile devices, it’s important to ensure that your email signature is optimized for mobile screens. This can include using a smaller font size and simpler formatting.


In conclusion, creating the perfect email signature is crucial for establishing a professional and credible image in electronic communication. By following the tips outlined in this article, you can ensure that your signature effectively promotes your personal brand and the company you represent, while also providing all necessary contact information in a clear and concise manner.


However, crafting the perfect e-mail signature can be time-consuming and challenging, especially if you lack the design skills or software necessary to create a professional-looking signature. That’s where SIGNandGO comes in! With SIGNandGO’s easy-to-use signature generator, you can create a custom email signature in just a few minutes. Our platform allows you to choose from a variety of templates, fonts, colors, and layouts, and also gives you the ability to add custom images, social media icons, and legal disclaimers.


So don’t let a lackluster email signature hold you back in your professional communications. Sign up for SIGNandGO today and start sending out emails with confidence!

If you want to witness SIGNandGO’s success, go ahead and take a look at our success story. 👩‍💻

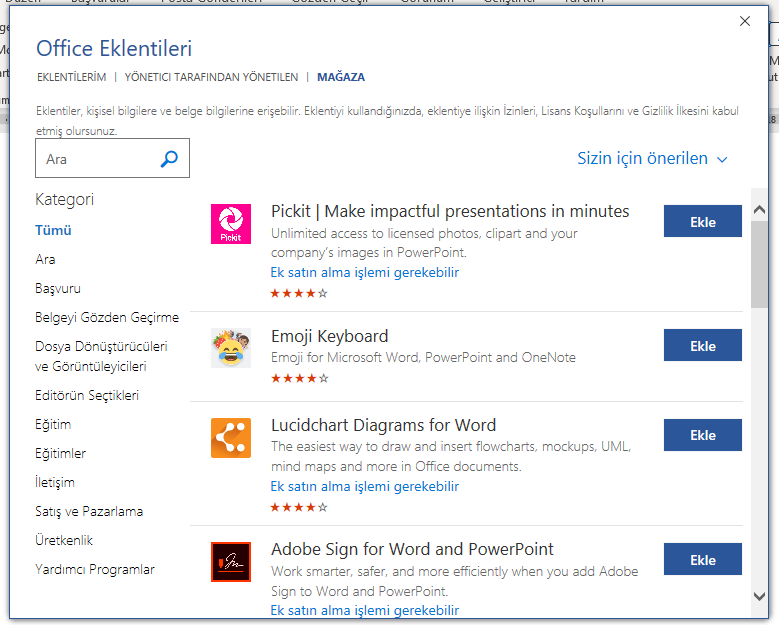
Give a Magic Touch to Your Office Programs with Add-ins

You customize you Office products like Excel and PowerPoint by adding features that are not standard.

There are a lot of add-ins like map graphs, Power BI extensions, Forms polls, Emoji and Stickers.

You can find the Add-ins in the Insert tab.

You can choose and use useful and interactive add-ins from various stores.

Excel – Bing Maps Add-in

Allows you to show data like Latitude, Longitude, City and Country in your Excel lists with points on Bing Maps.

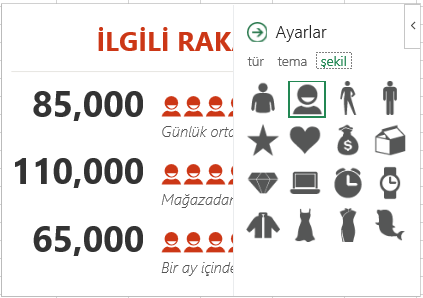
Excel – People Graph Add-in

How about using symbols instead of using standard Doughnut or Column charts?

With this add-in, you can express your numeral data with symbols.

You can customize the theme, symbol and chart view and use them the way you want.

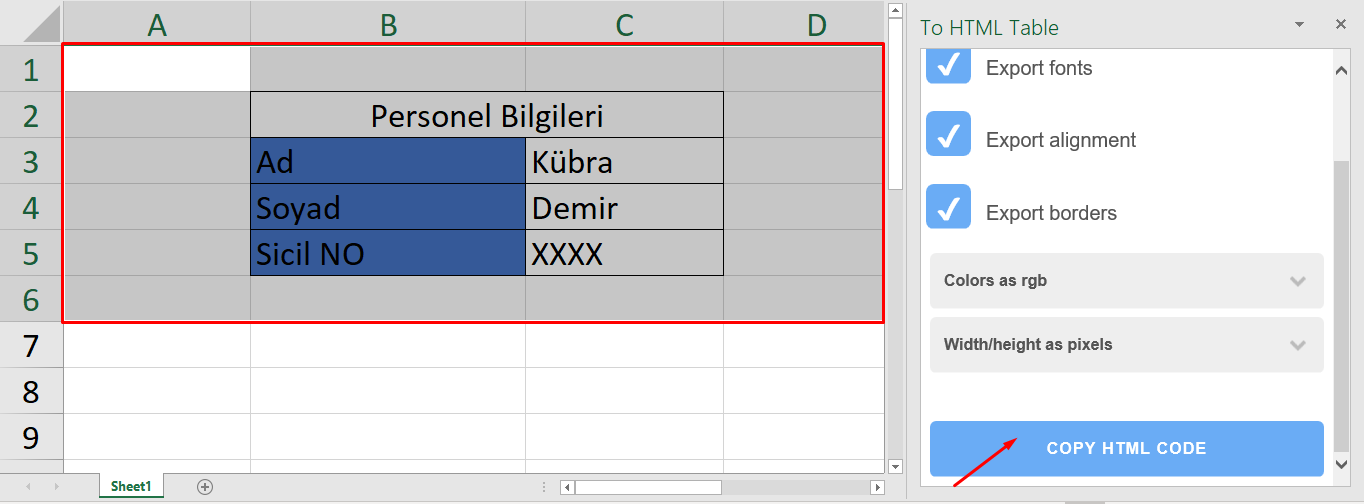
Excel – Selection to HTML Add-in

What do you say about an assistant that writes the HTML codes for you?

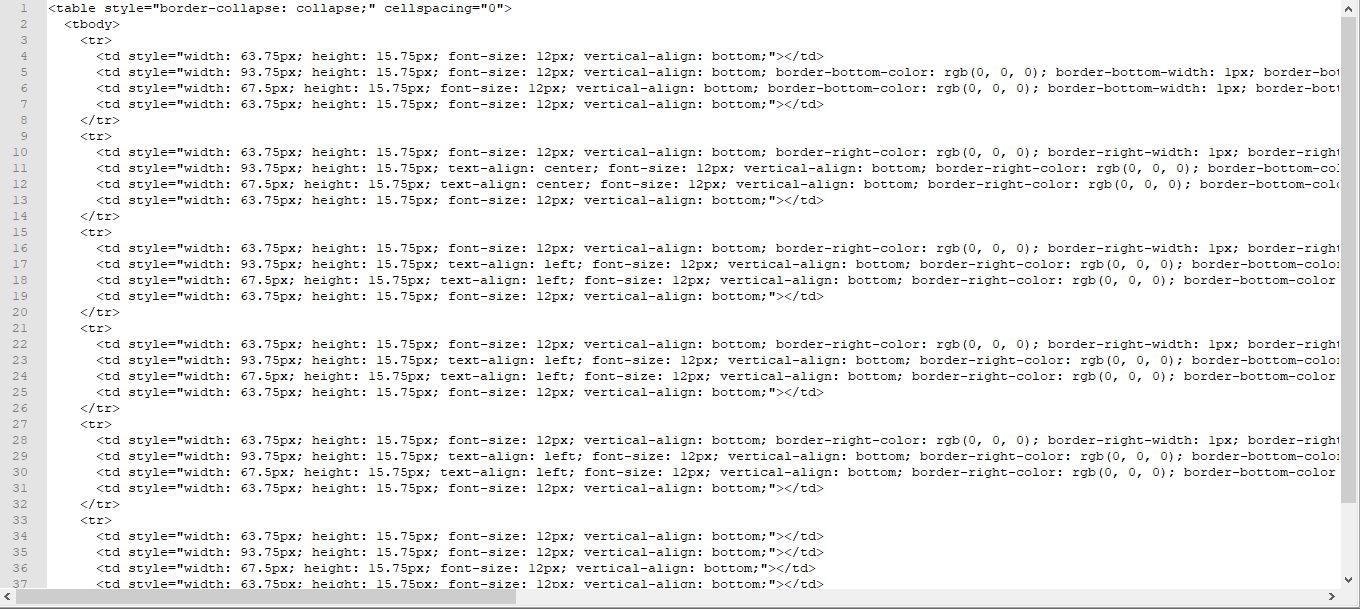
You can turn all the data in your Excel list -including tables and text- into HTML text directly.

All you need to do is to choose the list range that you want to turn and then press the COPY HTML CODE button that is located in the window of the add-in.

HTML codes have been created and copied in the background instantly, now you can paste them anywhere you want and use them.

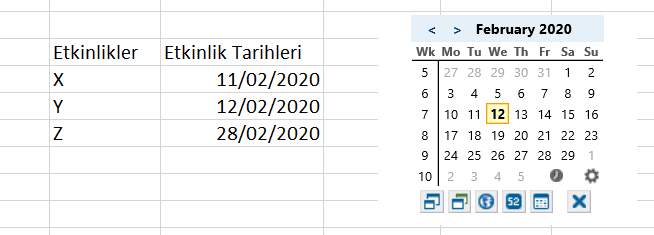
Excel – Mini Calendar and Date Picker Add-in

You can quickly plan with the dates you choose from the calendar.

You can customize the features like the week number, the first of the day and color.

PowerPoint – Forms

You can respond the electronic forms during the presentation.

You can add and use any form you want to the presentation with the Forms feature.

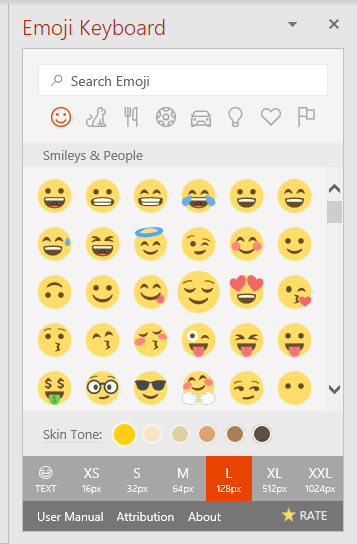
Word/PowerPoint/Outlook – Emoji Keyboard Add-in

You can use the emojis you use on your phone in your PowerPoint presentations as well.

PowerPoint – To Do List Pro Add-in

Do you need To-Do lists during a presentation?

You can keep your action steps as a To-Do list while preparing a presentation.

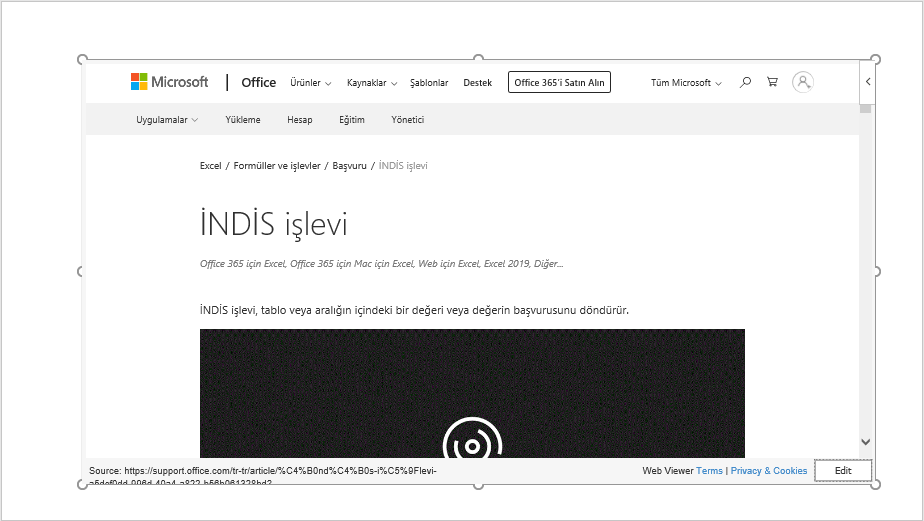
PowerPoint – Web Viewer Add-in

Would you like to show the preview of any website you want while presenting.

You can preview the website without having to stop your presentation and open the browser.

PowerPoint – Pixton Comic Characters Add-in
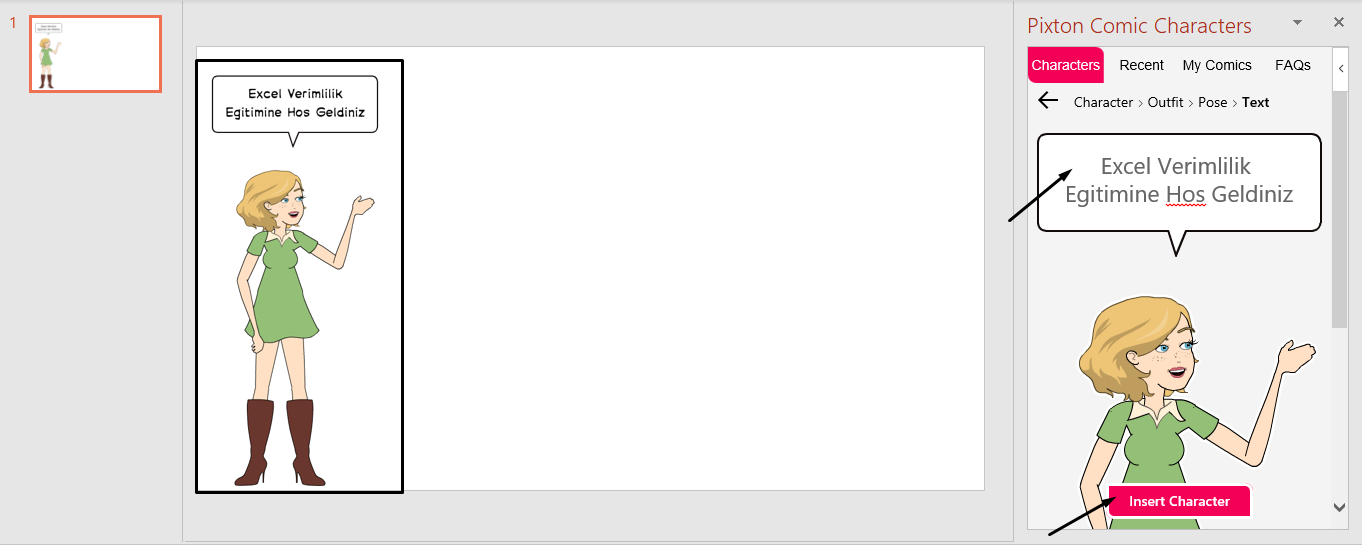
Make your presentations fun!

You can customize the look, clothes and stance of cartoon characters.

You can make your characters more impressive with speech balloons. Now your presentations are more colorful.

Word – To Do Add-in

You can use To-Do to make your work more planned.

Add information like hour and minute to the tasks and then press the Add Task button. You get to check the task duration with the countdown timer.

Don’t Miss Out Mails with High Importance

It can be hard to follow up e-mails because of workload or you might overlook them. You can try creating rules on Outlook in order not to miss out your e-mails.

You can achieve optimum mailbox usage by creating a variety of rules based on your daily work routine and how you get your job done. This way, you can categorize your mails and separate your workload into different sections and respond your mails faster.

Outlook Rules

With rules, you can use your mails separately based on importance, subject, contacts or a lot of different scenarios on Outlook.

Receive Notifications for the Mails with High Importance

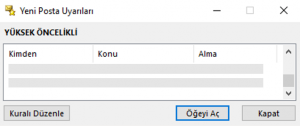
Wouldn’t it be nice to hear alert sounds and see a notification window on the screen when you receive an important mail?

Önem Derecesi Yüksek Maıller için Uyarı Sesleri Alma

In this article, we will create alert sounds and notification window for the mails marked as Important.

Play a Sound When Your Receive an Important Mail

We will execute the action on the File–>Manage Rules and Alerts window.

*With this rule, if the mail you receive is marked as High Importance, an alert sound will be played and notification window will be displayed for this mail.

Action Steps

You can start by choosing New Rule–> Play a sound when I get messages from someone. You can change all the necessary criteria for the rule with the Next button on a common screen all the time anyways. So, selecting the template is not that important.  So, you can choose Apply rule on messages I receive under the Start from a blank rule title.

Önemli Maıl Geldiğinde Ses Kaydı Çalma

Click next.

Step 1: unmark from people or public group.
Mark marked as important.

Step 2: Choose the Importance level by clicking the word “importance”. Click next.

Önem derecesi

In the new screen, you will see the Step 1: play sound option.

Step 2: Click play sound and choose the sound you want for the mails.

istenen sesi seçme

Scroll down and choose the Display a specific message in the new item alert window option.

Step 2: Write the message for the alert and move to the next screen.

Yeni Öğe Uyarısı penceresinde belirli bir ileti göster

Click next and get to the last screen.

Step 1: Specify a name for the rule.
Step 2: Select Run this rule now on messages already in “Inbox” and control the past data that meet this rule.

Close the rule window with the End button.

Gelen Kutusunda çalıştırma

Click the Apply button on the Rules and Alerts window to save the changes. If no new rules will be created, save and close the window.

Kurallar ve Uyarılar penceresi

You can take a look at here for the mail rules.

Don’t Miss Out Mails with Mail Alerts

It can be hard to follow up e-mails because of workload or you might overlook them. You can try creating rules on Outlook in order not to miss out your e-mails.

You can achieve optimum mailbox usage by creating a variety of rules based on your daily work routine and how you get your job done. This way, you can categorize your mails and separate your workload into different sections and respond your mails faster.

Outlook Rules

With rules, you can use your mails separately based on importance, subject, contacts or a lot of different scenarios on Outlook.

Create Mail Alerts with Outlook Rules

Wouldn’t it be nice to hear alert sounds and see a notification window on the screen when you receive an important mail?

Önem Derecesi Yüksek Maıller için Uyarı Sesleri Alma

In this article, we will create alert sounds and notification window for the mails marked as Important.

Mail Alerts

We will execute the action on the File–>Manage Rules and Alerts window.

*With this rule, if the mail you receive is marked as High Importance, an alert sound will be played and notification window will be displayed for this mail.

Action Steps

You can start by choosing New Rule–> Play a sound when I get messages from someone. You can change all the necessary criteria for the rule with the Next button on a common screen all the time anyways. So, selecting the template is not that important.  So, you can choose Apply rule on messages I receive under the Start from a blank rule title.

Önemli Maıl Geldiğinde Ses Kaydı Çalma

Click next.

Step 1: unmark from people or public group.
Mark marked as important.

Step 2: Choose the Importance level by clicking the word “importance”. Click next.

Önem derecesi

In the new screen, you will see the Step 1: play sound option.

Step 2: Click play sound and choose the sound you want for the mails.

istenen sesi seçme

Scroll down and choose the Display a specific message in the new item alert window option.

Step 2: Write the message for the alert and move to the next screen.

Yeni Öğe Uyarısı penceresinde belirli bir ileti göster

Click next and get to the last screen.

Step 1: Specify a name for the rule.
Step 2: Select Run this rule now on messages already in “Inbox” and control the past data that meet this rule.

Close the rule window with the End button.

Gelen Kutusunda çalıştırma

Click the Apply button on the Rules and Alerts window to save the changes. If no new rules will be created, save and close the window.

Kurallar ve Uyarılar penceresi

You can take a look at here for the mail rules.

Send E-Mails with Attachments Weekly with Power Automate

Do you send the latest version of the excel file on which you work with your team to your manager? Spare 10 minutes of your time now and create your own flow with Power Automate and send your e-mails with Excel attachments to your manager automatically every week at any hour your want.

When you want to create a flow, you start off with an action (trigger). The flow we will create needs to be run automatically every week, so we will start the flow with the Recurrence(Schedule) trigger.
*If you want, you can do monthly, daily, hourly controls.

In the next step, we need to indicate the location of the file that we want to send as an attachment to the flow. Thus, we need to add the related connector (for example: OneDrive) to the action flow. This way, the file we want to send with mail attachment will be accessed.

Actions are very short and simple. You can follow the steps below and create the flow quickly.

Power Automate Steps

  • Recurrence(Schedule) -> For weekly control
  • OneDrive(Get File Content)->
  • (List Files in Folder)-> To get the data there
  • To be able to choose the one we want among the files we have called Add Condition- > (We get the control of the file we want to call by writing [Name without Extension=ExcelName] through Name without Extension.
  • This action brings the apply to each command to the screen automatically ->
    Power Automate Uygulama Adımları 
  • If the condition is met, to send the mail: we need to add the content coming from OneDrive to the attachments content field in the Advanced Options in Outlook (Send an e-mail). Also, we need to fill in the attachments name field.
    mail atma işlemi

You can send the latest version of your Excel file in Outlook mail attachment with Recurrence(Schedule) control every week by following the steps above.

Send Calendar to a Guest List with Power Automate

You can send meeting calendars with customized data like addressing each person, event content and location for all your event invitations through Power Automate.

This way, you don’t have to deal with creating calendars one by one. You only need to indicate the guest list and event details.

Create a Table

Open en Excel in OneDrive. Add a Table from the Insert tab.

Write Mail, Name Surname and mail details into the columns of this table like below.

For each row of this table, e-mails will be sent separately by the flow.

The event date and hour was written as 2020-03-23T13:00:00 in order for it to be in the format Power Automate expects. The time format is 24-hours and the event will be created for the exact hour you determine.

Flow Process with Power Automate

Start a new blank flow.

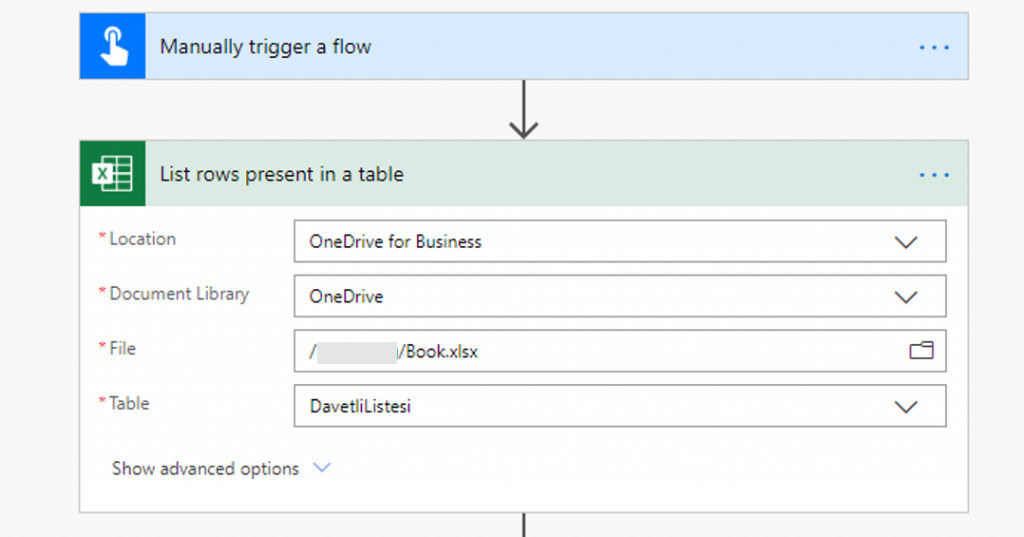
After the data in the table is filled, flow will be run by being triggered individually. For this reason, start the flow with Manually trigger a flow.

In the next step, add Excel for Business (List rows present in a table) to be able to add the data in the Excel table. Add the table you’ve just created into this item.

In the next step, add Outlook (Send an e-mail).

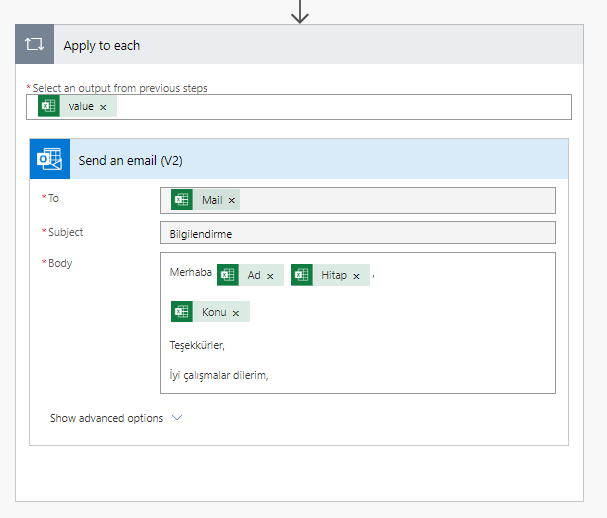
In this step, the columns of the Excel table is added to the related fields. With you choosing the Excel fields (mail, name, etc.) the Apply to each item will be added to the flow automatically. An event will be created for each row in the Excel file thanks to the Apply to each item.


After filling the related fields, name the flow on top left corner. For example: Send Mails to a Certain List. You can save and close the flow on top right corner.

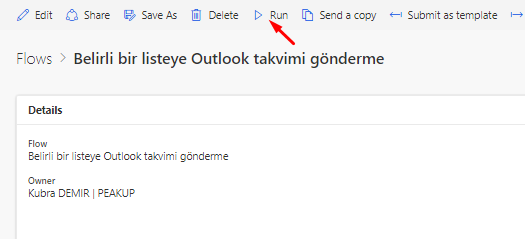
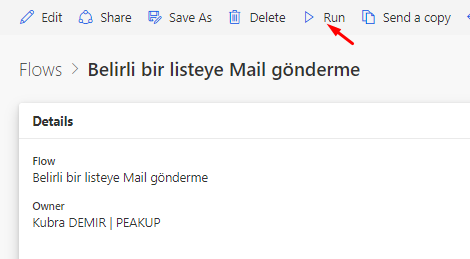
You can verify the data in the Excel table and run the flow.


You can take a look at this link for the Power Automate Outlook Connector.

Send Mass E-mails with Power Automate

You can send the mails with custom subject and content in which you address people specially in cases like congratulating, events, special day celebrations. This is something that especially the HR needs.

This way, you don’t deal with sending mails one by one. You only need to indicate the mail list and details.

Create a Table

Open en Excel in OneDrive. Add a Table from the Insert tab.

Write Mail, Name Surname and mail details into the columns of this table like below.

Each row of this table will be sent as separate e-mails by the flow.

Flow Process with Power Automate

Start a new blank flow.

After the data in the table is filled, flow will be run by being triggered individually. For this reason, start the flow with Manually trigger a flow.

In the next step, add Excel for Business (List rows present in a table) to be able to add the data in the Excel table. Add the table you’ve just created into this item.

In the next step, add Outlook (Send an e-mail).

In this step, the columns of the Excel table is added to the related fields. With you choosing the Excel fields (mail, name, etc.) the Apply to each item will be added to the flow automatically. An event will be created for each row in the Excel file thanks to the Apply to each item.


After filling the related fields, name the flow on top left corner. For example: Send Mails to a Certain List. You can save and close the flow on top right corner.

You can verify the data in the Excel table and run the flow.

You can take a look at here for the Power Automate Outlook Connector.

Microsoft Outlook Spaces

In this article, we will be giving information about Microsoft Outlook Spaces, which hasn’t been officially announced yet. It seems like Outlook is going to be the bomb! I think it is pretty assertive concerning the whiteboard look, drag and leave experience, viewing different apps in one screen. But there is a detail in the video that I want you to pay attention to: we can view multiple projects in different whiteboards.

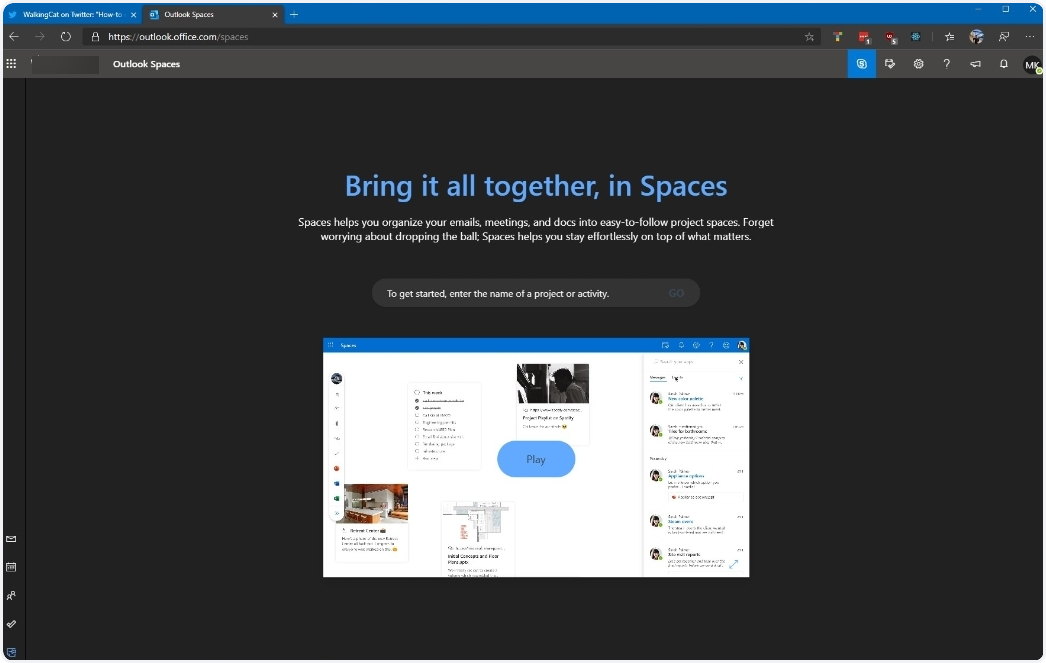
Microsoft is working on Microsoft Outlook Spaces, which is a project management tool that unites all documents. The address is going to be: https://outlook.office.com/spaces but it is still under construction. WalkingCat -a famous Twitter account about leaks- have shared an online video concerning Outlook Space. If you want to follow this kind of leaks, you can follow WalkingCat on Twitter.
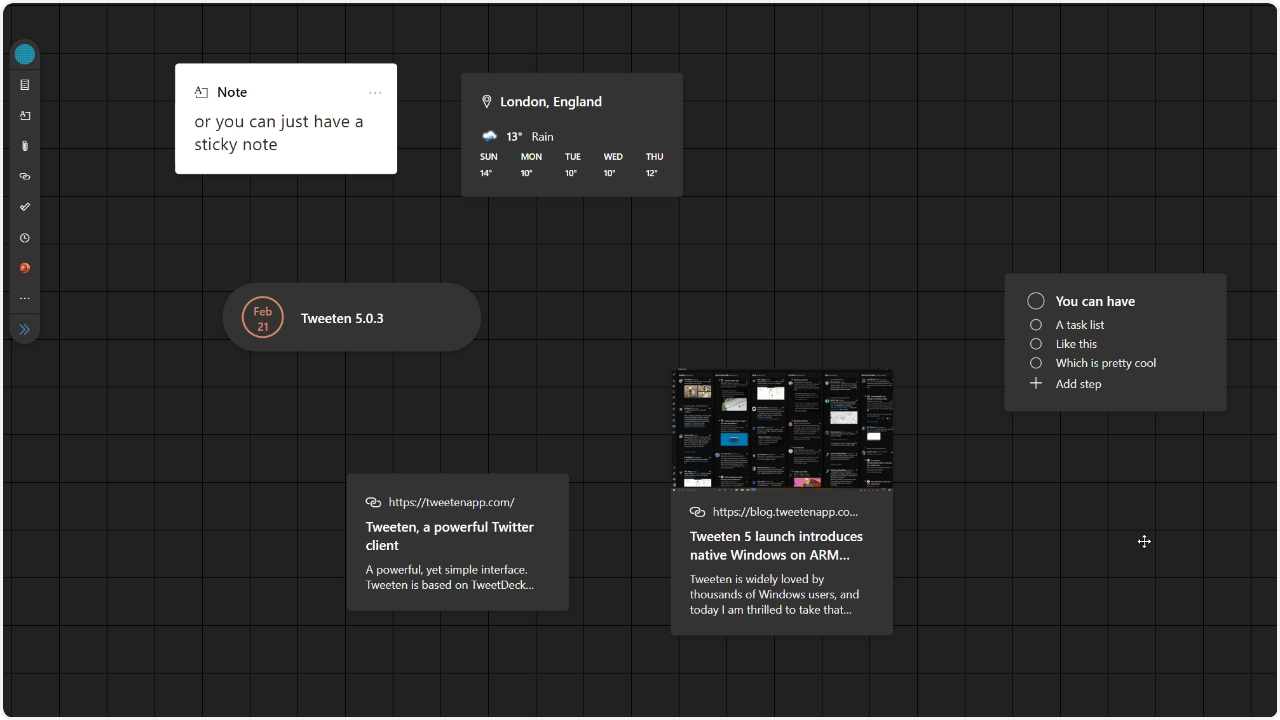
This new tool that can be accessed through Outlook web, makes it possible to organize and view different information of a certain project. It looks like a whiteboard where the user can pin different info from various Office 365 tools. I am already looking forward to Microsoft Outlook Spaces. 😎


Enabling Outlook Spaces


If you want to use Outlook Spaces right now, WalkingCat found a way to enable it a little early. You simply have to open up outlook.office.com/spaces and go into the developer tools on your browser (press F12). From there, go to the Console tab on the developer tools, copy and paste the following code into the console, and hit enter:

localStorage.setItem("featureOverrides", "outlookSpaces-enabled")

After that, refresh your browser and you’ll be allowed to get started with Outlook Spaces by creating your first project:


If you want, you can try it by following the steps below.

  1. Go to Https://outlook.office.com/spaces
  2. Open DevTools-> Application-> Storage-> LocalStorage on your web browse
  3. Add item: “featureOverrides“, value: “outlookSpaces-enabled”
  4. Refresh web browser


You can find other up-to-date articles on our blog.
You can share this post with your friends and get them informed as well. 👍🏻