Use Objects with a Condition in Gallery

We can design lists with a condition in the gallery by writing the If formula. With these conditions, it is possible to control a lot of features of objects like color, view, size, position. You can authorize based on person/department, hide/show buttons on the screen and highlight status in case of tracking.

Use Objects with a Condition in the Gallery

We will be going over how to show different objects for different question types in the gallery. This way, one question in the same group will be replied with the radio button and the other will be replied with rating.

Create a Collection

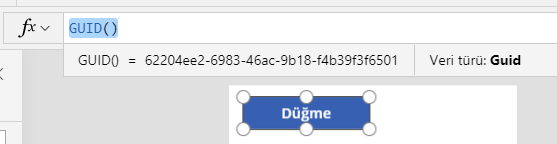
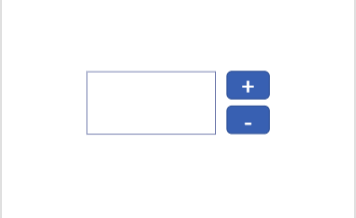
We will create a sample collection for an example with the data above. You need to create the collection by writing the code below into the OnSelect property of a button we will add to the screen.

ClearCollect( Questions;
{
Question:    “Question”;
Question_no:   “1”;
Question_type:    “Radio”   }
;
{
Question:    “Question”;
Question_no:   “2”;
Question_type:  “Rating”  }
;
{
Question:    “Question”;
Question_no:   “3”;
Question_type:    “Slider”   }
)

Show Objects in the Gallery

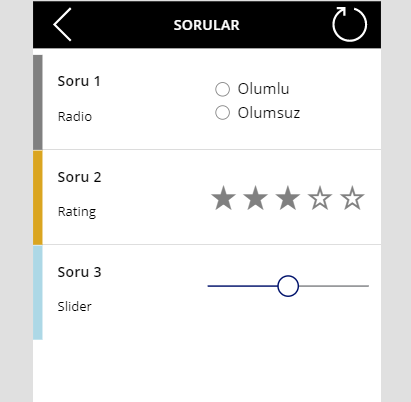
You need to add the Gallery object to the screen in order to do the action in the example. Questions collection should be connected to this gallery object’s Items.

The responding way of each question in the collection is indicated in the Question_type column. Depending on the responding way of questions, Radio Button, Rating and Slider has been added to the gallery. IF formulas will be written into the Visible property of each object and thus, the related item will be shown depending on the question type and the other ones will be hidden.


Radio Button Visible Code: If(ThisItem.Question_type=”Radio”;true;false)

Rating Visible Code: If(ThisItem.Question_type=”Rating”;true;false)

Slider Visible Code: If(ThisItem.Question_type=”Slider”;true;false)


You can click here to take a look at other Power Apps articles.

You can click here to take a look at the use of IF function.


GUID Function

What is the GUID Function?

A random id in all screens is created with the GUID function every moment. ID values are used as a key by the database systems like Common Data Service and SQL Server.

When the function is used on its own, it can include numbers, lower and upper case and hyphen. As you can see, this function returns pretty long outcomes but this function can be managed with some functions.

guid

GUID returns a different value each time the function is calculated.  If nothing else changes in the formula, it will have the same value throughout the execution of your app.

GUID is a volatile function when used without an argument. You can write it into a label in order to view or change the outcome of the function. You can convey it to the argument for the outcome to change actively.

A random id can be created while changing the page, opening the app, and saving data or with the timer.


GUIDE Function and Examples

Collect

For example, you can convey this function to a certain column by creating a collection.

Collect(Table1; {   Guid_Columns: GUID()  } )

Mid

GUID function creates an outcome that includes numbers, lower and uppercase and hyphen. For example, if you want to produce a 5-character outcome, you can use the Mid function.

When you add a label to the screen an set its Text property as Mid(GUID(); 1 ;5), a 5 character GUID is created.

Set

You can use the SET argument when you need to create a new argument id all the time.

Set the OnSelect property of a button you’ll add to the screen as Set(Guid_create ; Mid(GUID(); 1 ;5)) and the Text property of the label you’ve just added as Guid_create. Now each time you click the button, a new value will be created and it will be see in the  label.


Click here for the general usage of the GUID() function.

You can access the other Power Apps articles here.

Global Set Variable

Each object or property we use in Power Apps can be used as a variable. For example, we can set the value of a TextBox as TextBox1.Text and this way, it is defined as a variable that has a text value and that can be interfered by the users. Even though every object can be used as a variable, there are real functions designed to be a variable. These functions that are experts in assigning an using variables are used in more dynamic actions like calculating a value in an increasing or decreasing way, rather than a static Label moving data between pages. Set variable is one of them.

Properties

  • It’s a global/general variable, can be applied from all the screens of the app.
  • It can be created and applied anywhere in the app.
  • It can hold different data types like Numbers, Text string, Boole, Record and Table.
  • Set(variable_name; value)

Set Variable

It is a very easy-to-use function. You define the variable name and state the value that will be written in it. And then, the variable name is written in the required field and the data it contains is open to use.

Let’s practice with a counter example by creating a variable.

Add a TextBox and two buttons into the screen and position them like below.

Write + and – on the buttons. Set() functions will be written in the OnSelect property of buttons.

+ button: Set( Counter; Counter+1)

With this formula, the last value of the counter is increased by 1 and the data is transmitted to the counter again.

– button: Set( Counter; Counter-1)

With this formula, the last value of the counter is decreased by 1 and the data is transmitted to the counter again.

Label: Counter

Name of the variable is written in to the Text property of the Label and the value the variable holds is reflected on the screen.

Click here for the general usage of the function.

You can access the other Power Apps articles here.

Authorization with Department Control

You can enable interactive flow or do visual actions by creating rules in the application screen. Depending on the situation in the application scenario, you can connect objects or actions to department, user mail, location, title, marital status or user choice in multiple-choice actions.

Usually hide, show, freeze, open to edit or change color, location, size actions are done for the determined objects. You can apply all these controls in all application scenarios easily and flexibly.

Users whose department is HR will see the HR button that enables them to open the management and confirmation screen of HR.

It is better to do these actions step by step and in pieces while doing these controls. Like I mentioned in my previous article, the formula evaluations should be controlled in different labels and should be named depending on the outcome.

We will test the user department first in the example below.

Department Detection for the Existing User

We will use the Office365Users.MyProfile() formula that lets us get the existing login info of the user that opens the app for this action.

We will write the formula below in a label we named lbl_user_departmant and get the department information.

Office365Users.MyProfile().Department 

Is The Detected Department HR?

We will write the formula below into a label we named lbl_is_user_department_hr and check if the existing user is in the Human Resources department. If the user is in the HR, we will get the outcome as 1, if not; 0.


If the existing user is HR, what actions will be on the screen?

The Visible option of HR button will change depending on the 1/0 values that will come from the label named lbl_is_user_department_hr.

This way, the button will be showed and hidden depending on the department.

If(lbl_is_user_department_hr.Text=Value(1);true;false) 

Control Formulas

The labels named lbl_user_departmant and lbl_is_user_department_hr should be moved to the formula screen so that it is easier to revise them later. Click here to take a look at the article about creating a formula screen and its importance.

You can read about the details of the functions that are used to get user information through Office 365 here.

Similar Examples

You can do similar control with the same steps while filling a form prepared for personnel that consists of personal information like Name, Surname, ID Number, Gender, Date of Birth, Marital Status, Military Service Status.

When the gender is marked as Female, the military service status will be hidden (Visible) since it won’t be filled or it can be frozen (DisplayMode).

When the marital status is marked as single, the fields concerning spouse and children can be hidden (Visible) since they won’t be filled or they can be frozen (DisplayMode).

You can click here for other Power Apps articles.