Power Apps and Power Automate 2020 License Updates

Power Platform

We have been waiting for the work flow product we knew as Ms Flow to get the Power title like Power BI and Power Apps for a long time. It recently joined the Power Platform family with the name of Power Automate (Flow) as expected.

Power Apps and Power Automate (Flow) is a team that increases efficiency and speeds up the work right from the beginning. While end users are working on their Power Apps mobile apps, Power Automate quietly sustains the work flow and verification process in the background.

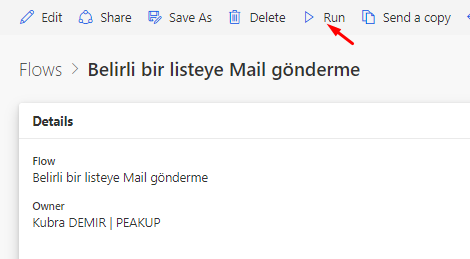
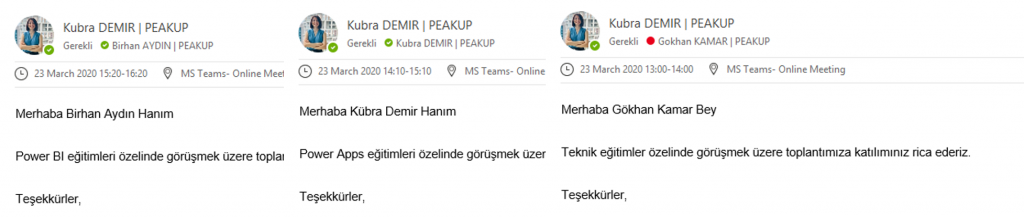
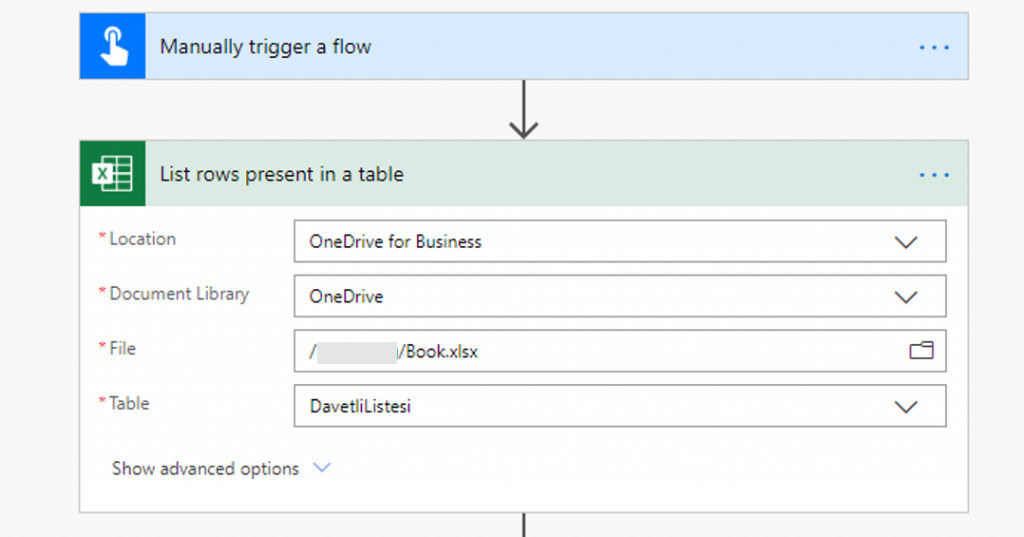
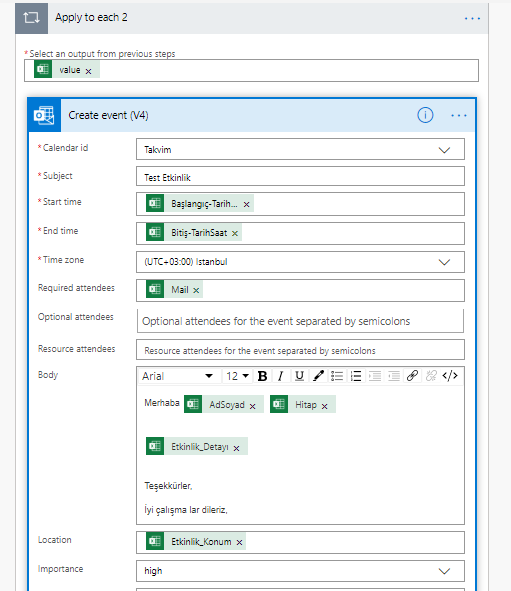
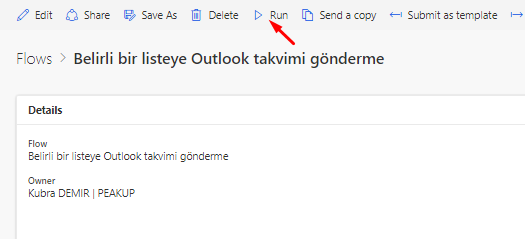
You can click here for the articles about Power Automate.

Can I use Power Platform for free?

If you have any type of Office365 license, yes!

If you have one of the Office365 licenses below, you can use the Power Platform products for free.

2020 Licensing Updates for Power Apps and Power Automate

The increase of Premium connectors and features was foreshadowing the licensing changes that would happen in Flow.

With the Flow joining the Power family, Power Apps & Power Automate came to the top of the agenda.

If you don’t have Office 365

With the licensing method based on layered quote becoming definite, the prices are still valid since December 1, 2019.

You can use Power Apps and Power Automate as Add-on with monthly payment.

Licensing is separated into two ways: based on the number of users or based on the number of applications you will use.

1st Payment Model

To use 2 mobile apps as Company/Person

It is priced as 56 TLs (in Turkey) per user and the costs increase as the application number increases.


2nd Payment Model

To use limitless number of mobile apps as Company/Person

It is priced as 224,20 TLs (in Turkey) per user and there are no extra costs.

Take a look at here for details.


Take a look at here for the document about licensing.

Create Poll Rules with MS Forms

Polls play an important role in enabling communication with your employees and customers, tracking and analyzing or determining business strategies. You can easily and quickly prepare and share e-forms with MS Form during your digitalization process.

In this article, we will be talking about adding rules to the Forms polls. You can manage polls based on questions by adding rules. You will be able to manage the next question that will be displayed depending on the answer user gave to the questions.

How Does It Work?

For example, while collecting personal information of the employees:

  • The What is your license class? question can be displayed if Yes is chosen from the Yes/No options of the Do you have driving license? question.
  • Detailed questions like the Ages of the children, Number of children can be displayed to the user when the Married option is chosen from Married/Single of the What is your marital status? question.

Thanks to the feature, user will not see all the questions while collecting information from them and polls will be answered more quickly and consistently and interactive work will be executed.

How Is It Done?

First, you need to create the poll questions. After you create the poll questions, choose Branching within … that is next to the Share button on top right.


We have created the first question with 4 options.
The directing action is complete by choosing the next question that you want to be asked for each option from the list that pops open.

Your actions will be saved that moment and you will be able to test your scenario whenever you want with the preview feature.

Let’s analyze the scenario below.

For the 1st question
If the 1st option is chosen –> It will lead to the 2nd question
The 2nd question will be answered –> the form will be complete

For the 1st question
If the 2nd option is chosen –> It will lead to the 2nd question
The 2nd question will be answered –> the form will be complete

For the 1st question
If the 3rd option is chosen –> It will lead to the 3rd question
The 3rd question will be answered –> form will be complete

For the 1st question
If the 4th option is chosen –> It will be waited for the user to write a text into the Other field.

We have analyzed that the form questions can be connected to rules and the sort of the questions can be changed.

When you want to cancel the actions you have executed, you can reset your document by clicking Reset withing … that is on the top right of the same screen.


Don’t Miss Out Mails with High Importance

It can be hard to follow up e-mails because of workload or you might overlook them. You can try creating rules on Outlook in order not to miss out your e-mails.

You can achieve optimum mailbox usage by creating a variety of rules based on your daily work routine and how you get your job done. This way, you can categorize your mails and separate your workload into different sections and respond your mails faster.

Outlook Rules

With rules, you can use your mails separately based on importance, subject, contacts or a lot of different scenarios on Outlook.

Receive Notifications for the Mails with High Importance

Wouldn’t it be nice to hear alert sounds and see a notification window on the screen when you receive an important mail?

Önem Derecesi Yüksek Maıller için Uyarı Sesleri Alma

In this article, we will create alert sounds and notification window for the mails marked as Important.

Play a Sound When Your Receive an Important Mail

We will execute the action on the File–>Manage Rules and Alerts window.

*With this rule, if the mail you receive is marked as High Importance, an alert sound will be played and notification window will be displayed for this mail.

Action Steps

You can start by choosing New Rule–> Play a sound when I get messages from someone. You can change all the necessary criteria for the rule with the Next button on a common screen all the time anyways. So, selecting the template is not that important.  So, you can choose Apply rule on messages I receive under the Start from a blank rule title.

Önemli Maıl Geldiğinde Ses Kaydı Çalma

Click next.

Step 1: unmark from people or public group.
Mark marked as important.

Step 2: Choose the Importance level by clicking the word “importance”. Click next.

Önem derecesi

In the new screen, you will see the Step 1: play sound option.

Step 2: Click play sound and choose the sound you want for the mails.

istenen sesi seçme

Scroll down and choose the Display a specific message in the new item alert window option.

Step 2: Write the message for the alert and move to the next screen.

Yeni Öğe Uyarısı penceresinde belirli bir ileti göster

Click next and get to the last screen.

Step 1: Specify a name for the rule.
Step 2: Select Run this rule now on messages already in “Inbox” and control the past data that meet this rule.

Close the rule window with the End button.

Gelen Kutusunda çalıştırma

Click the Apply button on the Rules and Alerts window to save the changes. If no new rules will be created, save and close the window.

Kurallar ve Uyarılar penceresi

You can take a look at here for the mail rules.

Don’t Miss Out Mails with Mail Alerts

It can be hard to follow up e-mails because of workload or you might overlook them. You can try creating rules on Outlook in order not to miss out your e-mails.

You can achieve optimum mailbox usage by creating a variety of rules based on your daily work routine and how you get your job done. This way, you can categorize your mails and separate your workload into different sections and respond your mails faster.

Outlook Rules

With rules, you can use your mails separately based on importance, subject, contacts or a lot of different scenarios on Outlook.

Create Mail Alerts with Outlook Rules

Wouldn’t it be nice to hear alert sounds and see a notification window on the screen when you receive an important mail?

Önem Derecesi Yüksek Maıller için Uyarı Sesleri Alma

In this article, we will create alert sounds and notification window for the mails marked as Important.

Mail Alerts

We will execute the action on the File–>Manage Rules and Alerts window.

*With this rule, if the mail you receive is marked as High Importance, an alert sound will be played and notification window will be displayed for this mail.

Action Steps

You can start by choosing New Rule–> Play a sound when I get messages from someone. You can change all the necessary criteria for the rule with the Next button on a common screen all the time anyways. So, selecting the template is not that important.  So, you can choose Apply rule on messages I receive under the Start from a blank rule title.

Önemli Maıl Geldiğinde Ses Kaydı Çalma

Click next.

Step 1: unmark from people or public group.
Mark marked as important.

Step 2: Choose the Importance level by clicking the word “importance”. Click next.

Önem derecesi

In the new screen, you will see the Step 1: play sound option.

Step 2: Click play sound and choose the sound you want for the mails.

istenen sesi seçme

Scroll down and choose the Display a specific message in the new item alert window option.

Step 2: Write the message for the alert and move to the next screen.

Yeni Öğe Uyarısı penceresinde belirli bir ileti göster

Click next and get to the last screen.

Step 1: Specify a name for the rule.
Step 2: Select Run this rule now on messages already in “Inbox” and control the past data that meet this rule.

Close the rule window with the End button.

Gelen Kutusunda çalıştırma

Click the Apply button on the Rules and Alerts window to save the changes. If no new rules will be created, save and close the window.

Kurallar ve Uyarılar penceresi

You can take a look at here for the mail rules.

Send Mass E-mails with Power Automate

You can send the mails with custom subject and content in which you address people specially in cases like congratulating, events, special day celebrations. This is something that especially the HR needs.

This way, you don’t deal with sending mails one by one. You only need to indicate the mail list and details.

Create a Table

Open en Excel in OneDrive. Add a Table from the Insert tab.

Write Mail, Name Surname and mail details into the columns of this table like below.

Each row of this table will be sent as separate e-mails by the flow.

Flow Process with Power Automate

Start a new blank flow.

After the data in the table is filled, flow will be run by being triggered individually. For this reason, start the flow with Manually trigger a flow.

In the next step, add Excel for Business (List rows present in a table) to be able to add the data in the Excel table. Add the table you’ve just created into this item.

In the next step, add Outlook (Send an e-mail).

In this step, the columns of the Excel table is added to the related fields. With you choosing the Excel fields (mail, name, etc.) the Apply to each item will be added to the flow automatically. An event will be created for each row in the Excel file thanks to the Apply to each item.


After filling the related fields, name the flow on top left corner. For example: Send Mails to a Certain List. You can save and close the flow on top right corner.

You can verify the data in the Excel table and run the flow.

You can take a look at here for the Power Automate Outlook Connector.

Send Calendar to a Guest List with Power Automate

You can send meeting calendars with customized data like addressing each person, event content and location for all your event invitations through Power Automate.

This way, you don’t have to deal with creating calendars one by one. You only need to indicate the guest list and event details.

Create a Table

Open en Excel in OneDrive. Add a Table from the Insert tab.

Write Mail, Name Surname and mail details into the columns of this table like below.

For each row of this table, e-mails will be sent separately by the flow.

The event date and hour was written as 2020-03-23T13:00:00 in order for it to be in the format Power Automate expects. The time format is 24-hours and the event will be created for the exact hour you determine.

Flow Process with Power Automate

Start a new blank flow.

After the data in the table is filled, flow will be run by being triggered individually. For this reason, start the flow with Manually trigger a flow.

In the next step, add Excel for Business (List rows present in a table) to be able to add the data in the Excel table. Add the table you’ve just created into this item.

In the next step, add Outlook (Send an e-mail).

In this step, the columns of the Excel table is added to the related fields. With you choosing the Excel fields (mail, name, etc.) the Apply to each item will be added to the flow automatically. An event will be created for each row in the Excel file thanks to the Apply to each item.


After filling the related fields, name the flow on top left corner. For example: Send Mails to a Certain List. You can save and close the flow on top right corner.

You can verify the data in the Excel table and run the flow.


You can take a look at this link for the Power Automate Outlook Connector.