MS Forms Integrated with All Platforms

Integrated Platforms

You can use Forms integrated with products like Teams, PowerPoint, Sway, Stream or your website. With MS Forms, preparing and distributing forms is very practical. You can distribute the prepared polls with a link on a user-base or publish them in digital platforms.  It can work integrated with web sites, presentations, journals and communication platforms.

Teams & MS Forms

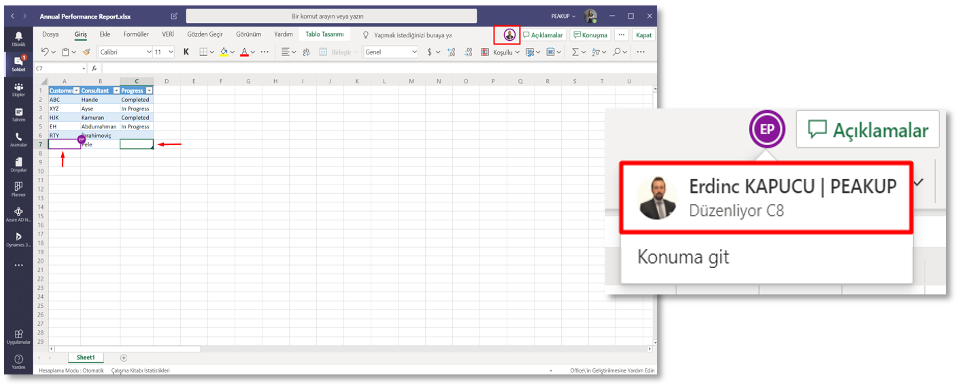
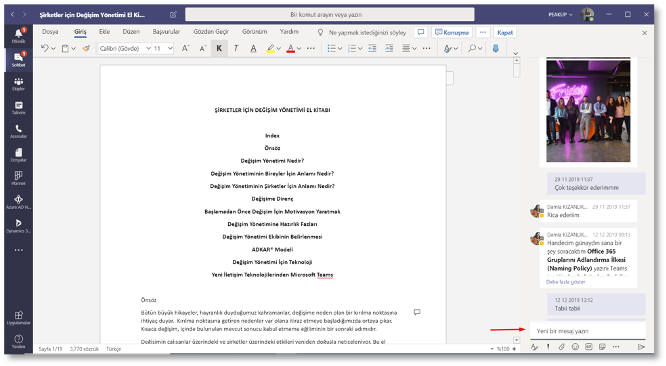
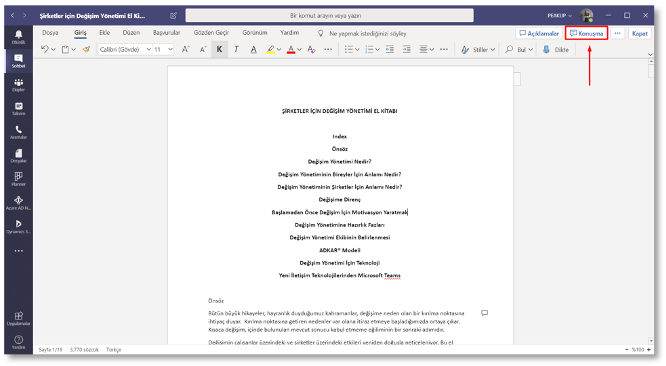
It stands out with the document sharing and co-authoring options that help to maintain a high-level communication. You can use Power BI reports, Power Apps mobile apps and hundreds of apps integrated with Teams. Also, you can use MS Forms polls within Teams.

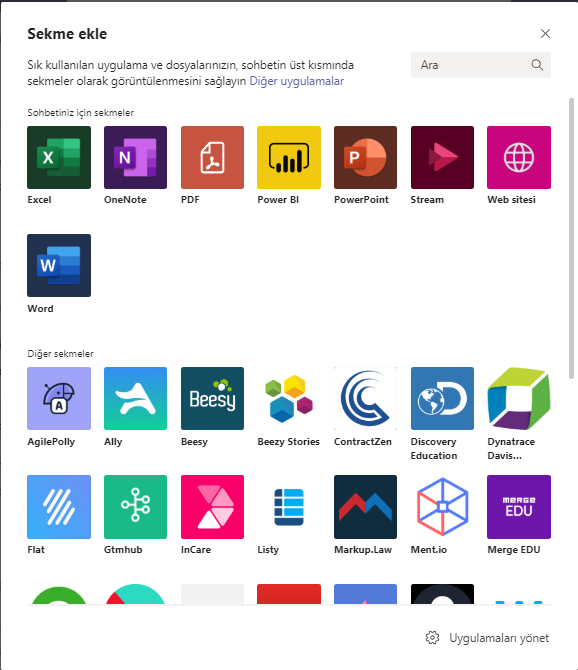
TEAM: Polls can be added to tabs in teams and be shared from a center and access can be controlled.


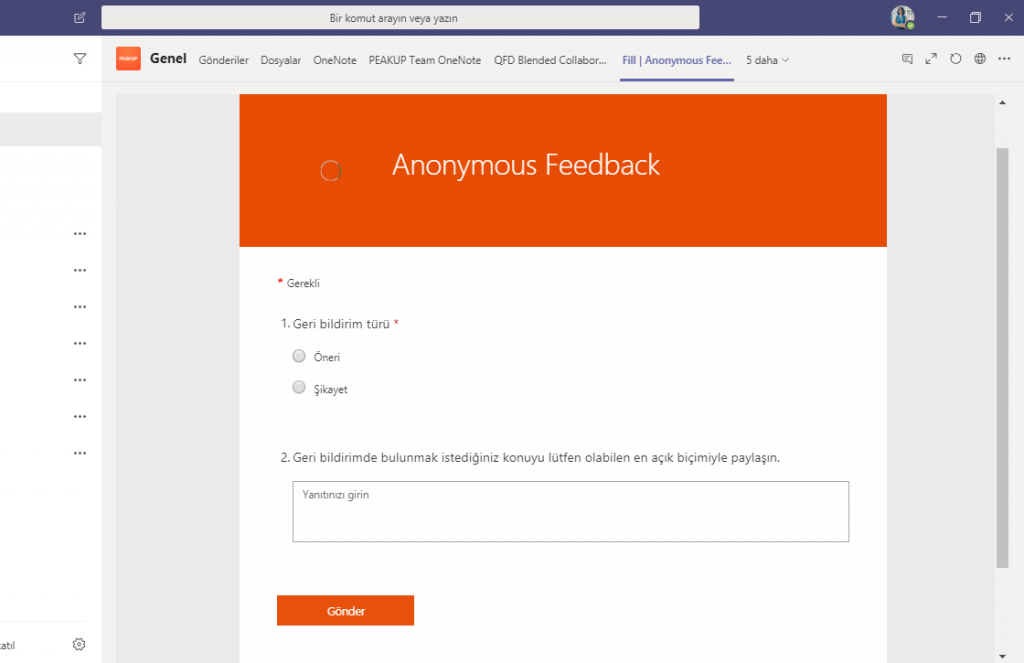
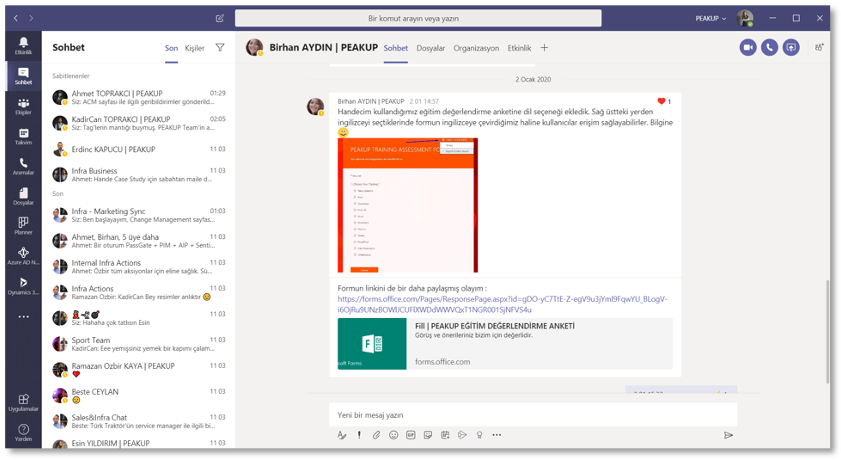
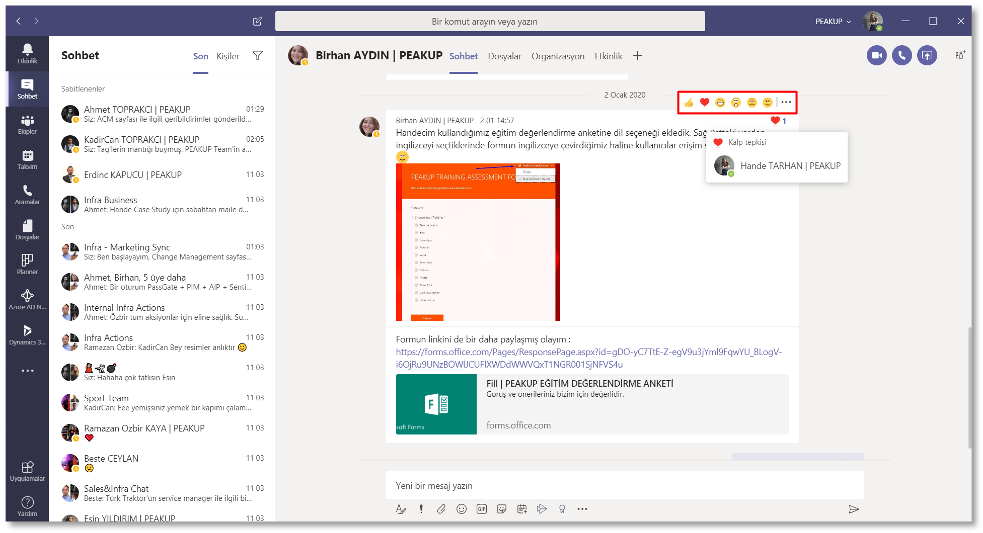
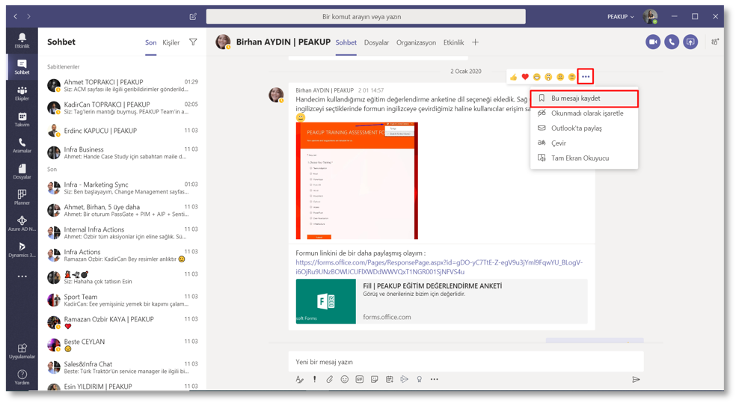
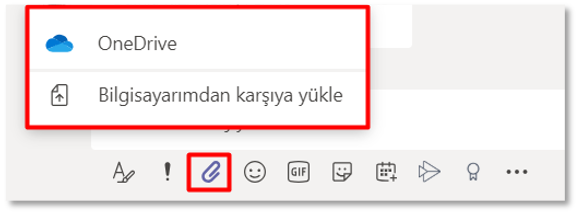
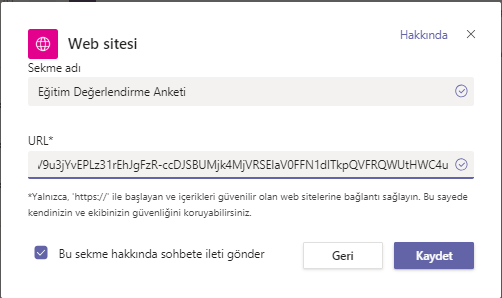
CHAT: Similarly, you can add polls into chats as well. You can create a connection with the respond link of the poll with the add a Web Site option.

Take a look at this link for the details of Teams&Forms integration.

Sway & MS Forms

You can run your internal or external communication process like mailing, journal, presentation, announcements and celebration with Sway.

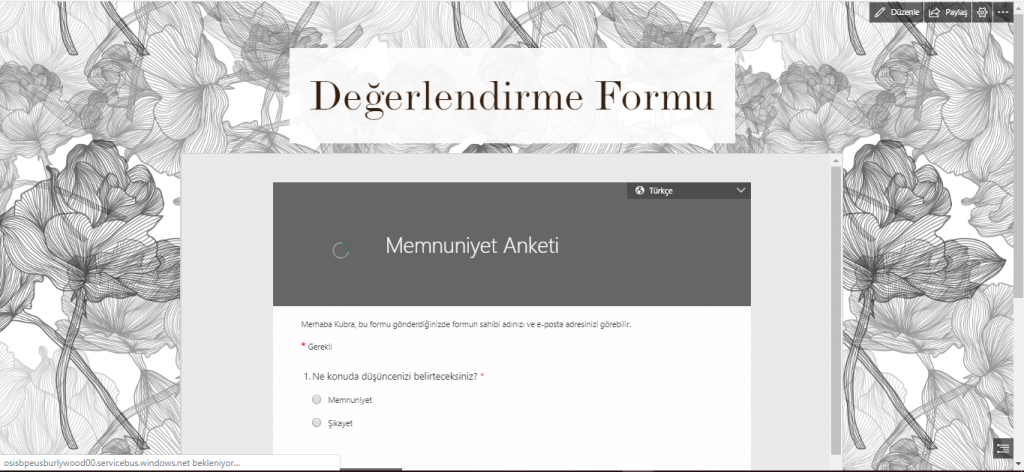
You can view polls with embedded code in Sway journals. This way, you can both share announcements with your personnel or customers and get feedback.

You can use this system in your events. You can make the event details like topic, content, duration and location a presentation with Sway and simultaneously collect feedback of participation.

And when the users approve the participation to your from,  you can automatically send an automatic meeting invitation with Power Automate.

Take a look at this link for the details of Sway&Forms integration.


PowerPoint & MS Forms

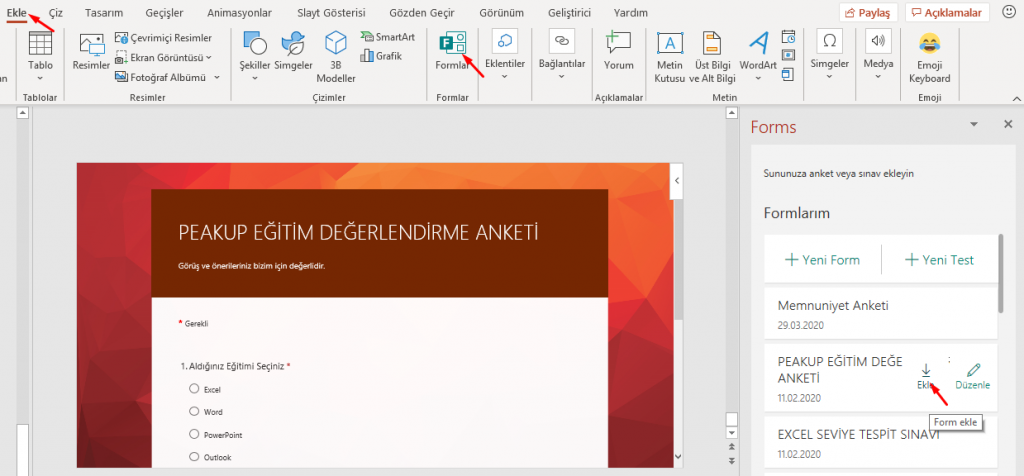
You can get responses from people you’ve sent your presentation to by adding MS Forms to PowerPoint presentations.

This way, the person who receives your presentation can respond your poll without changing to another screen.

You can create an education and exam system with this feature. You can talk about a certain topic in the presentation and make the users come across a test right at the end.

You can collect poll/test responds by adding them separately at the end of each part.

Take a look at the link for the details of PowerPoint & Forms integration.
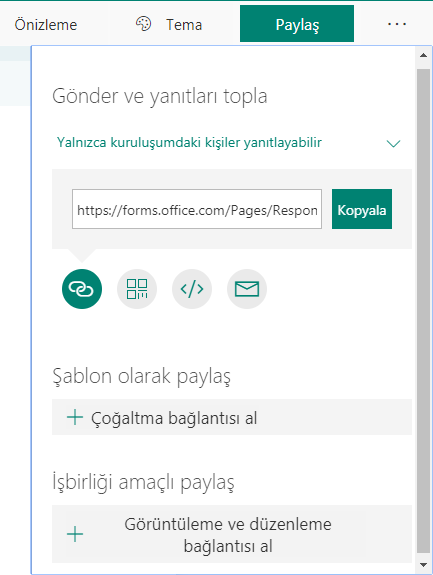
Share

The poll link, QR code, embedded code and mail options are location under the Share button in the editing screen of the form.


You can click here to take a look at our other articles.

Authorization with Department Control

You can enable interactive flow or do visual actions by creating rules in the application screen. Depending on the situation in the application scenario, you can connect objects or actions to department, user mail, location, title, marital status or user choice in multiple-choice actions.

Usually hide, show, freeze, open to edit or change color, location, size actions are done for the determined objects. You can apply all these controls in all application scenarios easily and flexibly.

Users whose department is HR will see the HR button that enables them to open the management and confirmation screen of HR.

It is better to do these actions step by step and in pieces while doing these controls. Like I mentioned in my previous article, the formula evaluations should be controlled in different labels and should be named depending on the outcome.

We will test the user department first in the example below.

Department Detection for the Existing User

We will use the Office365Users.MyProfile() formula that lets us get the existing login info of the user that opens the app for this action.

We will write the formula below in a label we named lbl_user_departmant and get the department information.

Office365Users.MyProfile().Department 

Is The Detected Department HR?

We will write the formula below into a label we named lbl_is_user_department_hr and check if the existing user is in the Human Resources department. If the user is in the HR, we will get the outcome as 1, if not; 0.


If the existing user is HR, what actions will be on the screen?

The Visible option of HR button will change depending on the 1/0 values that will come from the label named lbl_is_user_department_hr.

This way, the button will be showed and hidden depending on the department.

If(lbl_is_user_department_hr.Text=Value(1);true;false) 

Control Formulas

The labels named lbl_user_departmant and lbl_is_user_department_hr should be moved to the formula screen so that it is easier to revise them later. Click here to take a look at the article about creating a formula screen and its importance.

You can read about the details of the functions that are used to get user information through Office 365 here.

Similar Examples

You can do similar control with the same steps while filling a form prepared for personnel that consists of personal information like Name, Surname, ID Number, Gender, Date of Birth, Marital Status, Military Service Status.

When the gender is marked as Female, the military service status will be hidden (Visible) since it won’t be filled or it can be frozen (DisplayMode).

When the marital status is marked as single, the fields concerning spouse and children can be hidden (Visible) since they won’t be filled or they can be frozen (DisplayMode).

You can click here for other Power Apps articles.

Evolution of Leadership

We all saw during this new remote working and work order that came to our lives with the pandemic and we foresee to be permanent, that different characteristics of management has come to the forefront. These characteristics are very important in continuing the workflow non-stop and increasing employee loyalty and keeping the personnel loss minimum. So, let’s go over what these characteristics are.

Leaders need to assure the team that they trust them and believe that they will do their best. The “nosy parker” leaders that always keep the workers in sight have come to an end with the pandemic. Of course, explaining this with the pandemic only would be insufficient. We all foresaw that with the Z generation entering the work like actively, the management style would be changing. From now on, work processes will keep going with mutual trust, respect and open communication. It is important to mention that performance evaluation will be outcome oriented. In this new work order, leaders who reassure the employees, who can openly communicate, who create solutions to employees’ problems and who have a strong planning aspect will be prominent.

With the new era, management of teams that work in remote places restrict managing everyone one by one. Thus, the era of leaders who take the team’s professions and abilities seriously, who trust and take their ideas seriously and who can assure the teams with the “we are a team” feeling begins.

We will observe that the leaders who keep the employee motivation in the forefront will be working more productively. It is important to know the team, their characteristics and how they get motivated. Especially with the remote working era, we might have to create a different working standard for each person. You, day by day, will realize the importance of leaders who do this planning.

Alongside all this, the value of leaders that plan the work and time management efficiently, follow team’s workflow and guide when necessary will increase. Yes, everybody has their individual responsibilities but it is important to keep in mind that leaders have a bit more.

So, how much of these characteristics do you have?

FIELDVALUE Function

In this article, we will be informing you about the FIELDVALUE Function used with the Linked Data Types. You can use the FIELDVALUE function to retrieve field data from linked data types like the Stocks or Geography data types.

bağlantılı veri türleri

There are easier methods for writing formulas that reference data types, so the FIELDVALUE function should be used mainly for creating conditional calculations based on linked data types.


SYNTAX

fieldvalue fonksiyonu söz dizimi

This function requires two arguments.
It is necessary to enter both of these arguments.

There are these independent variables in the syntax of the FIELDVALUE function:

  • value– Function returns all matching fields(s) from the linked data type specified in the value argument.
  • field_name– The name or names of the fields you would like to extract from the linked data type.

Description

  • The FIELDVALUE function returns all matching fields(s) from the linked data type specified in the value argument.

  • The FIELDVALUE function belongs to the Lookup & Reference family of functions.


Examples

In the following basic example, the formula =FIELDVALUE(A2,”Area”) extracts the Area field from the geography data type for Turkey.

fieldvalue fonksiyonu örnek

Let’s list the data in the related field depending on the dynamic field choice about cities.

fieldvalue fonksiyonu örnek


Remarks

If you try to retrieve data from a non-existent data type field, the FIELDVALUE function will return the #FIELD! error. For instance, you might have entered “Field“, when the actual data type field is named “Area“. Double-check your formula to make sure you’re using a valid field name. If you want to display a list of field names for a record, select the cell for the record, and press Ctrl+Shift+F2 .

You can get more information on Microsoft Support.

See you in other articles, bye. 🙋🏻‍♂️
You can share this post with your friends and help them get informed as well.👍🏻

Capital – Fast Start Up

“WE ARE ACHIEVING OUR GOAL STEP BY STEP”

PEAKUP CEO Ahmet Toprakçı stated that they are preparing to open an office in the USA after UK and that they are among the fastest developing technology companies and added: “Our goal is to become a global company. We are achieving this step by step.”

PEAKUP helped over 600 thousand end users to migrate to cloud technologies as of today. They have over 700 customers in Europe, Middle East and Africa. PEAKUP was among the first 50 companies 3 years in a row in Deloitte Technology 2019 Fast 50 Turkey Program that determines the fastest growing 50 technology companies.

Ahmet Toprakçı, the founder and CEO of this 100% national capital company that exports technology abroad, highlights that their goal is to maintain the growth acceleration they’ve obtained. Toprakçı explained that they’ve developed with their own resource and that they don’t need funds and explains what they do like this:

“I HAVE THREE TEXTBOOKS”

“I have completed the Electrical Engineering major in Istanbul Technical University. And then, I did my masters degree in the same university. I had an experience of 6 years in corporate life before establishing my own business. I worked as a system manager in ITU Information Technology Department, as a lecturer, consultant and manager in Bilge Adam IT Academy.

In 2012, with cloud technologies entering the corporate world, I couldn’t ignore this trend and established my enterprise. Now, we have PEAKUP HR and London-based PEAKUP Technologies UK companies under the roof of PEAKUP technologies. Also, I have 3 textbooks that are used in lectures in universities.

WE’VE OPENED AN OFFICE IN UK

We hit the road with a very low capital. We didn’t get any support from VC or informal investors. Our model was “Bootstrapping”. We grew with our own resources. Opening an office in London as an 100% national capital technology company and being a Turkish company that exports technology to the world was one of the most important milestones for us.

We also create local technology solutions in our R&D center. We have a lot of projects that we carry out with the Scientific and Technological Research Council of Turkey (TÜBİTAK) and the Industrial Ministry. Today, we are among the first 500 IT companies and on a non-sector base among the first 250 companies that invest in R&D the most. Also, we have been among the Deloitte Technology Fast 50 3 years in a row.

“WE ARE GETTING PREPARED FOR PATENTS”

My most important goal is the turn our products into a strong brand in international competition and to be a global company. In this direction, we are working on getting the patents of our products and apply our international marketing technology. We are achieving our goal step by step.

After UK, we will be opening our US office soon. On the other hand, we want to show that a global technology brand can come from Turkey and inspire people. We foresee an increase of 15-20% in our workforce plan. Business intelligence, IoT, mobile and web based software will be main areas of our recruitment.”


IoT platform Nova will pioneer contact-free working

PEAKUP aims to pave the way for contact-free work in offices and factories by popularizing the usage of Nova, the IoT platfrom they’ve developed.

PEAKUP has developed a platform to make workers that are back to working continue their work contact-free. It is sated that Nova, 100% local IoT platform that was developed by Turkish engineers in PEAKUP technology labs, enables working contact-free in a lot of areas. This platform that detects if someone’s temperature goes up has a lot of features that enable controlling lights and ac without any contact as well as blocking the entrance of someone who doesn’t need to come to the office.

PEAKUP COO Kadircan Toprakçı stated that Nova is a smart management platform. He highlighted that they have a lot of different control scenarios. And expressed that they believe the platform will especially be important during the coronavirus pandemic to decrease contagion through contact. Toprakçı said that there is a perception as “IoT apps are usually products that SMEs cannot access”. He said they want to popularize this platform among SMEs too with an affordable price. Toprakçı said: “Even if it’s just a studio, how much the machines work and their efficiency is calculated with a simple app. With this platform, the efficiency of operators can be calculated as well.”

“Detects and reports the risks”

Toprakçı mentioned that Nova has other smart features than turning on and off through a mobile app. He continued: “It has automatic control mechanisms like turning the lights on when it is dark inside or turning the ac on when the carbon dioxide level is too high. It warns the overcrowded areas by detecting the number of people per square meter. It has a determining role in putting just the people in the risk group into quarantine rather than shutting down the whole office in case of a risk. Analyzed and reports the people who was contacted by the risky person”. Toprakçı stated that with this platform, you can take someone’s temperature contact-free as well and a person with a risk will not be let in and said: “If someone’s temperature goes up during the day, it will be detected with the heat detector and warning and guidance systems will activate by detecting where that person walked around in the office and who he/she had contact with.”

Toprakçı mentioned that it also enables to measure efficiency with artificial intelligence. He added:” It can detect workers that always take a break together. You can measure the time people spend outside. It can warn when a personnel goes into a restricted area in terms of occupational health and security. When someone’s temperature goes up entrance to the areas that person contacted can be blocked. Even before knowing if that person is sick or not.”

Nova was developed with open innovation

Kadircan Toprakçı said that Nova, that is the product of around a 2 year work, was developed with the open innovation method with their customers and said: “While we were developing, we learned this: For example, waking up chicken during the night is important in terms of efficiency. This platform enables you to wake your chicken up whenever you want with sensors.”

Microsoft Teams , Chats

  • Activity

You can see and filter your notifications within the Activity page.


microsoft-teams-etkinlik-activity


Activity page is an area where you receive and filter notification. You will be receiving all the notifications that concern you.

  • Filter Notifications

You can access your notifications like unread messages, liked/replied comments and missed calls.

microsoft-teams-bildirimleri-filtreleme

To filter notifications, click on the filter option and then the ellipsis to see the categories. In all Microsoft applications the ellipsis means “more options” and usually shows us beneficial things. You can narrow your notifications to unread messages, liked/replied comments, missed calls etc.


  • Chat – New Chat

  • You can click on the New Chat option and type one or more people’s names to start a new chat.

microsoft-teams-kullanimi-yeni-sohbet-2microsoft-teams-kullanimi-yeni-sohbet

Click the New Chat option that is seen as a pen and paper icon and type 1 or more people’s names to start a new chat. The maximum number of people that you can chat with as a group is 100 here.

  • Reaction

When you hold a message you can choose different reactions like like/angry.


When you see different reaction that we got used to on social media like like/angry when you hold a message.

  • Save a Message

When you click the ellipsis next to the reactions, you can find a message later among Saved with the “Save this message” option.

microsoft-teams-mesaji-kaydetmemicrosoft-teams-mesaji-kaydetme-2

When you click the ellipsis next to the reactions, you can find a message later among Saved with the “Save this message” option. We can make key word-based searches with the search button but saving would be better for links that we don’t remember and screenshots.

  • Files

You can access and edit documents like Word, Excel and PDF shared in chats within the “Files” tab.

microsoft-teams-dosyalar-files

You can access and edit documents like Word, Excel and PDF shared in chats within the “Files” tab. People will see the latest version of the file.

  • Organization

With the organization tab, you can see the place and title of people within the organisation chart with.

It can be helpful with even learning how to address someone alongside finding out their job. The Organization Charts is received from an index called Azure AD. If you cannot see the chart, you need to fill in the related fields. That field can be entered by managers (usually IT admins) only.

  • Buttons at the Bottom of the Chat

    • You can format what you write with the A (Format) icon.


    • You can send important/urgent messages with the exclamation icon. (People who receive an urgent message get notifications for 20 minutes.)


    • You can make your conversation fun with GIFs, stickers and emojis.

    • A (Format) button enables working like you are on Word. For example, when you press enter you move to the next line instead of sending the message. You can add titles to your paragraphs and write in bullets, give links.
    • There are two types of notifications under the exclamation icon. Important messages are used to draw attention. If you mark as urgent, people will get the notification of the message every 2 minutes during 20 minutes. If the person read the message, he/she will not receive any more notification.
    • You can make word-based searches in GIFs and edit the texts on the stickers.


  • Share a File in a Chat

With the Attach icon at the bottom of the chat screen, you can choose between files in your computer or OneDrive and share them.

Files in Chats use your OneDrive, and the teams use your SharePoint. The storage limit in OneDrive per person is 1-5 Tb, and in SharePoint it is 1TB + The Number of Licensed users x 10GB per company. So, you can share files without any problems.

  • Co-authoring

After you share files like Excel, PowerPoint, Word and open them, you can edit these files at the same time . This way you can prevent time loss by having to keep multiple versions of a file.

Versioning nightmares have become a part of our lives, especially for projects. We save new versions of a file and send to each other via e-mail. Now it is time to stop sending files and start “sharing” them. This way we can prevent version pollution with just one version of a file. On top of that, it is possible to access old versions of a file on OneDrive/SharePoint.

  • Chat While Working on a File

You can click on the “Chat” button to keep chatting while working on a file.

Chat will be opened at the point it was left.


  • Add a New Participant to the Chat

You can see and remove participants from a chat or leave the chat with the “Add participants” button on the top-right.

Sharing the chat history or not when you add a new participant is your decision to make.


There is no admin in a chat group. So, anyone in a group can add and remove participants. When you add a new participant, you can share all the chat history or the last few days or not share at all. When a new participant is added, a warning that say “A new participant has been added and the chat history has been shared” to the group members.

Task Management with Planner

MS Planner is a task management product with which you can track your personal tasks in your daily routine or distribute tasks within teams. It is also possible to manage plans on mobile phone with the Planner mobile phone.

It can be seen in the same screen with Teams thanks to integration. Each team can see its plans on its own team page and directly track the tasks within the team. Take a look at this link to add Planner into the Teams screen.

Add a Plan

Start with the New Plan button to create a plan. You can choose the Private option to keep the content of the plan confidential.

You can use the Add to an Existing Office 365 Group to add plans to existing Teams.

Plan Screen

A task can consist of different steps, can be done with different people or can be tracked in different phases. You can create different categories for these different options. That will facilitate the task management as well. You can choose the Add a new box option to be able work by grouping tasks. You can define different titles depending on the range of the project, month, importance or personnel. You can add Tasks into each group and manage step by step.

You can move the boxes and transfer a task into another box.

New Task

While adding a new task, you can add information like name, importance, start and due date, and task status.

When you assign a task to someone, that person is directly and automatically added to the Plan page and receives automatic mail notification.

You can revise the task status as not started, in progress, and completed.

You can set the importance of the task as urgent, important etc.

Entering the start and due dates of the task will make tracking easier and will be seen in the Plan Calendar. When an incomplete task is overdue, an automatic mail is sent.

You can add notes for the tasks.

You can state the articles of the tasks one by one on the checklist. You can display the articles in the Plan screen with the show in the card button.

You can add requirements or outcomes by adding Attachments.

Screen for Task Management

The tasks should be updated by the user as actions get completed. Since the whole process is online, last task status is obtained instantly. You can analyze the plan status on Chart or Timing Views.

Tasks Management with Chart View

You can view the task that are complete, pending, in progress; priority of tasks, status in boxed and assigned tasks on charts.


Task Management with Timing View

Tasks with a start and due date are viewed in this screen on the base of week and month. You can add tasks to a day on the calendar.

Complete tasks will not be displayed on the calendar.

Use Stream As an Education Platform

A video education portal that most of the time education departments need can be managed basically with Stream. Especially in the remote education model, the video trainings are in the foreground. Education processes can be started quickly after uploading videos on Stream. There are a lot of products and services that Office 365 offers. You can use Planner for tracking tasks, Power BI for reporting, Power Apps products for mobile apps and all these products can be put together under the roof of Teams.

Create an Education Platform with Stream

You can add videos under different teams or categories within Stream to create an education platform. It is possible to manage educations online concerning personnel development, technical trainings etc.

In order to evaluate the information obtained from the video education platform, it can work integrated with Forms. You can collect responds from the users by adding Forms polls into the desired videos. You can add a Forms poll to the any minute of the desired video.

Add Forms to a Stream Video

Note: You can open Stream on portal.office.com

Choose a video within the Videos in the My content menu. Choose +Add New in the Interactivity tab.

Enter the link and name of the prepared Forms into this screen and choose the second you want the poll to come up.

Stream Time Line

Forms Link

The poll link is found under the Share button in the editing screen.

Forms


You can take a look at the MS Form is Integrated with All Platforms articles to find out about the other products that can be integrated to Forms.

Click here to take a look at the MS Stream introduction page.


Sort and Fill Data with Custom Lists

In this article, we will be talking about how to create a custom list in Excel and what we can do with it. We can get faster in entering and analyzing data by creating data tables quickly with custom lists. If you already have a data list, i.e. certain product names, brands, stock names, region names etc.; if you add them to custom lists once, it is possible to list all the data in the list quickly instead of writing them over and over again. You just need to write any data from that list into a cell and drag it down. In addition, you can find articles concerning other features of Excel on our blog.

HOW ARE THE CUSTOM LISTS STORED?

Once you create a custom list, it is added to your computer registry, so that it is available for use in other workbooks. If you use a custom list when sorting data, it is also saved with the workbook, so that it can be used on other computers, including servers where your workbook might be published to Excel Services and you want to rely on the custom list for a sort.

However, if you open the workbook on another computer or server, you do not see the custom list that is stored in the workbook file in the Custom Lists popup window that is available from Excel Options, only from the Order column of the Sort dialog box. The custom list that is stored in the workbook file is also not immediately available for the Fill command.

If you prefer, add the custom list that is stored in the workbook file to the registry of the other computer or server and make it available from the Custom Lists popup window in Excel Options. From the Sort popup window, in the Order column, select Custom Lists to display the Custom Lists popup window, then select the custom list, and then click Add.


HOW ARE CUSTOM LISTS CREATED?

You need to access the existing custom lists box to create a custom list. There are two ways to access that box.

  1. File > Options > Advanced >  Edit Custom Lists

özel listeleri düzenle


2. Data > Sort > Order > Custom Lists

özel listelere ulaşmak


BUILT-IN LISTS

Excel provides day-of-the-week and month-of-the year built-in lists. The names will change depending on the language you use.

Built-in lists

Sun, Mon, Tue, Wed, Thu, Fri, Sat
Sunday, Monday, Tuesday, Wednesday, Thursday, Friday, Saturday

Jan, Feb, Mar, Apr, May, Jun, Jul, Aug, Sep, Oct, Nov, Dec

January, February, March, April, May, June, July, August, September, October, November, December

Note: You cannot edit or delete a built-in list.


For this reason, when we type January into a list and drag it down, a list that goes like February, March, April is created. If these lists didn’t exist, when we dragged the list it would have gone like January, January, January.

yerleşik özel listeler


HOW DO YOU CREATE A CUSTOM LIST MANUALLY?

  1. Access the Custom Lists Box with one of they ways we’ve mentioned above.
  2. Enter the data you want into the List entries field.
  3. Click Add.
  4. You will see that it is added in the Custom Lists field.
  5. Finally, click the OK button.

özel liste penceresi


Now you will see that when you write and drag any data that you’ve entered to the List entries field, every single one of them will be listed.

manuel özel liste


Let’s quickly create a data table that contains of the data we created and also months.


özel listeler hızlı doldur


IMPORT YOUR DATA TO YOUR CUSTOM LISTS

If you have steady and unique data in a range of cells, you can import that date to the customs listens box as a whole and use them in your lists. For that you need to go to the Custom Lists box from File > Options > Advanced > Edit Custom Lists. Afterwards, we will select the cell range and import the content.


toplu listeyi custom listden içeri aktarmak


And the thing about accessing these lists from the Sort window is that you can use them with the Sort feature.

For example; there are multiple lists in a table and you want to sort the list but you want 2019 and 2020 be the primary ones. You can add the 2019 and 2020 data into the Lists box and sort the way below.


custom list sıralama yapmak


You can get detailed information on Office Support.

See you in other articles, bye. 🙋🏻‍♂️
You can share this post with your friends and make sure that they are informed too.👍🏻