Manage Items Centrally by Using Properties

You might feel the need to manage the items on the screen from a center while developing a Power Apps application. When the properties of a certain item change, the features like the color, size, place can be managed for the related items on all screens.

There are two existing methods for central management.

  1. Method 1: Managing by using the item properties on the formula bar.
    Since the actions are executed through formulas, it is the most stable method. You can use all the features in the Properties window like color, position and size. This method is one of the first actions you need to execute while you’re developing an app. It can be hard to execute this action on an existing app, but it will help to do it.
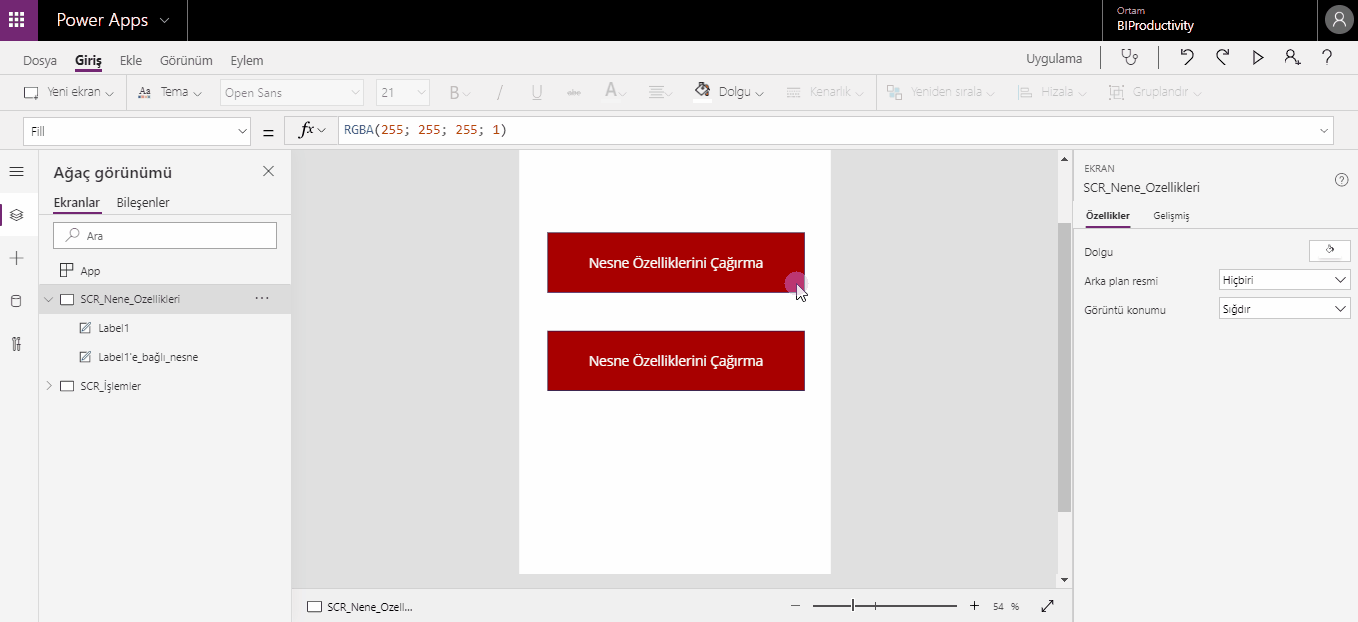
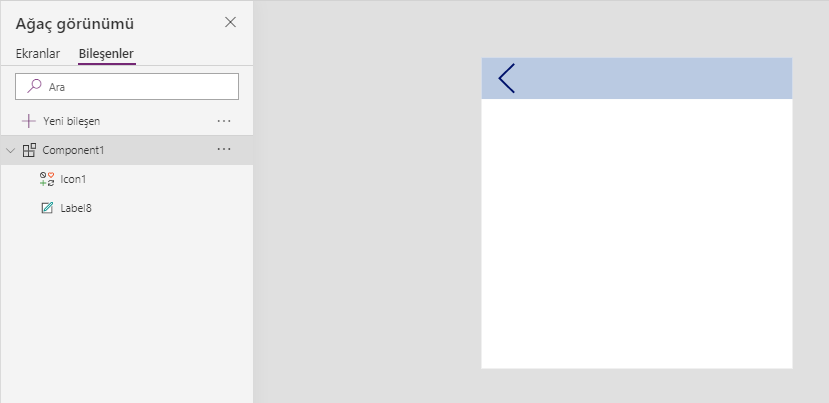
  2. Method 2: Components (Experimental)
    Since this method is experimental, it doesn’t work in a stable way. Compared to the formula method, it is way easier to use.

Manage Items Centrally with Formulas

You might have heard in a lot of places that Power Apps works with the Excel logic and the formula structure is similar.

We write =A1+A2  into the formula bar in Excel to sum up two cells. In this action, we use the cell names directly in the formula and thus call and sum up the value in the cell directly. This way, whenever the value in the cell changes; the sum value gets recalculated.

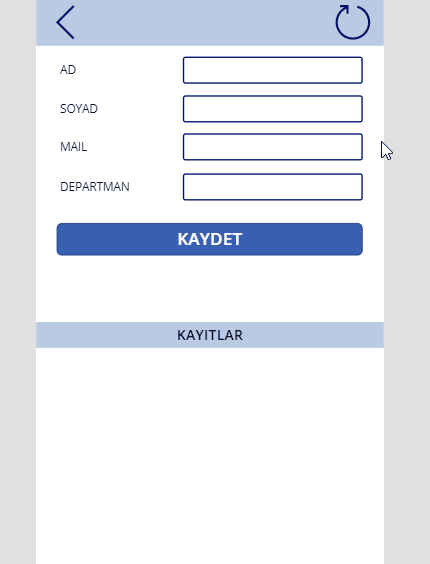
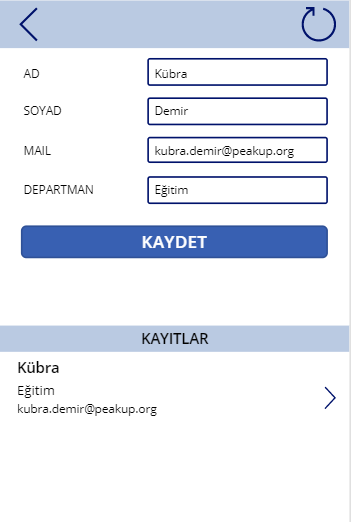
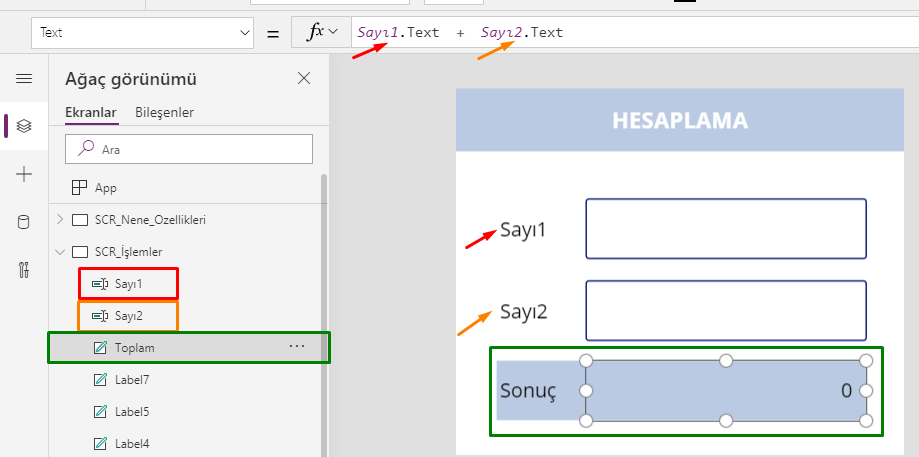
When we want to execute the same action on Power Apps, we can use items like Text Box and Label. For example, we can calculate and display the sum of values entered in 2 Textboxes in a Label.

The Label item on the screen is named as Toplam (Sum), and the TextBoxes are named as Sayı1 (Number1) and Sayı2 (Number2).
We can display the sum value by writing the =number1. Text + Number2.Text into the Text property of Sum.

It means: Get the Text data of the Number1 item   +   Get the Text data of the Number2 item.

Right with the same logic of this examples, the item properties can be used in order for the items to imitate each other.
Actually, we are going to execute the action by assigning the properties of an item to another item.

Action Steps

Add two Label items to the screen.

Label1–> will stay as Label1
Label1–> will be renamed as Item_dependentto_Label1
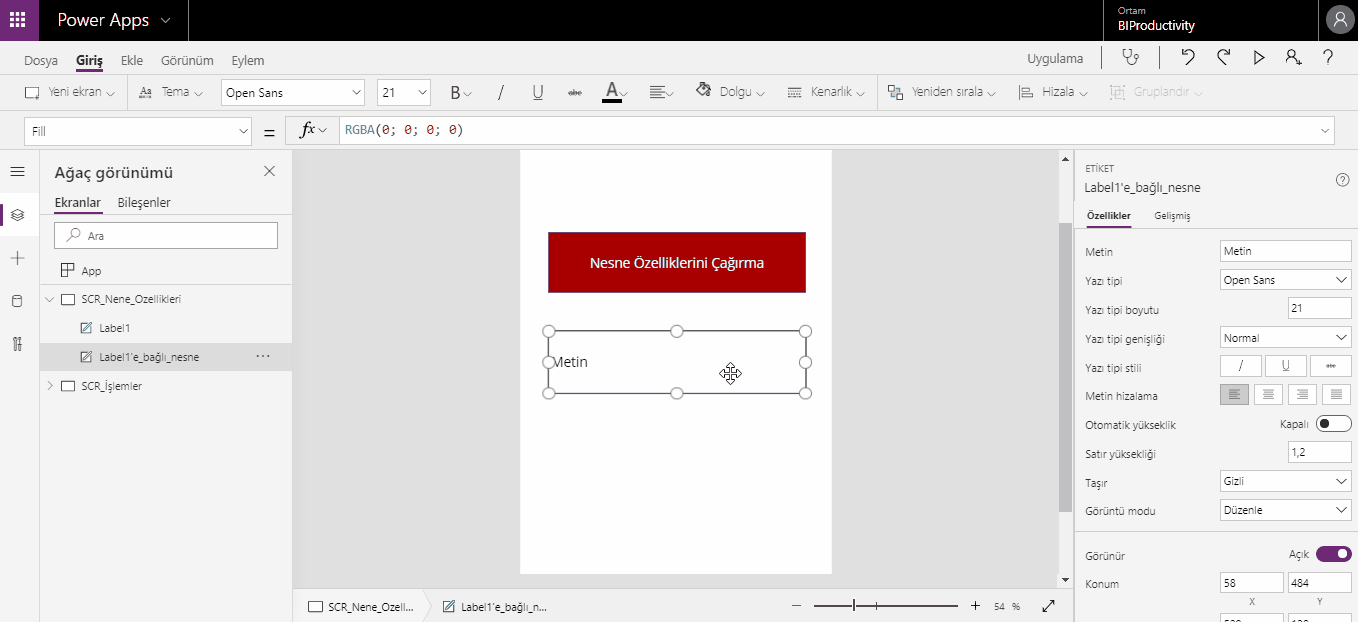
Label1
Its features like fill color, text and border color are changed and thus, it is customized.

Item_dependentto_Label1

The properties are changed with the formulas below for this Label.

Fill –>  Label1.Fill  (Gets the fill color of Label1)
BorderColor–>  Label1.BorderColor  (Gets the border color of Label1)
Text–>  Label1.Text  (Gets the text of Label1)
Width–>  Label1.Width  (Gets the width of Label1)
Height–>  Label1.Height  (Gets the height of Label1)

Like it was written in the formula, this item is now dependent to Label 1. When the features of Label1 change, the dependent item will change.
You can distribute the dependent item to screens with copy-paste.

Using Collections

Usually it is necessary to store the data in temporary storage while calculation or processing. Then, the processed data is transmitted to the data source by saving permanently as ultimate data. Temporary records are stored in the variable tables called Collection. In this method, the data is calculated, processed and quickly written to the cache memory on the app screen only.

These tables are created virtually. Tables and columns can be named however wanted. Columns’ data types are automatically shaped based on the data they contain or the data source that will be saved tı later.

The Collect formula is used to create the collection tables. It is written as (table name ; { columns}) like below:

Collect(name_of_table;
{ column1:   textbox1.Text;
column2:   textbox2.Text;
column3:   textbox3.Text    } )

For example, you can write this formula into the OnSelect property of the SAVE button of OnTimerStart/OnTimerEnd property of the timer.

Using Collections

The personnel records will be written on collection in the screen of the image you see. 4 textboxes, 4 labels, button and gallery items have been used in this screen.

Item names are frequently used in formulas. So, the functional items in the screen should be named based on what they do or the data they contain.

Textbox names are: txt_name, txt_surname, txt_mail, txt_department

The formula below has been written into the OnSelect property of the SAVE button for the data entered in textboxes to be written to the Collection table.

*Table and columns can be named as desired.

Collect( Personnel;
{
P_name:    txt_name.Text;
P_surname:    txt_surname.Text;
P_mail:    txt_mail.Text;
P_department:    txt_department.Text   } )

When you click the save button, the data will be transmitted to the collection in seconds.

How to View Collection Data

All collections and their contents can be analyzed on a single screen with the Collections button in the View tab.

Click the gallery item to view the data in lists and choose the related Collection in the screen that opens up.

For the older versions, you can choose in the Data Source field in the Properties Window. Or you can execute the same action why writing the table name into the Items property of the gallery through formula bar.

To reset the textboxes after clicking the save button, the Reset() function is used.

*;; is used in actions that need to be executed successively.

Collect( Personnel;
{
P_name:    txt_name.Text;
P_surname:    txt_surname.Text;
P_mail:    txt_mail.Text;
P_department:    txt_department.Text   } );;

Reset(txt_name);;
Reset(txt_surname);;
Reset(txt_mail);;
Reset(txt_department)


Conditional Formatting Lists

You can design lists with a condition with the If Formula in the gallery. It is possible to control a lot of features of the objects like color, look, size and place with these conditions. You can authorize based on person/department , hide/show buttons on the screen and highlight status in tracking processes.

Designing Lists with a Condition

In this example, items indicated with colors depending on the information they contain. While all the items of the “Education” department are indicated with purple, the Sales department is displayed with Grey.

ThisItem word is used to individually evaluate each item in the gallery. This way, it is possible to access the data of a certain row among the items.

While registering, people enter their names and surnames separately. And the & concatenation operator is used to write the name and surname next to each other.

ThisItem.P_name & ” ” & ThisItem.P_surname

Adding a Condition

An empty Label is added to the gallery and placed on the left of the gallery to highlight the items.

If(ThisItem.P_departman=”Education”;Purple; Gray) is written into the Fill property of the Label.

With this syntax, each row in the gallery will be evaluated one by one and the department info will be checked. If the department is Education, it will be displayed with Purple. If it is another department, it will be displayed with Grey.

As well as you can write the color as Purple, Red, Blue; you can also write it through the RGB codes.

When you want to use a special color code, the RGBA() function is used.
This function is written as RGBA(255; 255 ; 255 ; 1) as well. The last parameter of the formula gets a value between 0 and 1 and affects the transparency of the color.

You can click here for the other Power Apps articles.

You can click here for the details of the use of the If function.

Manage Formulas by Creating a Formula Screen

You can have an interactive flow or execute visual actions by creating rules with formulas in application screens.

Usually hide, show, freeze, open to edit or change color, location, size actions are done for the determined objects. You can apply all these controls in all application scenarios easily and flexibly.

Depending on the situation in the application scenario, you can connect objects or actions to department, user mail, location, title, marital status or user choice in multiple-choice actions.You can apply all these controls in all application scenarios easily and flexibly.

In this article, we will be talking about managing the conditions in the screen centrally and formula evaluation duration. And most importantly, we will talk about the importance of executing an action after the formula evaluation duration is done.

What is Formula Evaluation?

Formula evaluation is the test done during the result that is created by the written formula. Depending on the performance of the formula, a certain duration is needed.

Why Does Formula Evaluation Takes Too Long?

Depending on the performance of the formula, duration will be longer or shorter. As the conditions in the screen get more complex; main reasons like using nested formulas, waiting for the control of  different objects related to each other to be complete, and executing an action depending on the respond from the data source can make the duration of formula evaluation longer.

For this reason, it is important to make the formula evaluation run as fast as possible. When the respond of a formula that hasn’t been completely evaluated yet is late, the default value can be accepted as a respond and cause wrong actions.

What if a Formula is not Evaluated?

When the respond of a formula that hasn’t been completely evaluated yet is late, the default value can be accepted as a respond and cause wrong actions. Moving on to the next action before the formula evaluation is complete will cause incorrect results. Which means that even the condition you’ve specified is met, since the respond came later it will look like it is not met. When the conditions don’t work as fast as they are supposed to, it is necessary to do actions and review formulas to manage the screens in which formulas run.

How Should the Formulas Be Managed?

  • An evaluation screen should be created for the formulas.
  • Like we always mention, it is very important to pay attention to naming correctly. The Label in which the formula is evaluated should be named based-on what it does and the outcome it creates.
  • The formula should produce 1 and  as a result when it is used with the If function.
  • Since actions like OnSelect, OnVisible,OnScan are instant actions, the formulas that has a long duration should be calculated outside with labels and be run with 1,0 control only.

Text Functions

Power Apps Writing Formulas

PowerApps has its own software language and its special functions. Alongside these functions, it also contains a lot of functions that exist in Excel. These functions are offered in a general frame, they are not separated into categories as function groups like text, date, and statistic. In this article, we will analyze text functions.

It is very practical to code with PowerApps, with the formula language you are used to from Excel.

You can write all formulas on objects. After you choose the related object, you can write on Formula Bar.

*While writing a formula, you can write with commas (,) or semicolons (;) (depending on the browser language), you don’t need to use the equal sign.

Text Functions

There are basic text functions like Concatenate, Left, Right, Mid, Len, Upper, Lower in the Power Apps functions. You can edit or create text expressions with these functions.

Let’s write the formulas below for a textbox in which Text Functions is written. The name of this textbox is txt_sampletext.

The Concatenate function concatenates a mix of individual strings and a single-column table of strings. When you use this function with individual strings, it’s equivalent to using the & operator.

ConcatenateString1 [, String2, …] )

Concatenate(txt_sampletext.Text;  txt_sampletext.Text;  txt_sampletext.Text)


Left function returns the beginning characters of a string.

Left( StringNumberOfCharacters )

Left(txt_sampletext.Text;1)


Mid function returns the middle characters of a string.

Mid( StringStartingPosition [, NumberOfCharacters ] )

Mid(txt_sampletext.Text;3;1)


Right returns the ending characters of a string.

Right( StringNumberOfCharacters )

Right(txt_sampletext.Text;1)


Len function returns the length of a string of text.

Len( String )

Len(txt_sampletext.Text)


Lower function converts any uppercase letters to lowercase.

Lower(txt_sampletext.Text)


Upper function converts any lowercase letters to uppercase.

Upper(txt_sampletext.Text)


Proper function converts the first letter in each word to uppercase if it’s lowercase and converts any other uppercase letters to lowercase.

Proper(txt_sampletext.Text)


The Trim function removes all spaces from a string of text except for single spaces between words.

Trim(txt_sampletext.Text)


The TrimEnds function removes all spaces from the start and end of a string of text but leaves spaces between words intact.

TrimEnds(txt_sampletext.Text)


You can access the list of all the other functions here.

Automatic Page Redirect with Timer

Navigate Between Screens

The Navigate function is used to navigate between screens in PowerApps mobile apps. Navigation between screens can be done when the objects are touched/clicked(by the trigger of user) or within a certain period of time(with a timer). In our previous article, we navigated by writing a formula into the OnSelect property of a button. In this article, we will automatically navigate after a while.

Timer

You can use the Timer object for each action that will be executed based on a duration. This way, when the time start or ends, it will be run to be applied on the actions you’ve determined. Timer works here as a trigger (It is a word that we use a lot in our Power Automate articles). It starts for the time to be up and starts the flow.

Timer objects has properties like OnTimerStart, OnTimerEnd, Duration, Repeat, and Reset and actions are executed with these properties. You can take a look at the general features of Timer here.

For example, you can display a text and image that states uploading/saving/wait etc. You can start the page redirect when it’s OnTimerEnd.

When it’s OnTimerStart and OnTimerEnd, you can create a collection. You can create or compare conditions.

Navigate

Let’s make an example where we see a screen with the “Saved successfully” text after saving and when the duration is done we go back to the main page.

Two screens need to be added into the application. Let’s call one of the screens SCR_Mainpage , and SCR_Action_Successful the other.

Timer object will be added to the SCR_Action_Successful page.

Duration property of the Timer objects writes in milliseconds, and this indicates the duration of the times. When you add a timer, standard Duration comes as 60 000 and it indicated 60 seconds. Which means that when the timer start from 1 and end with 60, it will start the actions.

Let’s make the Duration 3000 and get the action done in 3 seconds in order not to wait for too long and to see the results faster.

Duration: 3000

When the specified time of 3 seconds ends, we’ll be redirected to the main page.

OnTimerEnd: Navigate(SCR_Mainpage)

It was set as true in order for the timer to start automatically.

AutoStart: true

After these actions, the timer works actively. If you want, you can hide the time by setting the Visible property as Visible.

Use Objects with a Condition in Gallery

We can design lists with a condition in the gallery by writing the If formula. With these conditions, it is possible to control a lot of features of objects like color, view, size, position. You can authorize based on person/department, hide/show buttons on the screen and highlight status in case of tracking.

Use Objects with a Condition in the Gallery

We will be going over how to show different objects for different question types in the gallery. This way, one question in the same group will be replied with the radio button and the other will be replied with rating.

Create a Collection

We will create a sample collection for an example with the data above. You need to create the collection by writing the code below into the OnSelect property of a button we will add to the screen.

ClearCollect( Questions;
{
Question:    “Question”;
Question_no:   “1”;
Question_type:    “Radio”   }
;
{
Question:    “Question”;
Question_no:   “2”;
Question_type:  “Rating”  }
;
{
Question:    “Question”;
Question_no:   “3”;
Question_type:    “Slider”   }
)

Show Objects in the Gallery

You need to add the Gallery object to the screen in order to do the action in the example. Questions collection should be connected to this gallery object’s Items.

The responding way of each question in the collection is indicated in the Question_type column. Depending on the responding way of questions, Radio Button, Rating and Slider has been added to the gallery. IF formulas will be written into the Visible property of each object and thus, the related item will be shown depending on the question type and the other ones will be hidden.


Radio Button Visible Code: If(ThisItem.Question_type=”Radio”;true;false)

Rating Visible Code: If(ThisItem.Question_type=”Rating”;true;false)

Slider Visible Code: If(ThisItem.Question_type=”Slider”;true;false)


You can click here to take a look at other Power Apps articles.

You can click here to take a look at the use of IF function.


GUID Function

What is the GUID Function?

A random id in all screens is created with the GUID function every moment. ID values are used as a key by the database systems like Common Data Service and SQL Server.

When the function is used on its own, it can include numbers, lower and upper case and hyphen. As you can see, this function returns pretty long outcomes but this function can be managed with some functions.

guid

GUID returns a different value each time the function is calculated.  If nothing else changes in the formula, it will have the same value throughout the execution of your app.

GUID is a volatile function when used without an argument. You can write it into a label in order to view or change the outcome of the function. You can convey it to the argument for the outcome to change actively.

A random id can be created while changing the page, opening the app, and saving data or with the timer.


GUIDE Function and Examples

Collect

For example, you can convey this function to a certain column by creating a collection.

Collect(Table1; {   Guid_Columns: GUID()  } )

Mid

GUID function creates an outcome that includes numbers, lower and uppercase and hyphen. For example, if you want to produce a 5-character outcome, you can use the Mid function.

When you add a label to the screen an set its Text property as Mid(GUID(); 1 ;5), a 5 character GUID is created.

Set

You can use the SET argument when you need to create a new argument id all the time.

Set the OnSelect property of a button you’ll add to the screen as Set(Guid_create ; Mid(GUID(); 1 ;5)) and the Text property of the label you’ve just added as Guid_create. Now each time you click the button, a new value will be created and it will be see in the  label.


Click here for the general usage of the GUID() function.

You can access the other Power Apps articles here.

Global Set Variable

Each object or property we use in Power Apps can be used as a variable. For example, we can set the value of a TextBox as TextBox1.Text and this way, it is defined as a variable that has a text value and that can be interfered by the users. Even though every object can be used as a variable, there are real functions designed to be a variable. These functions that are experts in assigning an using variables are used in more dynamic actions like calculating a value in an increasing or decreasing way, rather than a static Label moving data between pages. Set variable is one of them.

Properties

  • It’s a global/general variable, can be applied from all the screens of the app.
  • It can be created and applied anywhere in the app.
  • It can hold different data types like Numbers, Text string, Boole, Record and Table.
  • Set(variable_name; value)

Set Variable

It is a very easy-to-use function. You define the variable name and state the value that will be written in it. And then, the variable name is written in the required field and the data it contains is open to use.

Let’s practice with a counter example by creating a variable.

Add a TextBox and two buttons into the screen and position them like below.

Write + and – on the buttons. Set() functions will be written in the OnSelect property of buttons.

+ button: Set( Counter; Counter+1)

With this formula, the last value of the counter is increased by 1 and the data is transmitted to the counter again.

– button: Set( Counter; Counter-1)

With this formula, the last value of the counter is decreased by 1 and the data is transmitted to the counter again.

Label: Counter

Name of the variable is written in to the Text property of the Label and the value the variable holds is reflected on the screen.

Click here for the general usage of the function.

You can access the other Power Apps articles here.

Variable Types

Each object or property we use in Power Apps can be used as a variable. For example, we can set the value of a TextBox as TextBox1.Text and this way, it is defined as a variable that has a text value and that can be interfered by the users. All the values like the color of an object, the text, borders can be used. From this point of view, we can see all the objects as variables. You can take a look here to read other article concerning this topic.

Even though every object can be used as a variable, there are real functions designed to be a variable. These functions that are experts in assigning an using variables are analyzed under 3 categories for Power Apps. They are used in more dynamic actions like calculating a value in an increasing or decreasing way, rather than a static Label moving data between pages.

Power Apps Variable Types

1-General Variables:

Set

  • It’s a global/general variable, can be applied from all the screens of the app.
  • It can be created and applied anywhere in the app.
  • It can hold different data types like Numbers, Text string, Boole, Record and Table.
  • Set(variable_name; value)

2-Context Variables:

UpdateContext

  • they can be applied from one screen only.
  • a single value, a record, a table, an object reference, any result from a formula
  • UpdateContext({variable_name : value })

3-Collection: 

Collect & ClearCollect

  • Holds tables that can be created and applied anywhere in the applications.
  • Saved in the local device to be used later.
  • Different data can be enter based on columns or rows in a table.
  • Every time collect is created, writes the data on top of each other.
  • ClearCollect deletes an existing table and recreates it from scratch every time.
  • Collect( table name ;{column1: “value1” ; column2: “value2”; column3: “value3” ;…})
  • Collect( table name ;{column1: “value1” ; column2: “value2”}; {column1: “value1” ; column3: “value3”} ; {…})

You can click here to take a look at the other article concerning the usage of collections.