In this article, we will be talking about how to create a custom list in Excel and what we can do with it. We can get faster in entering and analyzing data by creating data tables quickly with custom lists. If you already have a data list, i.e. certain product names, brands, stock names, region names etc.; if you add them to custom lists once, it is possible to list all the data in the list quickly instead of writing them over and over again. You just need to write any data from that list into a cell and drag it down. In addition, you can find articles concerning other features of Excel on our blog.
HOW ARE THE CUSTOM LISTS STORED?
Once you create a custom list, it is added to your computer registry, so that it is available for use in other workbooks. If you use a custom list when sorting data, it is also saved with the workbook, so that it can be used on other computers, including servers where your workbook might be published to Excel Services and you want to rely on the custom list for a sort.
However, if you open the workbook on another computer or server, you do not see the custom list that is stored in the workbook file in the Custom Lists popup window that is available from Excel Options, only from the Order column of the Sort dialog box. The custom list that is stored in the workbook file is also not immediately available for the Fill command.
If you prefer, add the custom list that is stored in the workbook file to the registry of the other computer or server and make it available from the Custom Lists popup window in Excel Options. From the Sort popup window, in the Order column, select Custom Lists to display the Custom Lists popup window, then select the custom list, and then click Add.
HOW ARE CUSTOM LISTS CREATED?
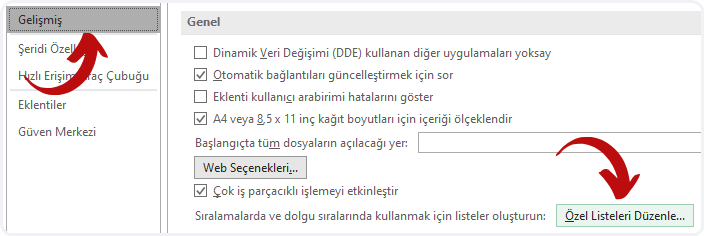
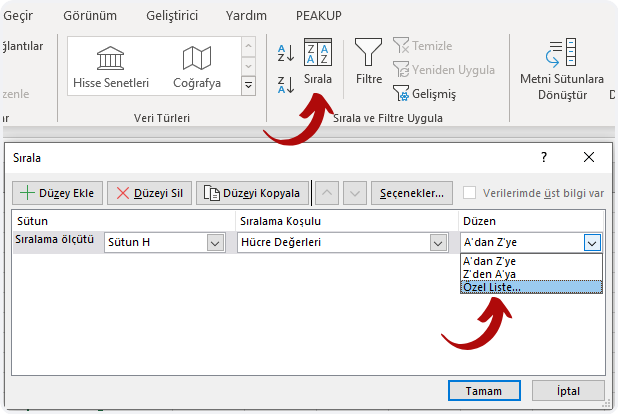
You need to access the existing custom lists box to create a custom list. There are two ways to access that box.
- File > Options > Advanced > Edit Custom Lists
2. Data > Sort > Order > Custom Lists
BUILT-IN LISTS
Excel provides day-of-the-week and month-of-the year built-in lists. The names will change depending on the language you use.
|
Built-in lists |
|---|
| Sun, Mon, Tue, Wed, Thu, Fri, Sat |
| Sunday, Monday, Tuesday, Wednesday, Thursday, Friday, Saturday |
|
Jan, Feb, Mar, Apr, May, Jun, Jul, Aug, Sep, Oct, Nov, Dec |
|
January, February, March, April, May, June, July, August, September, October, November, December |
Note: You cannot edit or delete a built-in list.
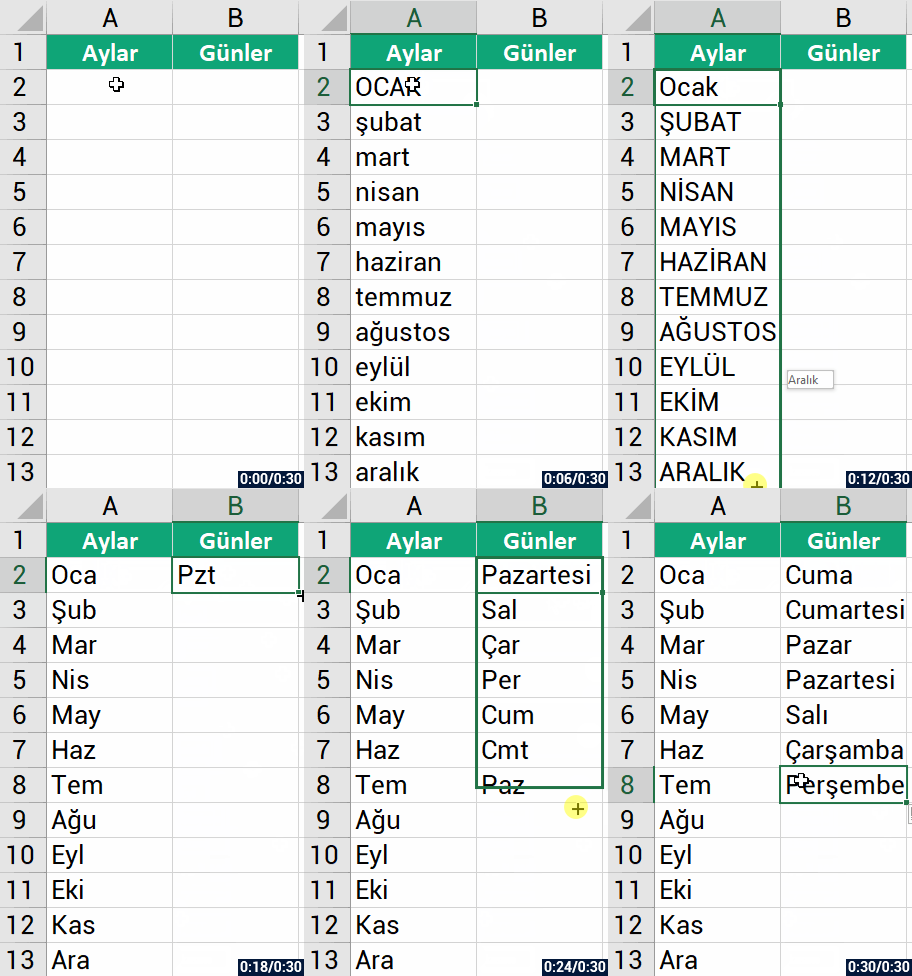
For this reason, when we type January into a list and drag it down, a list that goes like February, March, April is created. If these lists didn’t exist, when we dragged the list it would have gone like January, January, January.
HOW DO YOU CREATE A CUSTOM LIST MANUALLY?
- Access the Custom Lists Box with one of they ways we’ve mentioned above.
- Enter the data you want into the List entries field.
- Click Add.
- You will see that it is added in the Custom Lists field.
- Finally, click the OK button.
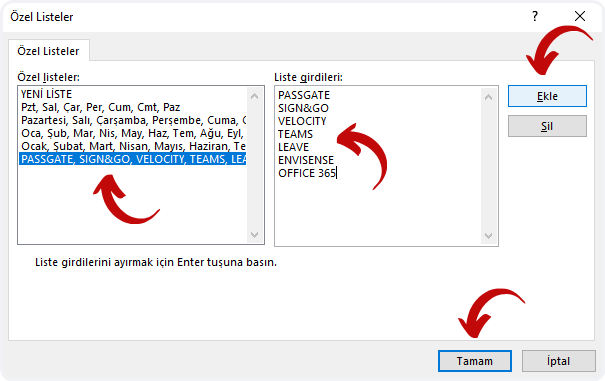
Now you will see that when you write and drag any data that you’ve entered to the List entries field, every single one of them will be listed.
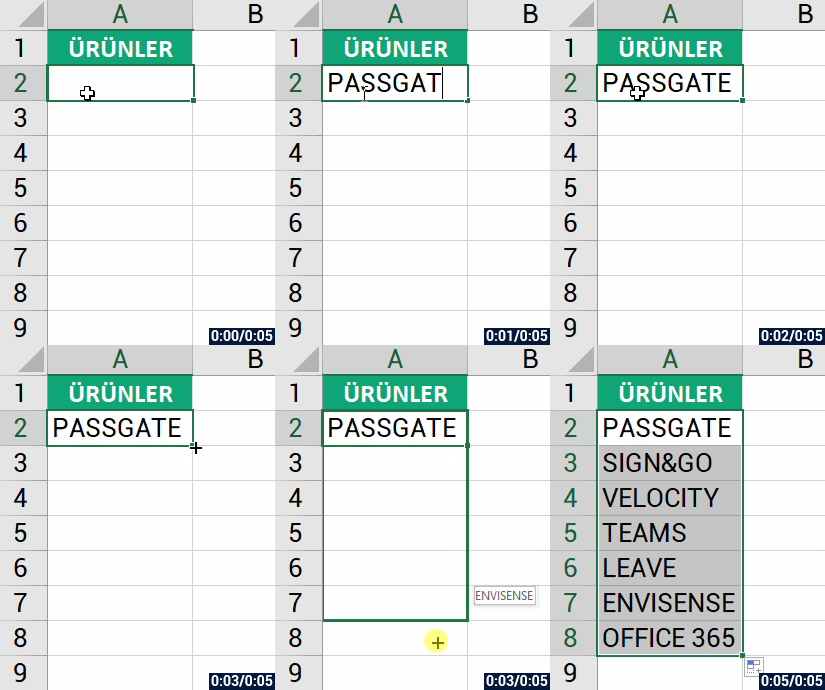
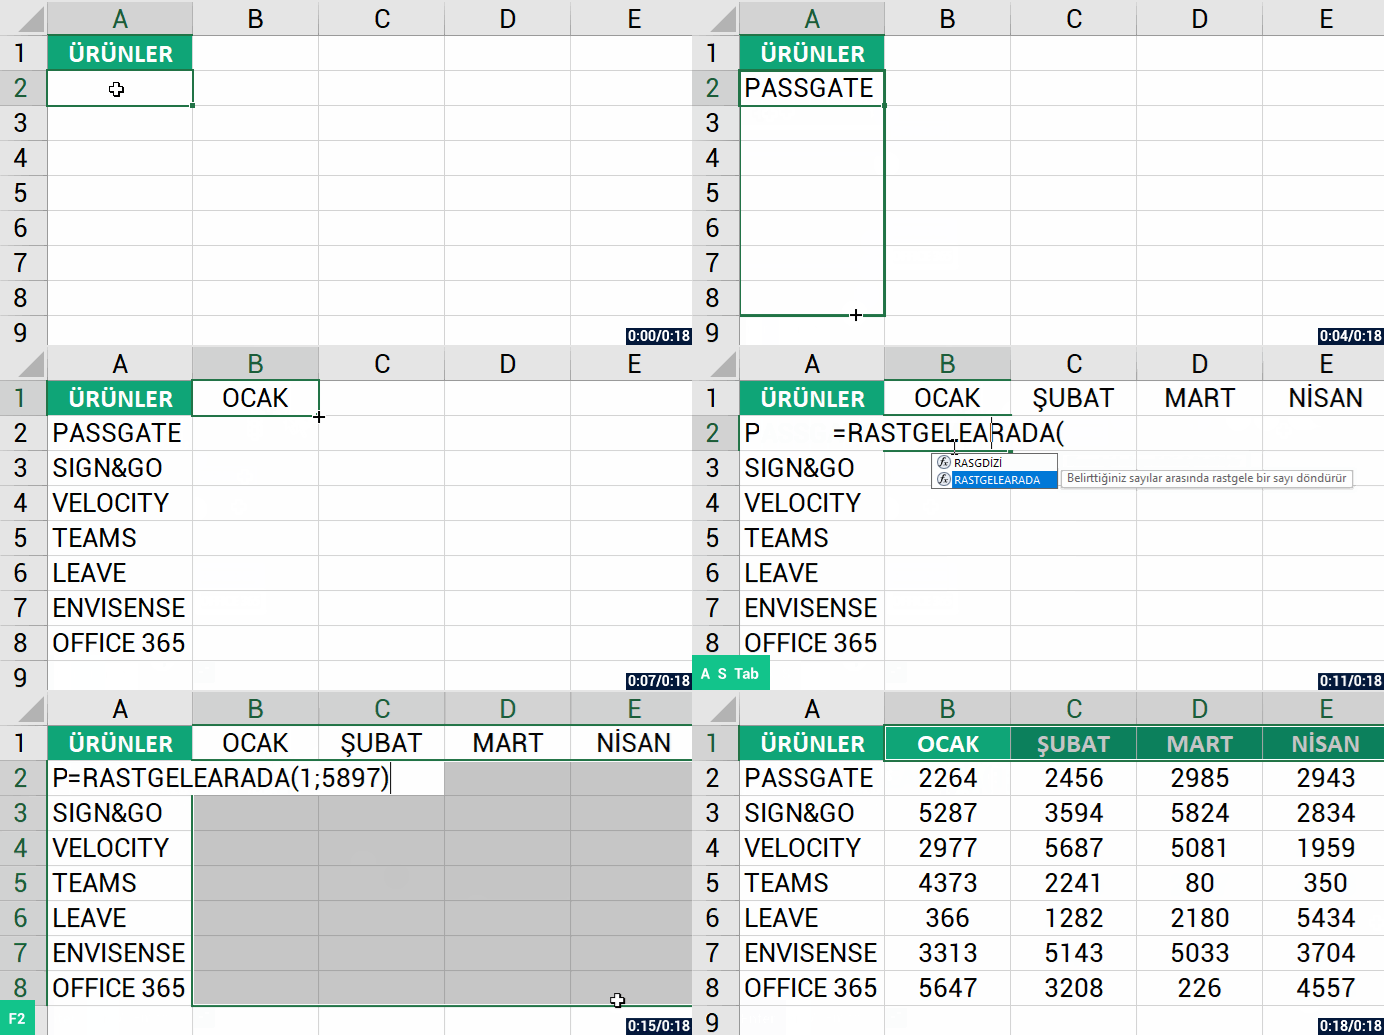
Let’s quickly create a data table that contains of the data we created and also months.
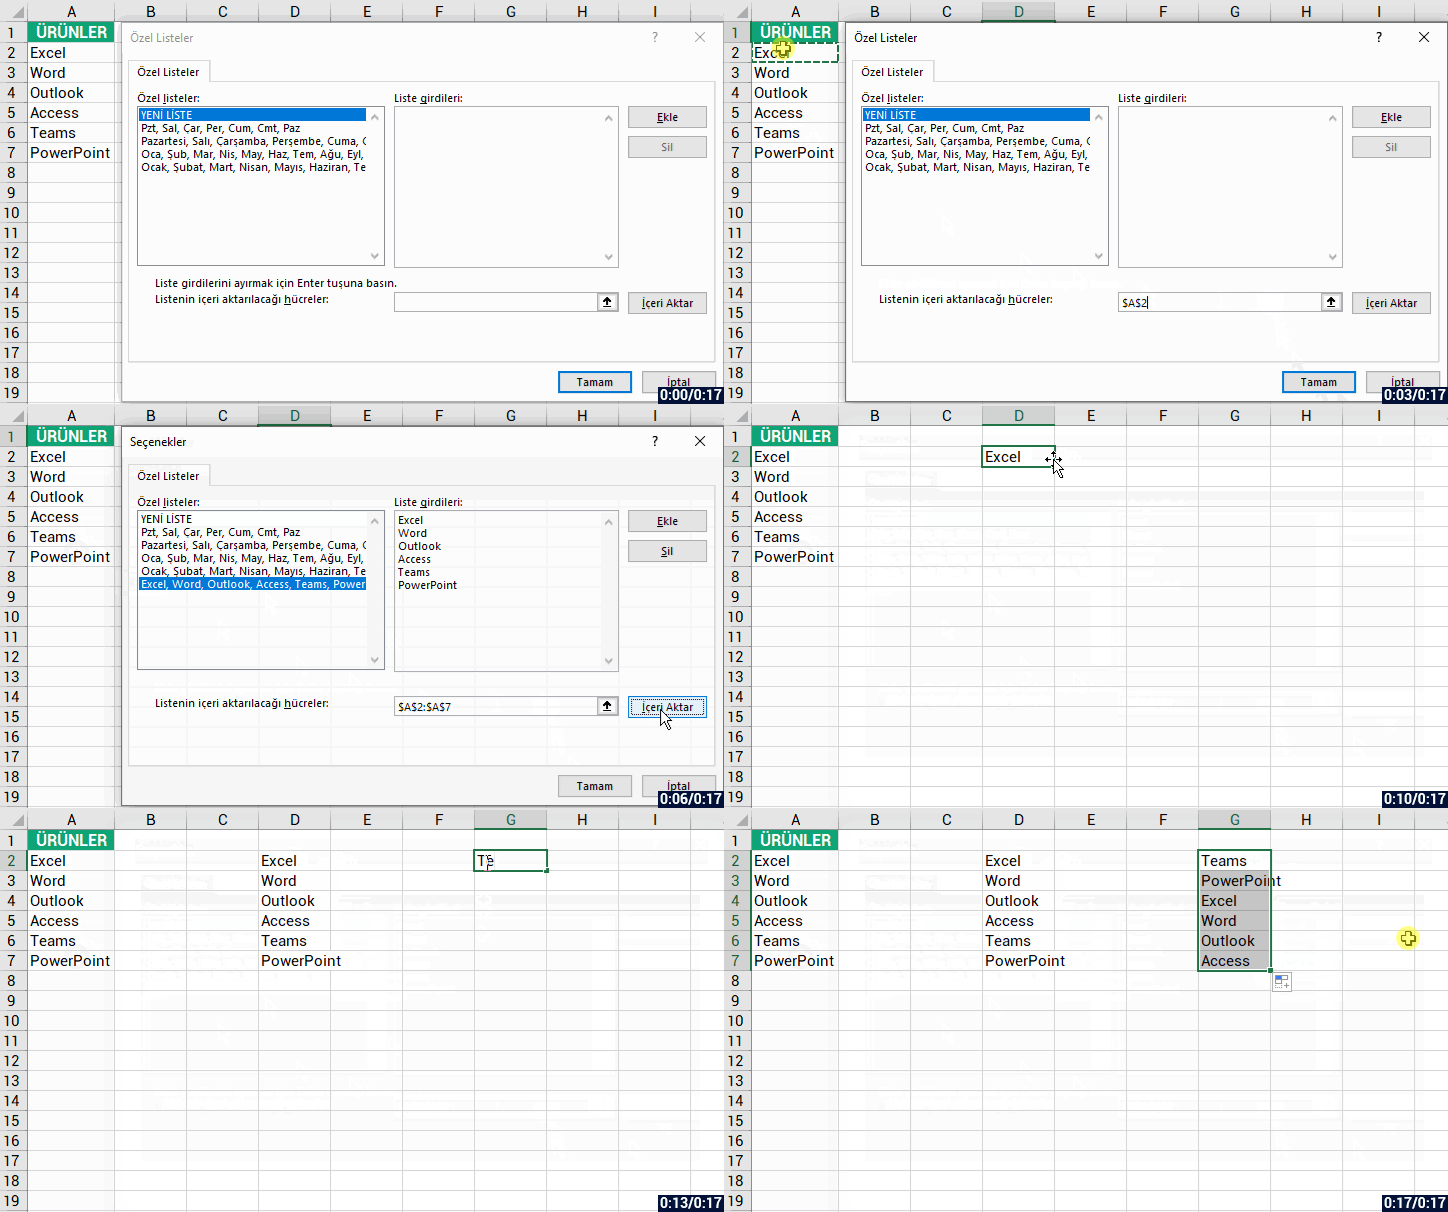
IMPORT YOUR DATA TO YOUR CUSTOM LISTS
If you have steady and unique data in a range of cells, you can import that date to the customs listens box as a whole and use them in your lists. For that you need to go to the Custom Lists box from File > Options > Advanced > Edit Custom Lists. Afterwards, we will select the cell range and import the content.
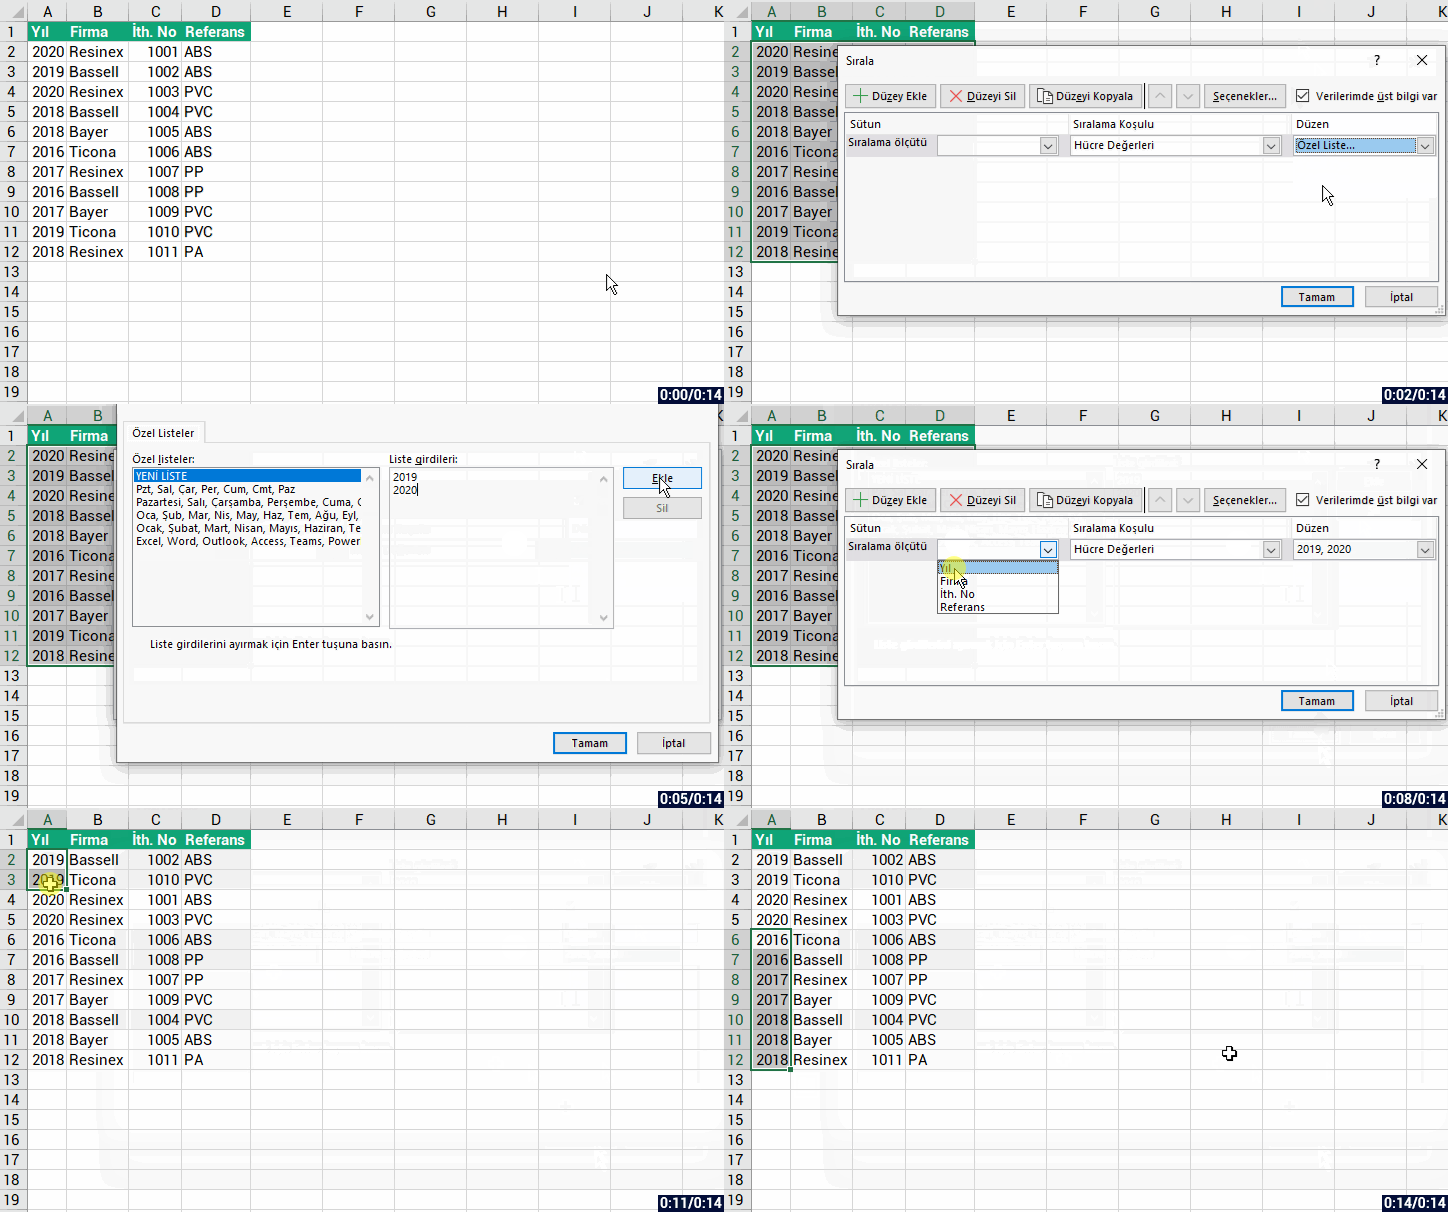
And the thing about accessing these lists from the Sort window is that you can use them with the Sort feature.
For example; there are multiple lists in a table and you want to sort the list but you want 2019 and 2020 be the primary ones. You can add the 2019 and 2020 data into the Lists box and sort the way below.
You can get detailed information on Office Support.
See you in other articles, bye. 🙋🏻♂️
You can share this post with your friends and make sure that they are informed too.👍🏻

