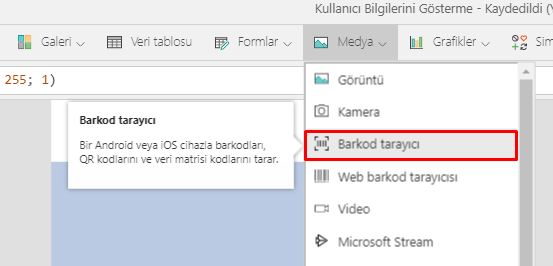
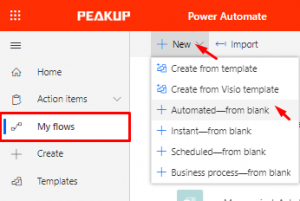
MAKE A SEARCH IN THE OFFICE 365 USERS LIST
Office 365 Users
is a data source that enables you to import data to Power Apps. You can access the user profiles in your company by using your Office 365 account with the Office 365 Users connection. There are various titles like your own profile information, other employee’s profile information and manager information.
In this article, we will use the SearchUser feature.
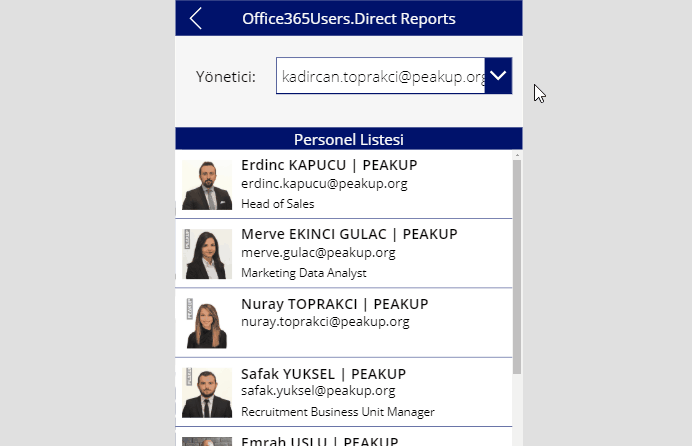
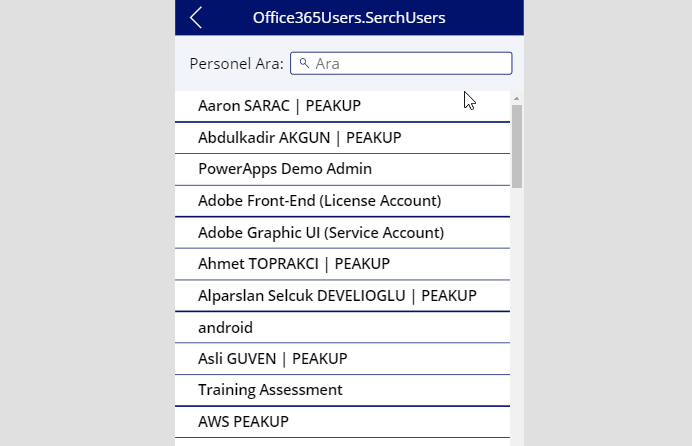
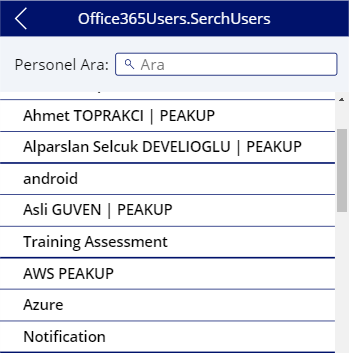
Thanks to this feature, you can view the list of company users and search users like in the image below.
Add Office 365 Users Connection to the Mobile App
Go View –> Data Sources –> Add Data Source –> Write Office to the search bar and add the Office365Users connection.
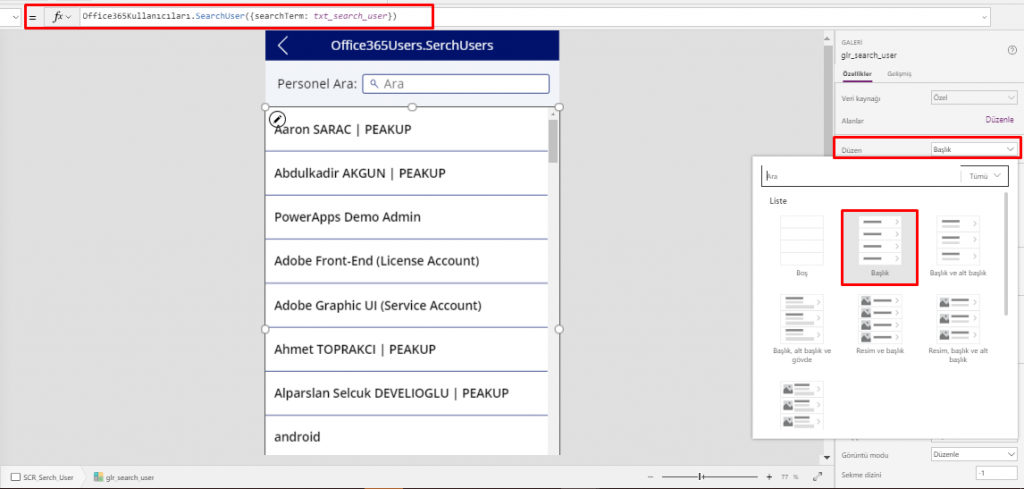
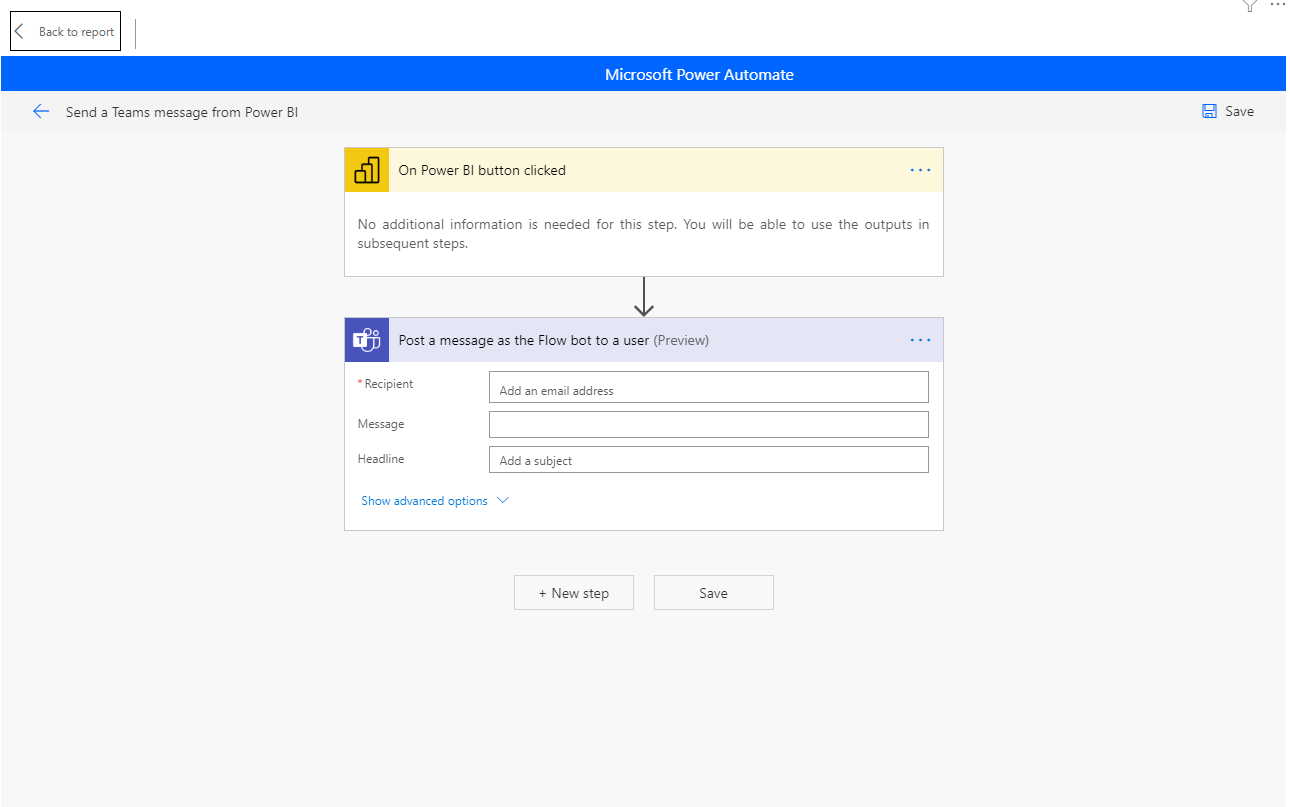
Using the Office365Users.SearchUser Property
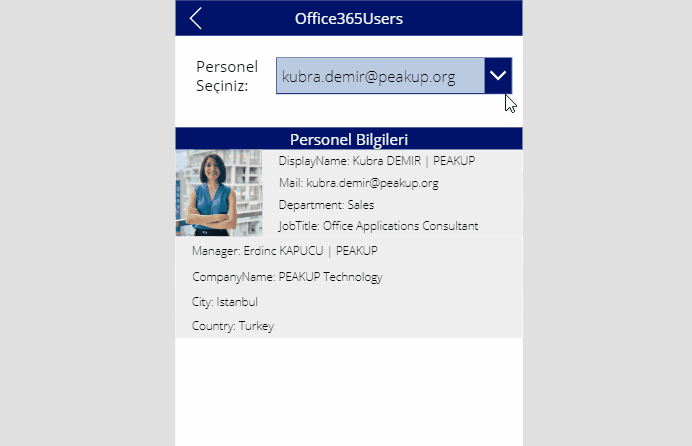
You need to add a Text Box and a Gallery item to your own application in order to design a screen like below and make a search by writing user names.
*The name of the Text Box used in the scree is txt_search_user. The formulas have been written according to this item name.
“Search” has been written into the Hint Text property of the txt_search_user item through the properties window on the right. And then it has been enabled for the text to be written inside by increasing the left padding through the padding field.
The magnifying glass icon has been chosen among the icons and positions on the upper left of the Text Box.
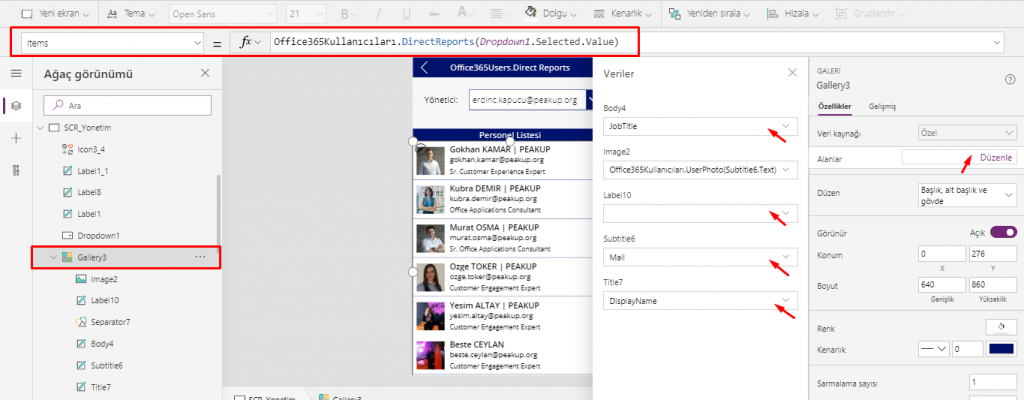
- This formula is written into the Items property of the gallery item on the screen
Office365Users.SearchUser({searchTerm: txt_search_user})
- In order to edit the text in gallery, you can click on the Fields Edit in the window on right and edit one by one on the screen that pops up. This way, Fields like Display Name, Department and Mail can be quickly added.

- To create a one line text without an image like in the example, click Gallery and open the Display option on the menu that pops open on right and then choose Title. You can choose the Gallery display the way you want.