Send E-Mails with Attachments Weekly with Power Automate

Do you send the latest version of the excel file on which you work with your team to your manager? Spare 10 minutes of your time now and create your own flow with Power Automate and send your e-mails with Excel attachments to your manager automatically every week at any hour your want.

When you want to create a flow, you start off with an action (trigger). The flow we will create needs to be run automatically every week, so we will start the flow with the Recurrence(Schedule) trigger.
*If you want, you can do monthly, daily, hourly controls.

In the next step, we need to indicate the location of the file that we want to send as an attachment to the flow. Thus, we need to add the related connector (for example: OneDrive) to the action flow. This way, the file we want to send with mail attachment will be accessed.

Actions are very short and simple. You can follow the steps below and create the flow quickly.

Power Automate Steps

  • Recurrence(Schedule) -> For weekly control
  • OneDrive(Get File Content)->
  • (List Files in Folder)-> To get the data there
  • To be able to choose the one we want among the files we have called Add Condition- > (We get the control of the file we want to call by writing [Name without Extension=ExcelName] through Name without Extension.
  • This action brings the apply to each command to the screen automatically ->
    Power Automate Uygulama Adımları 
  • If the condition is met, to send the mail: we need to add the content coming from OneDrive to the attachments content field in the Advanced Options in Outlook (Send an e-mail). Also, we need to fill in the attachments name field.

    mail atma işlemi

You can send the latest version of your Excel file in Outlook mail attachment with Recurrence(Schedule) control every week by following the steps above.

Send the File added to OneDrive in Mail Attachment

Hello! In this article, we will be sending the file added to OneDrive in mail attachments. Of course, as you might have guessed, we will be using Power Automate.

Before we start the flow, there are some files we need to create on OneDrive.

OneDrive for Business

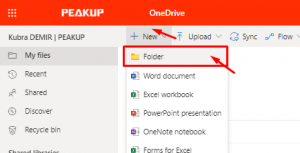
Go to OneDrive–> New–>Folder and create a folder named Mail Folder.

Create another folder named Attachments in the Mail Folder. We will add the mail attachments into this folder.

OneDrıve'a Eklenen Dosyayı oluşturma

Now we can move on to Power Automate.

Power Automate

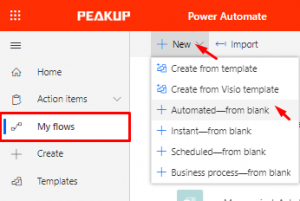
Go My flows –>New–> Automated- from blank and create the process with a blank flow.

Power Automate

You don’t have to choose anything in the window that opens up. You can skip to the flow window directly with the Skip button.

Atla (Skip) butonu

Flow Actions

Our flow will run when the file added to OneDrive is added. So, we start by choosing OneDrive for Business –> When a file is created (properties only).
When a file is created (properties only)
contains details like the name and root of the file that has been added to Drive.

Akış İşlemleri

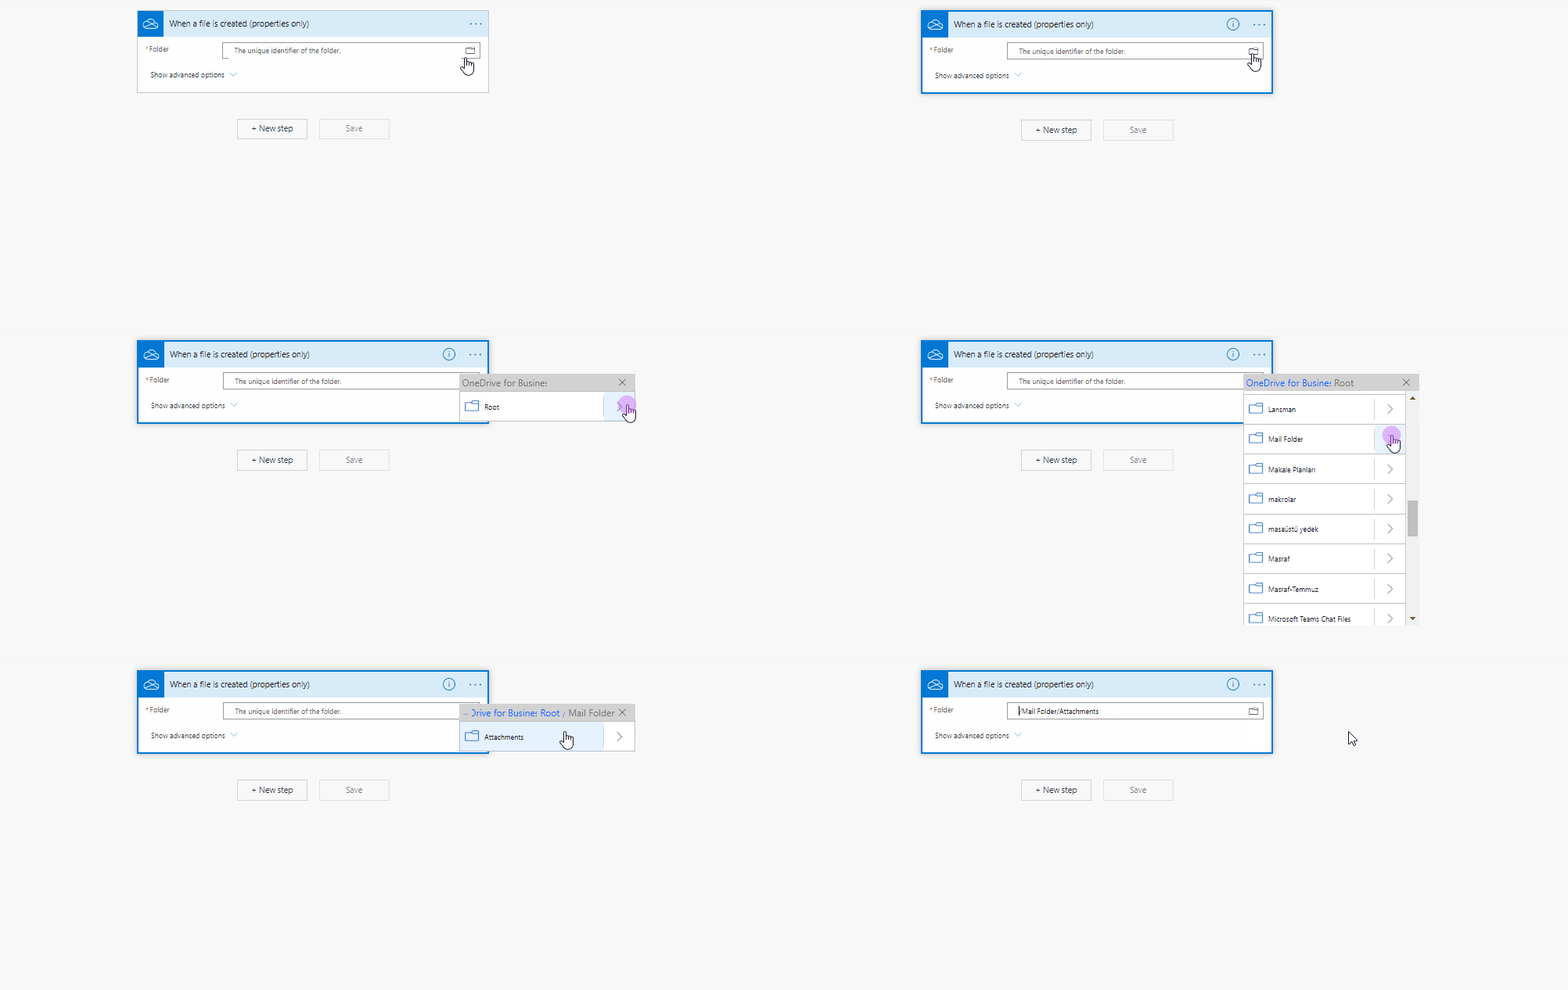
After adding this item, we will indicate the file into which attachments will be uploaded.

Choose Root–>Mail Folder–> Attachments.

Dosya yolu seçim alanı

In the new step, we add the Get File Content item to use the file added to the folder in a tangible way.

We need to give the unique identifier info to this item to detect the file that has been added to the folder.

Click Add dynamic content and choose List of Files Id.

Dinamik içerik ekle

In the next step, add the Send an Email(V2) item.

In this item:

To: The mail address of the person you’ll send the mail to.

Subject: Mail’s subject (optional)

Body: Mail content (optional)

Open mail sending details with Show advanced options that is located on left bottom corner to add the mails to the flow.

Add File Attachments to the Mail

Choose Attachments name: List of Files Name.

File Content that has been gotten with the Attachments Content: Get File Content object is added to this field.

Maıle Dosya Eklerini Ekleyin

And the flow is complete.

You can name the flow on top left corners and then save it by clicking the save button on top right corner.

Now when you add any file into the Attachments folder, it will be sent as an e-mail with attachment automatically.

You can click here for the other Power Apps articles.

Send Mass E-mails with Power Automate

You can send the mails with custom subject and content in which you address people specially in cases like congratulating, events, special day celebrations. This is something that especially the HR needs.

This way, you don’t deal with sending mails one by one. You only need to indicate the mail list and details.

Create a Table

Open en Excel in OneDrive. Add a Table from the Insert tab.

Write Mail, Name Surname and mail details into the columns of this table like below.

Each row of this table will be sent as separate e-mails by the flow.

Flow Process with Power Automate

Start a new blank flow.

After the data in the table is filled, flow will be run by being triggered individually. For this reason, start the flow with Manually trigger a flow.

In the next step, add Excel for Business (List rows present in a table) to be able to add the data in the Excel table. Add the table you’ve just created into this item.

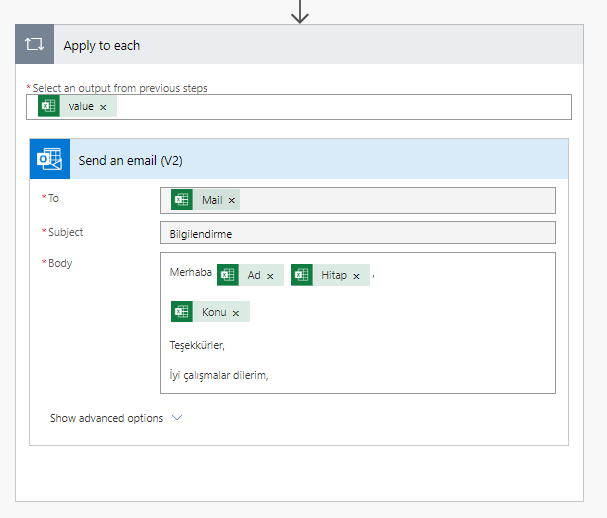
In the next step, add Outlook (Send an e-mail).

In this step, the columns of the Excel table is added to the related fields. With you choosing the Excel fields (mail, name, etc.) the Apply to each item will be added to the flow automatically. An event will be created for each row in the Excel file thanks to the Apply to each item.


After filling the related fields, name the flow on top left corner. For example: Send Mails to a Certain List. You can save and close the flow on top right corner.

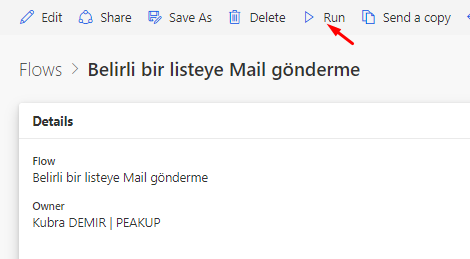
You can verify the data in the Excel table and run the flow.

You can take a look at here for the Power Automate Outlook Connector.