You can create dependent dropdown lists on your mobile apps. For example, Countries can be displayed when Continent is selected, regions when Country is selected and cities when regions are selected.
You can create a manual list or get one from a database while creating a Dropdown List.
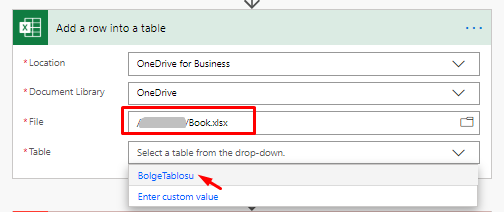
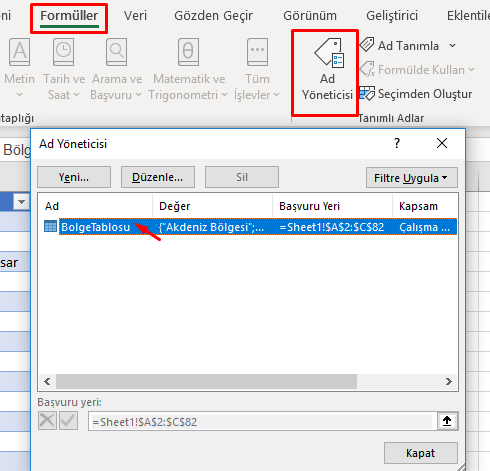
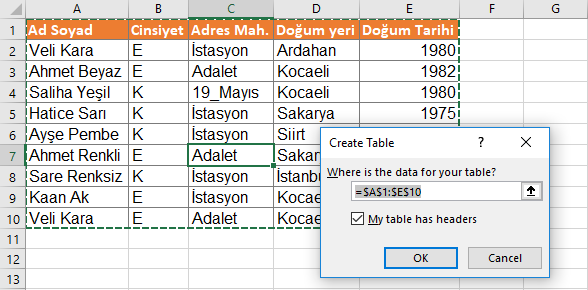
It is necessary to enter data as [“text1” ; “text2” ; “text3” ] within brackets in order to add data manually to the dropdown lists. For example, If the data is on an Excel in OneDrive, the data field should be formatted as Table. The shortcut to create a table in Excel is CTRL+SHIFT+L.
When you turn your data into a table, it is named as Table1. And the data is used with this table name in Power Apps. When there are multiple tables, it is important to name the Excel Table before going into Power Apps to prevent name confusion like Table1, Table5, Table3.
Dropdown Lists
We will execute the action with two dropdown lists.
Dropdown1 named as–> dd_region.
Dropdown2 named as–> dd_city.
The cities in dd_city will change depending on the selected region on dd_region.
Get Data from the Table
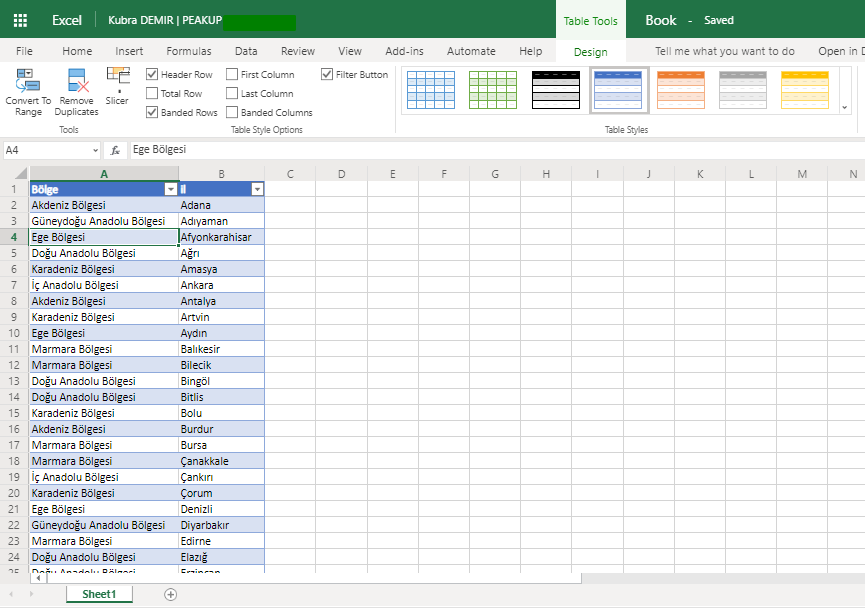
Cities are written cross the region names. Since there are multiple cities in a region, the regions are repeated. You need to use the Distinct formula for the region names to be displayed singularly.
You can write Distinct(RegionTable;Region) into the items property of dd_region.
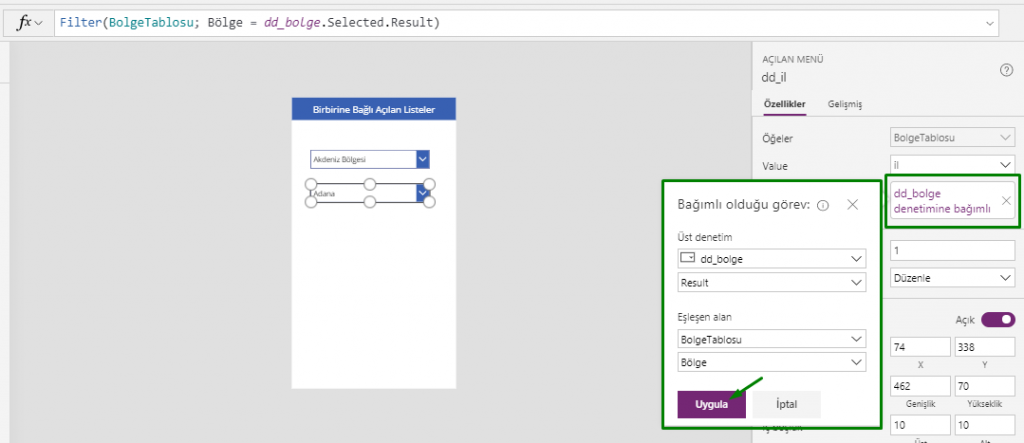
You can use the menu on the right directly for the dd_city item.
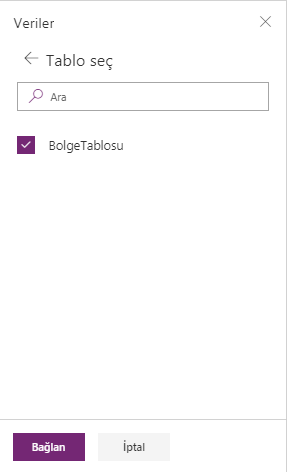
The name of the Items table is selected as RegionTable.
The Value column’s name is selected as the city column.
The upper control ins chosen as dd_region, the matched field as RegionTable, Region Column for the dependent control.
This way, the formula below is automatically written.
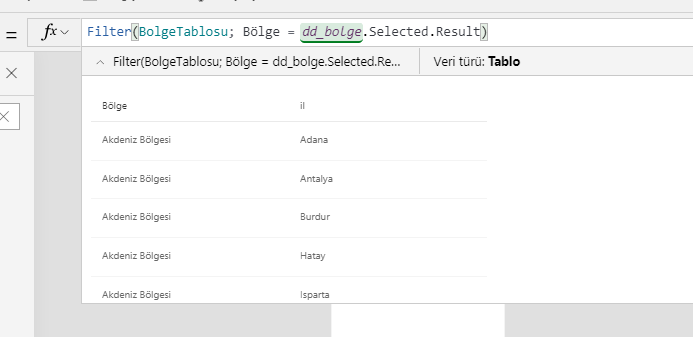
Filter(RegionTable; Region= dd_region.Selected.Result) to the items property of dd_il
Distinct is not necessary in cases of the region names are not repeated and the formula should be revised in this context.
Filter(RegionTable;dd_region.Selected.Region=Region)
The value that formula returns will be displayed on the formula bar.
Using Manual Lists
Since it will be hard to type long data on by one and the formula get longer, it makes sense to use the manual lists for short data.
You can write [“Marmara Region”; “Ege Region”;”Karadeniz Region”] into the items property of dd_region.
You can write:
If(
dd_region.Selected.Value=”Marmara Region”; [ “İstanbul”;”Kocaeli”];
dd_region.Selected.Value=”Ege Region”; [“İzmir”;”Çanakkale”];
dd_region.Selected.Value=”Karadeniz Region”;[“Zonguldak”;”Sinop”;”Trabzon”]
)
to the items property of dd_il. You can use different methods fore dropdown lists just like for other actions. For example, you can prefer to write Switch() instead of IF ().
You can take a look at this link for the details about Dropdown Lists.