How Do You Turn an E-Mail Signature into a Marketing Tool?

As the communication processes are digitalizing, e-mail signatures are becoming an important marketing tool for every sector. Digitalization of communication also plays an important role in the determination of the target audience. Bearing in mind that a worker sends an average of 121 e-mails every day and the average number of this is 293,6 billion globally, why would you wait more to use e-mail signatures correctly? 

Create your Marketing Strategy with your E-Mail Signatures! 

You can create a pretty  effective marketing strategy by including your workers to the marketing process in the equation where when your visibility increases so does your brand’s recognition. You wonder how? 

You can make sure to reach the correct target audience the fastest and cheapest way the moment you add your announcements, campaigns and advertisements to your e-mail banners in a system that you can manage all your signatures centrally.  

Numbers don’t lie!  

According to the studies every day the average worker sends 121 e-mails in average. Considering that the number of sent e-mails in a company with 100 workers is 12.100 making sure that your messages reach to thousands of people makes you obtain incredible results.  

What you have to do to use such a fast and easy communication tool is pretty simple.  

Design Your E-Mail Signatures without Waiting for your IT Department 

Being able to access your e-mail signatures anywhere and anytime is the most basic matter when it comes to announcing your new advertising campaign without wasting time. Keep the control of the signatures that you can easily manage and update centrally. A consistent and well-designed signature banner increases your brand identity and reputation. You can create your own designs and advertisements easily without needing the IT department. Wouldn’t you like to design your own signature right now?

Time to Say Goodbye to Business Cards 

We have a culture of loving traditionalism and not being able to detach from it. There are a lot of people who especially like to buy and even collect business cardsBut in these times where lately the contact decreased, the meetings are done online, and the companies change to digital management the life of business cards comes to an end.  

You can use the announcements and campaigns that you have on your e-mail signatures that you always keep updated as your business card and also reach them to hundreds of your associates, clients and end users. This would be an excellent communication channel that is more interactive compared to handing out your business cards one by one and that you can get the feedback immediately from.

Locate your Banners Correctly 

You can send the messages that you have highlighted the content of, advertisedand that you want to convey with the designs that reflects your corporation to your potential clients instantly.  

 Having more fame and sticking-in-mind better is as close to you as a signature. 

Your e-mail signatures that you have created with a short and effective message will increase the click rate as well. And this will provide you competitive advantageThe simpler and more comprehensible for your target audience the message content, design and content language is, the more impact you will have on the receiver 

Imagine creating different advertisements for each one of your advertising campaigns and activities and having to updating them all the time. This process will be a burden for you in terms of both time and costs. The effects might ware off as you plan the right campaign and you might not be able to get the desired reaction right away. You can design your e-mail signatures for the campaign and the target audience you desire on a department, sector or person base. Thus, the messages you send will be more personalized. Making a good impression on the e-mail receiver will be very important in terms of your persuasiveness. 

You can liven up your mails with the signatures you can effortlessly design on Sign&GO and reach your brand recognition to the target audience you desire with a right strategy.  


Power BI – 2020 July Favoruites

Hello dear reader! This month’s updates are for those who can resist the charm of sea and sand right in the middle of summer. There are two very important features among Power BI July 2020 updates. Let’s go and take a better look right away.

1-   The most important update: Financial Functions on Excel are now on Power BI!

A total number of 49 financial functions are coming to the infrastructure of Power BI. Since we build financial reports on Power BI, it is especially nice to have these functions. These functions added to Power BI have the same function same and syntax as in Excel. You can reach functions and their details here. You can find the names of new functions below.

FINANCIAL FUNCTIONS
ACCRINT CUMIPMT INTRATE PDURATION SLN
ACCRINTM CUMPRINC IPMT PMT SYD
AMORDEGRC DB ISPMT PPMT TBILLEQ
AMORLINC DDB MDURATION PRICE TBILLPRICE
COUPDAYBS DISC NOMINAL PRICEDISC TBILLYIELD
COUPDAYS DOLLARDE NPER PRICEMAT VDB
COUPDAYSNC DOLLARFR ODDFPRICE PV YIELD
COUPNCD DURATION ODDFYIELD RATE YIELDDISC
COUPNUM EFFECT ODDLPRICE RECEIVED YIELDMAT
COUPPCD FV ODDLYIELD RRI

2-Notable Update: Azure Maps visual

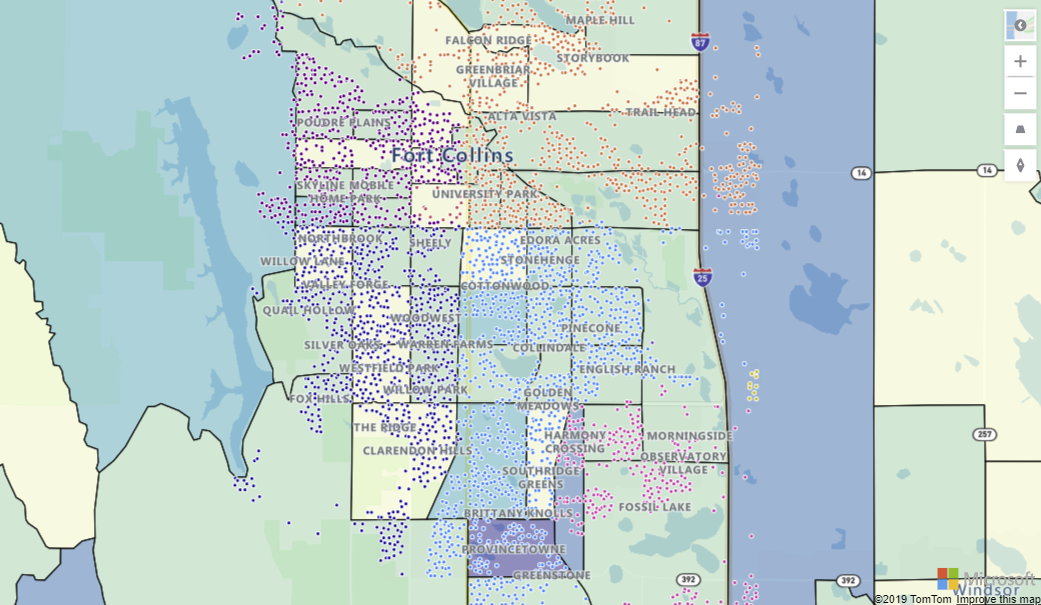
Another update we see as important is Azure Maps being included among the defaults images of Power BI.  But, why is it so important? This chart has different  features than the other map charts.

Now we can add extra layers to maps. One of them is “Reference Layer”. With this feature a GeoJSON file containing custom location data can be uploaded and overlaid on the map. This way you can use it as a reference layer containing different information like population and real estate.

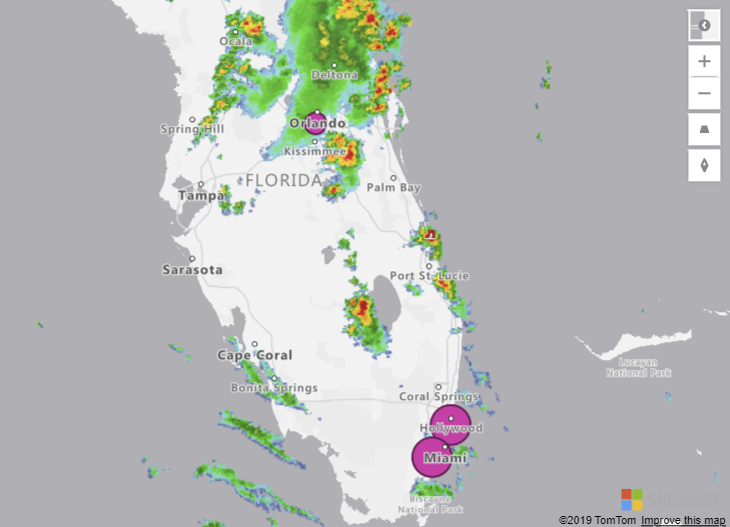
Another one is “Custom Tile Layer”. Tile layers allow you to superimpose images on top of Azure Maps base map tiles. What tiles? For example, weather forecast.

Another standing-out thing is that you can see the real-time traffic overlay on the map in your report. If you work in a logistic related area, it will be very useful for you in terms of increasing efficiency.

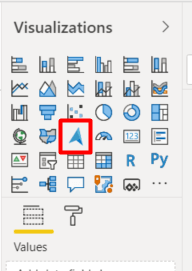
In order to activate this update, you need to activate Azure Map Visual in Preview Features. Then, when you restart Power BI, you will see it among default images on the right .


3-Update: External Tools ribbon- Preview

External tools are non-Microsoft tools that work with Power BI and that allow you to create calculations and calculation groups and analyze data in terms of performance. The prominent ones are:

  • DAX Studio
  • Tabular Editor
  • ALM Toolkit

These feature cannot be opened on Preview Features. We need to create a folder and set up these programs in that file. The folder shortcut should be:

Program Files (x86)Common FilesMicrosoft SharedPower BI DesktopExternal Tools

You can get details about downloading these tools here.

4- Gradient Legend

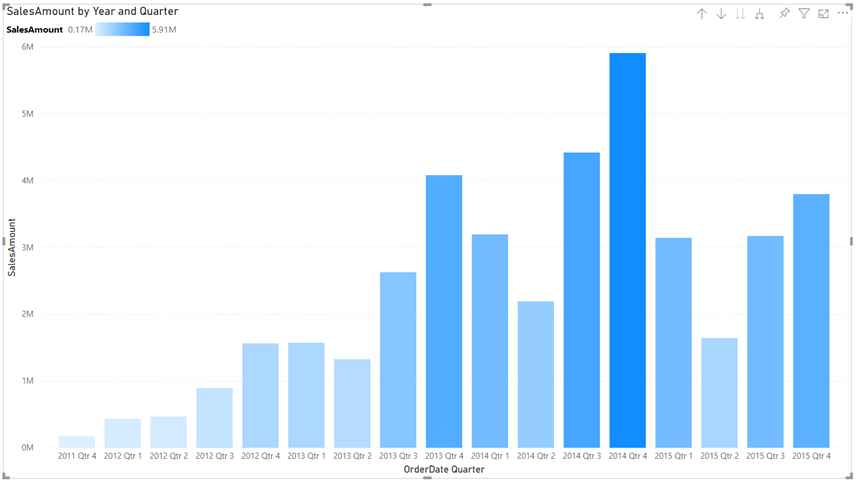
You can now see the color scale that have been conditionally formatted by columns and bar charts as a legend. Of course, unless you add a legend on purpose.

5-Global option to disable automatic type detection

Power Query tries to automatically detect column headers and types based on the data. This feature didn’t function on schema-less data sources and we had to fix it manually. Now we can disable automatic type detection against schema-less sources. This new option can be found under the Options dialog under Global > Data Load.

We cannot talk about data sources in Power BI 2020 July updates 😮 We haven’t come across this situation for a while. If you want to see prior Power BI updates or take a look at other Power BI articles on our blog, click here. Till the next time, take care!

Good game well played

Teams and Cloud Storage – A Deep Insight

[vc_row][vc_column][mk_fancy_title size=”20″ font_family=”none”]In the last week of our event we went to the beginning and thought about what more we can do on Teams while working from home and talked about the new features, Pop-out Chat being in the first place. Easy but important features like how we can filter our unread messages and notifications, how we can arrange our left navigation panel were among our event subjects. We also talked about the differences between opening Office apps on Teams/Online and opening it on desktop. We took a look at options like pinning for rapid accesspinning as a tab, installing the files we choose on the Files

We analyzed the notification settings on Teams Mobile app and talked about “receive mobile notification when Desktop app is not active” and pinning Chat/Channels to the frequently used. In the second part of our event we went into more details about accessing Version History. We talked about the storage space and technical differences between Chat and Channels. Saving an online only file from 1st and 2nd phase trash bins in what time and how when we delete it was one of our important topics.


Also, how to share a file without sending to Teams, having the files as only accessible when they are shared, limiting authority to edit and download were features that enable us to work in a safer environment. While we analyzed sending the files added to SharePoint Online to approval with “Request Sign-off” which was the last subject of our event, we showed how to access PowerAutomate templates in SharePoint [/mk_fancy_title][vc_video link=”https://youtu.be/hHUyTt-5zCo”][/vc_column][/vc_row]

The Most Basic DAX Functions of Power BI

Hello dear reader! In this article we will be talking about the most basic DAX functions of Power BI. We use these functions a lot in our daily lives. And this shows us that we will be using these while preparing reports.


Keep calm and think simple 😃 Yeap, the functions I will talk about go like this:

  • Count (COUNT)
  • Sum (SUM)
  • Calculate the average (AVERAGE)
  • Find the maximum value (MAX)
  • Find the minimum value (MIN)


All these functions have a very simple structure. We usually use the functions above in measures. The results of measures give a a single scalar value. We are looking for the answers of questions below as a single scalar value.

I got the exemplary data set for application of these functions from kaggle.com. You can reach example datasets here. This data set contains information about video games like name, rank, platform, year, genre, publisher, global sales . We will be getting answers of some questions we ask to the data set with the functions above.

Let’s transfer this data set to Power BI first. For this choose Text/CSV from Get Data options on the Home tab and lead to this data set. When you click OK to get this .csv format file it will recognize the bracket between texts and display the version automatically divided into columns on the Navigation window and we will only need to click Load.

In this stage we will try to get the answer of the questions below from this data set.

1-How many games are there?

Lets’s satisfy our curiosity about this first. We will count how many games there are by using the COUNT function from the basic DAX functions. We can use any column for this action. We usually choose the columns that we know will never be empty for counting. We write the related table and column name inside the COUNT function and execute this action. You can find the related syntax below:

Game Count= COUNT(vgsales[Name])

By typing this function we find out that we are talking about 16.598 games here.

2-What is the sum of values on the Global_sales column?

When we talk about sum of values on a column another basic DAX function comes into play. We will obtain the sum of values on the GlobalSales column by using the SUM function. We have to choose a column with numeric values to use the function. The column we want the sum of contains numeric value of Decimal Number data type. We do the action by writing the related table and column name into the SUM function. You can find the related syntax below:

GlobalSales Sum= SUM(vgsales[Global_Sales])

We obtain the sum of values on the GlobalSales column as 8920.44 with this function.

3- What is the average of values on the Global_Sales column?

Let’s find the average for the same column. If we are talking about the average of values on a column, the function we will use is AVERAGE. To use AVERAGE function as well we have to choose a column that contains numeric data type just like in the SUM function. We can obtain the result we want by writing table and column name in AVERAGE function just like the two functions above. You can find the related syntax below:

GlobalSales Average= AVERAGE(vgsales[Global_Sales])

AVERAGE function gives as the answer as the value of 0.54. The average sale price of the games in this data set is 0.54.

4-What is the maximum of the values on the NA_Sales column?

This time we have another curiosity on another column. What is the maximum sales value on the NA_Sales column? The answer of this question can be provided by the MAX function only. Of course for this function too the related column has to contain numeric value. But this function gives us two syntax options: we can find the maximum value in a column, or can tell which one is bigger of two scalar values. We will request the maximum value in the whole column. The general use of MAX function is like that. You can find the related syntax below:

Maximum NA_Sales = MAX(vgsales[NA_Sales])

According to the information we obtained with this function, the maximum value on the NA_Sales column is 41.49.

5-What is the minimum of the values on the NA_Sales Column?

This is the last question we will be asking: What is the minimum sales value on the NA_Sales column? We will use the MIN function to get the answer of this question. While it has been built to bring out the minimum value, the syntax is completely same with the MAX function. The general use is to find the minimum value on a column. You can find the related syntax below:

Minimum NA_Sales = MIN(vgsales[NA_Sales])

According to the information we obtained with this function the minimum value on the NA_Sales column is 0.

With this last question we answered all the questions above by using the most basic DAX functions.


DAX fonksiyon sonuçları

If you please, you can download the .pbix file in which all these actions are done here. Until next time, bye!

Good game well played.

Games as the Language of Children

The importance of games has an irreplaceable place in children’s development in terms of language development, physical and intellectual development and self-care development. Games help children to develop by bringing out their skills like exploration, imitation, and creativity. Games are an opportunity to solve problems.

Even though as parents we doubt the security of technology and feel worried about it, playing games also reflect as learning on our children.

Our children who were born in to a time of digitalization and see tools like phones, tablets, computers and imitate what they see with their imitation skills get involved in this situation -even though we are careful about it and draw the line- somehow. We complied a few applications that can be beneficial as long as parents are in control and that our children can learn as they play.

ABC WOW:

It is an interactive application that helps children to learn the alphabet and English words with objects and the sounds they make when you touch them,  and that helps to develop their visual and auditory memory. The sounds of the objects make children laugh and entertain them. It is a verbal-auditory app i.e an app that is based on language. Although legal age-limit of the app is 4+ you can use it with your babies over 1 under parental control.


WWF Together:

This application narrates the interactive story of endangered animals like giant pandas, tigers, monarch butterflies, sea turtles and polar bears thoroughly.It is a learning-centered game that enables getting to know 16 species of endangered animals with information like their features, populations natural habitats, weights and heights. There are also graphics in which origami art was used. There are “origami methods” where they can create these animals with paper within the app. You can execute this paper folding art with your children while having fun. Although legal age-limit of the app is 4+ you can use it with your babies over 1 under parental control.


Listen & Understand: 

This app was developed with the goal of contributing to development of comprehension what is being said of children with normal development, along with children who has autism spectrum disorder.

The app consists of 2 parts and 10 modules in total. In each one of the 10 modules there are 10 questions. Another important feature of the application is that it collects and analyzes data for the family and educators. It is a learning-based and a dramatic game as an education method. Although legal age-limit of the app is 4+ you can use it with your babies over 1 under parental control.

Paintbox :

Children’s senses work really well during the game. They develop their skills like perceiving, distinguishing and classifying the data they obtain by their senses in their brains. It is an app designed to improve children’s drawing skills by using colors with graphic and drawings activities on a digital environment. There are 8 types of different brushes and you can automatically save the images. Although legal age-limit of the app is 4+ you can use it with your babies over 1 under parental control.

Stack the Countries:

Provides 193 country flash cards and colored interactive maps of continents. It is an educational app where children can improve their geography and atlas information. It is one of the learning-focused interactive apps where they can get information about capitals, borderlands, flags of countries and continents. The parents can brush up on their information as well and spend some time with their children. Although legal age-limit of the app is 4+ you can use it with your babies over 1 under parental control.


Nasa Kids Club

We couldn’t forget about science and technology enthusiasts! Along with the activities on the web page where children can learn a lot about NASA and play games about the space, there are coloring activities for younger space enthusiasts. You can visit their website. With the NASA mobile app we can recommend for adults, you can explore the latest images, videos, task information, news, feature stories, tweets and NASA TV features. Although legal age-limit of the app is 4+ you can use it with your babies over 1 under parental control.

Safe Collaboration with Office Applications and OneDrive

In the 2nd week of our event we talked about some actions we can take in order to prevent data loss in some issues about our computer while working from home. For example, we showed that it is possible to access that data on our phone or another device by keeping a backup of our desktop and other files on OneDrive. We took a deeper look at the simultaneously working on a shared document feature: Writing comments while editing these documents, tracking changes in the documents with the “Track Changes” feature and even accessing old version makes accessing without losing the copies of each document easier. This week we also made our work sustainable with being able to scan our documents by bringing the scanner option at our offices home, saving these documents as PDF and even signing them within the new mobile Office application.

Enterprise Video Portal, Task and Feedback Management

We divided the 3rd week of our Working from Home Practices event into 3 main sections: Stream & Forms & Planner and Teams collaboration functions.

We started our video portal Stream with a general view of easy but very effective features like searching in the portal, uploading videos, adding videos to “Watchlist” and being able to watch them later. Cutting and sharing a video, editing sharing permissions, making the videos interactive by adding polls and quizzes to the minutes we want on Stream we can find our meeting videos is very useful.  Moreover we can obtain integrity by viewing our portal’s channels or videos within Teams.

In the second part we took a look at question types, theme settings for personalizing, sharing options by digitalizing our form and quizzes with our survey application Forms. It is possible to edit questions together by sharing a link to work together, enable one person to answer only or in a certain period of time, register names in answers or answer anonymously with Forms. Also, you can transfer the results to Excel and zeroize the error margin and connect to different reporting tools. These surveys can be used under one app only like Stream by publishing within Teams.

Our last topic the Planner application is our task management tool where we can assign tasks to people and get graphic reports. You can categorize tasks with this tool and filter by these categories or assigned people, and transfer it to Excel. We can add our tasks to Outlook calendar and receive reminders. We included this app as well under the roof of Teams and finished this week’s event.


Office Insider Program – How to Join

What is the Windows Insider Program?

Microsoft Insider

was created for all Microsoft 365 users.

  • Office insider participants are granted first-hand access to new features and updates.
  • You can access dynamic array formulas.
  • In addition to this, you can share your comments about developments with the developers.

Click here to become an Office Insider member.


Access to the Insider Program

The procedure below is the simplest and most complete one.
For a long time it was blocked to go back to “standard” Excel version after you became an Insider .

But with this method you can change between channels anytime you want. smiley

When you go to File> Account menu and want to see information about Microsoft Account like synchronized files, you will see that there are 3 standard buttons that enable you to know your software version number and Office news. If you cannot see the Office Insider button there, follow the steps below.

1st Step: Add Office Insider Button to your Account

After yo do the settings below, you will see that the 4th button is added too. Click on the Insider button.
To do it you need to add a key into registry.  To open your registry type regedit on your Windows taskbar.

Normally Office, 16.0 and Common arrays are not on registry, you need to create them.

Path : HKEY_CURRENT_USERSoftwarePoliciesMicrosoftOffice16.0Common
Key Name: insiderslabbehavior
Value type : REG_DWORD
Value : 1

After you restart Office you will see that on the File > Account menu you have the Office Insider button.


2nd Step: Changing Office Channel 

Then, to see both of the recommended levels click on the Insider > Modification Level button.

You can see 2 levels of the available update by clicking on the popup menu: Monthly Channel or Insider.
Needless to say you need to accept terms of use to change the channel of your application.

3rd Step: Differences between the Two Programs


Insider Channel
This is the level that open the latest Office updates. Some of them didn’t have the chance to be tested by the developers or to be completed. Thus, it carries a risk to fail your Excel functions and collapse your workbooks (it is pretty common). However, it is the only way to access latest features like XLOOKUP.

My recommendation: Don’t set up this version on a professional environment. Would be better in a test machine.

Monthly Channel
This channel is not for test users, it is for very advanced level Excel users. This version opens up persistent features that are usually non-existent in Office standard version (six month channel). For example, to be able to use dynamic array functions you need to subscribe to one of the 2 levels of Insider. If not, you cannot use them.

For this, if some of your employees want to access features that require Insider, this channel is the one that needs to be set up.

4th Step: Update Office

Whatever Office level you choose, it is a must to update your Office.
Single selection of Office channel is not enough to open the Insider program.

After you choose one of the insider levels and click on update button, upgrade will start automatically.


5th Step: Restarting Excel

It is enough to restart your Office apps once or twice to see the changes.


Going back to the Six Month Channel (standard version)

The only thing you need to go back to the six month channel which is Office’s basic version:

  • Click on the Insider icon.
  • Uncheck Save to Preview new versions of Office option
  • Update Office again.


Don’t forget to check other articles on our blog.
You can share this article and make sure that many other people get informed as well.okay

Bye. 🙋🏻‍♂️

Increase your Productivity with Windows 10

In the 4th week of our event we talked about making our work easier along with digitalizing our routine processes with Windows 10. In the previous weeks we mentioned importance of OneDrive and backed up our data. This week we talked about synchronization settings and smartly managing the files occupying our computer with “Storage Sense”. Storage Sense makes the not regularly used files Online Only and thus prevents them to take up unnecessary storage. We managed to have our computers locked when we got away from them with “Dynamic Lock by pairing our mobile devices with our computers via Bluetooth.

We talked about synchronizing all our choices from language settings and password to backgrounds between devices with “Sync Your Settings”. Also how to access the pages we worked on, the pages we opened in all devices with Windows’ Timeline feature; how to access everything we copied from one clipboard without copy-paste on “Clipboard” were important details. We wouldn’t skip mentioning the new Edge application. We asked “How can we pin the websites we opened in the browser to the taskbar as an app? We created the problem of opening millions of tabs and getting lost among them by creating Collections. While carrying the PostIt experience to digital with Sticky Notes, we introduced the new screenshot tool Snip&Sketch. And last but not least, we took a look at the Whiteboard feature we mentioned the first week, and left another event full of information behind.

Let PowerAutomate Do All your Routine Work

This week’s Working From Home Practices topic was the PowerAutomate application  on which you can create work flows. While you can create a new work flow from scratch with PowerAutomate, you can also utilize templates in the application. For the work flows to be created there must be a Trigger and an Action in consequence.  PowerAutomate automatizes your work by connecting to 3rd party applications (Google Sheets, Jira, Twitter, SalesForce etc.) with connectors. So this week we created work flows by utilising templates like receiving approval from specified people for a file added to SharePoint Online, notifying when a task is created on Planner by sharing a post on Teams, automatically saving e-mail attachments from Outlook to any area we want on OneDrive and reporting our location with one click. Also it is as easy to create a work flow from scratch without using templates!