Global Set Variable

Each object or property we use in Power Apps can be used as a variable. For example, we can set the value of a TextBox as TextBox1.Text and this way, it is defined as a variable that has a text value and that can be interfered by the users. Even though every object can be used as a variable, there are real functions designed to be a variable. These functions that are experts in assigning an using variables are used in more dynamic actions like calculating a value in an increasing or decreasing way, rather than a static Label moving data between pages. Set variable is one of them.

Properties

  • It’s a global/general variable, can be applied from all the screens of the app.
  • It can be created and applied anywhere in the app.
  • It can hold different data types like Numbers, Text string, Boole, Record and Table.
  • Set(variable_name; value)

Set Variable

It is a very easy-to-use function. You define the variable name and state the value that will be written in it. And then, the variable name is written in the required field and the data it contains is open to use.

Let’s practice with a counter example by creating a variable.

Add a TextBox and two buttons into the screen and position them like below.
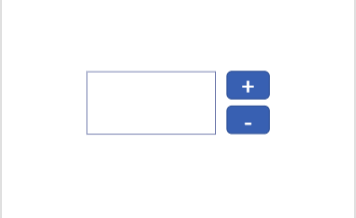
Write + and – on the buttons. Set() functions will be written in the OnSelect property of buttons.

+ button: Set( Counter; Counter+1)

With this formula, the last value of the counter is increased by 1 and the data is transmitted to the counter again.

– button: Set( Counter; Counter-1)

With this formula, the last value of the counter is decreased by 1 and the data is transmitted to the counter again.

Label: Counter

Name of the variable is written in to the Text property of the Label and the value the variable holds is reflected on the screen.

Click here for the general usage of the function.

You can access the other Power Apps articles here.

Authorization with Department Control

You can enable interactive flow or do visual actions by creating rules in the application screen. Depending on the situation in the application scenario, you can connect objects or actions to department, user mail, location, title, marital status or user choice in multiple-choice actions.

Usually hide, show, freeze, open to edit or change color, location, size actions are done for the determined objects. You can apply all these controls in all application scenarios easily and flexibly.

Users whose department is HR will see the HR button that enables them to open the management and confirmation screen of HR.

It is better to do these actions step by step and in pieces while doing these controls. Like I mentioned in my previous article, the formula evaluations should be controlled in different labels and should be named depending on the outcome.

We will test the user department first in the example below.

Department Detection for the Existing User

We will use the Office365Users.MyProfile() formula that lets us get the existing login info of the user that opens the app for this action.

We will write the formula below in a label we named lbl_user_departmant and get the department information.

Office365Users.MyProfile().Department 

Is The Detected Department HR?

We will write the formula below into a label we named lbl_is_user_department_hr and check if the existing user is in the Human Resources department. If the user is in the HR, we will get the outcome as 1, if not; 0.


If the existing user is HR, what actions will be on the screen?

The Visible option of HR button will change depending on the 1/0 values that will come from the label named lbl_is_user_department_hr.

This way, the button will be showed and hidden depending on the department.

If(lbl_is_user_department_hr.Text=Value(1);true;false) 

Control Formulas

The labels named lbl_user_departmant and lbl_is_user_department_hr should be moved to the formula screen so that it is easier to revise them later. Click here to take a look at the article about creating a formula screen and its importance.

You can read about the details of the functions that are used to get user information through Office 365 here.

Similar Examples

You can do similar control with the same steps while filling a form prepared for personnel that consists of personal information like Name, Surname, ID Number, Gender, Date of Birth, Marital Status, Military Service Status.

When the gender is marked as Female, the military service status will be hidden (Visible) since it won’t be filled or it can be frozen (DisplayMode).

When the marital status is marked as single, the fields concerning spouse and children can be hidden (Visible) since they won’t be filled or they can be frozen (DisplayMode).

You can click here for other Power Apps articles.

Get a Picture from a Cell with a Formula

In this article, I want to explain you how to get a picture to a cell with a formula. As you know, we can get the data of the columns we want from a table by looking up for a value on the specified table with lookup and reference functions like VLOOKUP but we can only get the data inside a cell. At this point, what we want to tell you is that if there is a picture in the are we want to get, we can get it with a formula. By the way, we would like you to read and analyze our articles about Office, you can find them on our blog.


Get a Picture to the Cell with a Formula

Let’s say that we have two different pages. On one page, there are products, brand names etc. and on the other page there are product and brand pictures. We can get the picture on the second page next to the product and brand name on the first page with a formula that we’ll write. While doing that, as you’ll see below, we need to define names. We cannot get the picture in a cell without defining names.


Here is how you do it step by step:

  • Create a Data Verification list with brands.
  • Write the main formula necessary for this action.
  • Name the formula we created with the Name Manager.
  • Complete the process by assigning the name to the picture.


Let’s start understanding how to do it with pictures! 😀

We talked about creating a data verification list first, let’s take a look at it.

veri doğrulama listesine almak


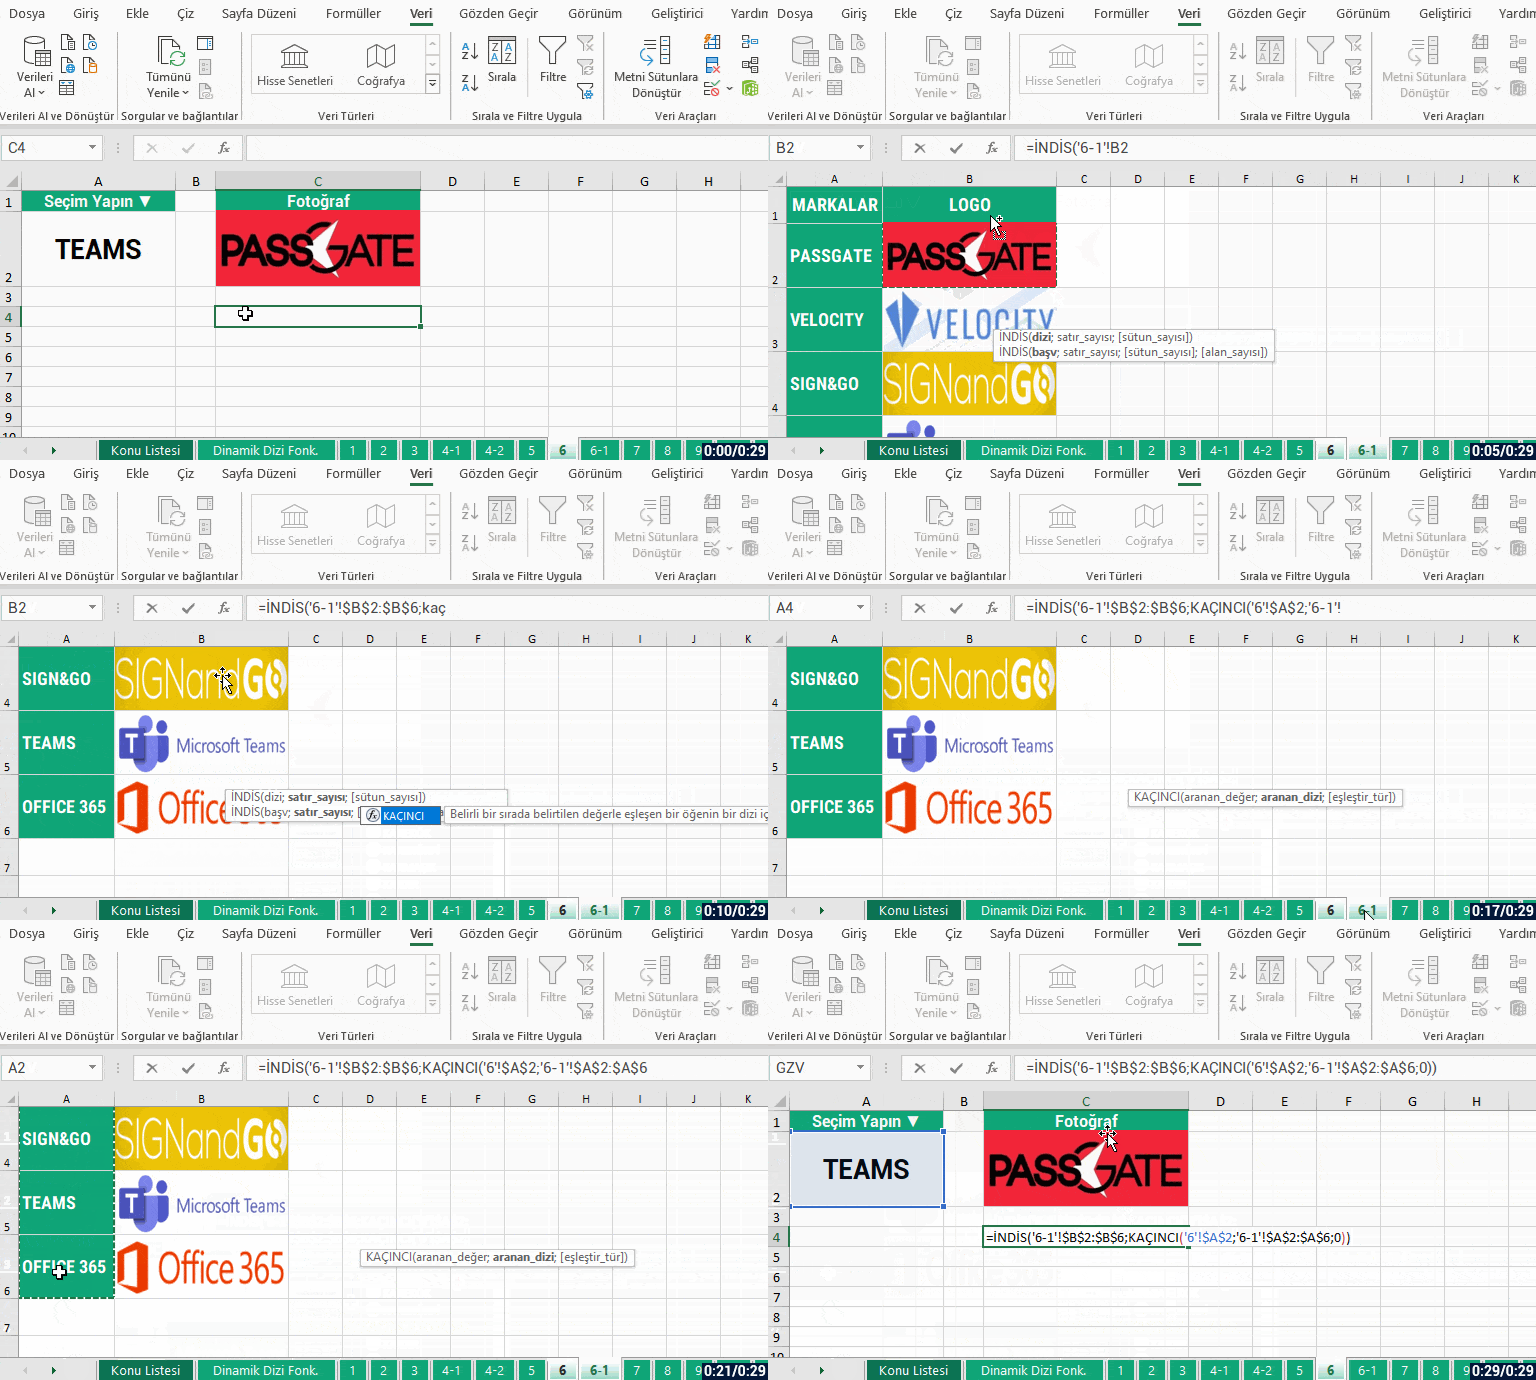
We took the brand names to the data verification list.Let’s write the formulas that will do the job. I am leaving the formula here, you can see how I write it in the gif below.

=İNDİS('6-1'!$B$2:$B$6;KAÇINCI('6'!$A$2;'6-1'!$A$2:$A$6;0))


formülle resim getirme formülü


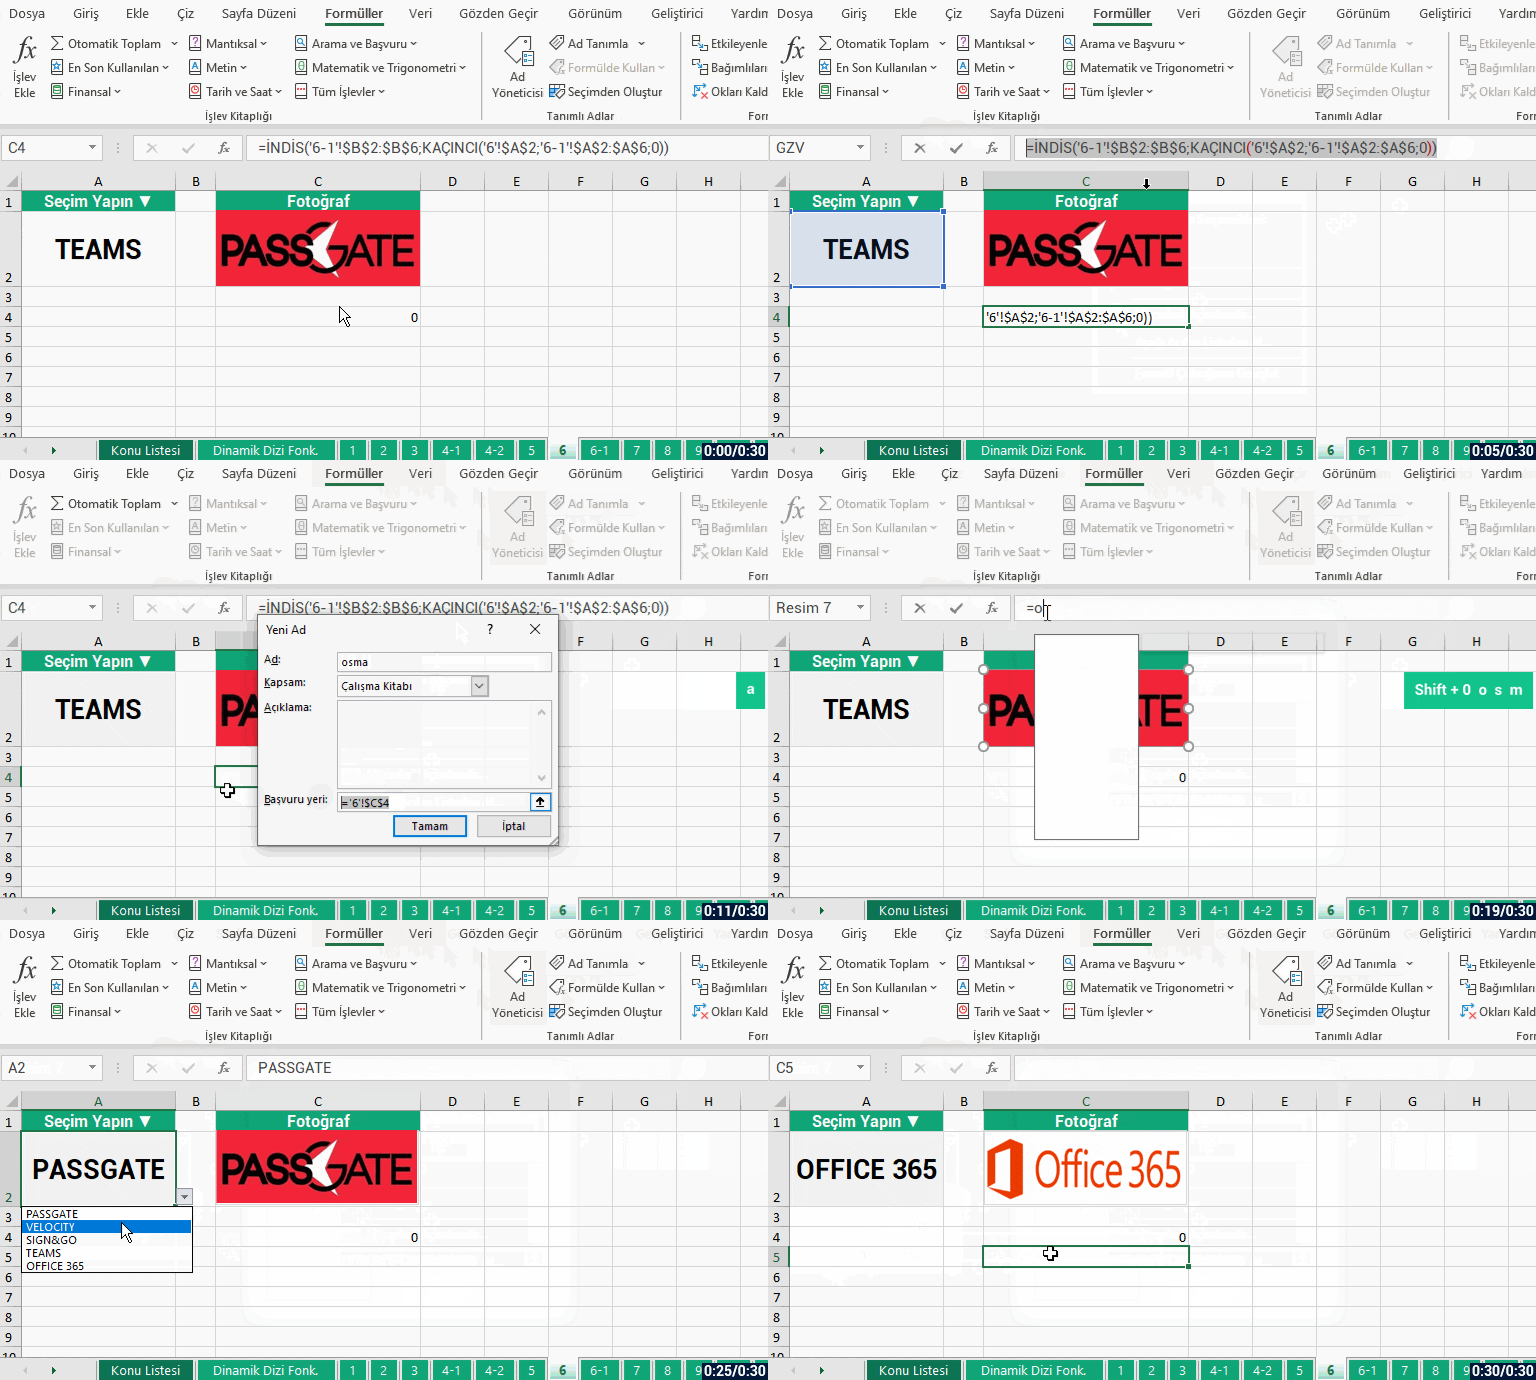
Now we’ll name the formula I have written, assign the picture on the first page and complete this action.


formüle ad verme


As you can see, we have learned how to get a picture to a cell with a few steps.. We have called a picture on another page to the active page with brand names. You can execute this kind of examples by getting pictures dynamically.

Also, you can get more information about defining names on Microsoft Support.


See you in other articles, bye.🙋🏻‍♂️
You can share this post with your friends and help them get informed. 👍🏻