
Usually it is necessary to store the data in temporary storage while calculation or processing. Then, the processed data is transmitted to the data source by saving permanently as ultimate data. Temporary records are stored in the variable tables called Collection. In this method, the data is calculated, processed and quickly written to the cache memory on the app screen only.
These tables are created virtually. Tables and columns can be named however wanted. Columns’ data types are automatically shaped based on the data they contain or the data source that will be saved tı later.
The Collect formula is used to create the collection tables. It is written as (table name ; { columns}) like below:
Collect(name_of_table;
{ column1: textbox1.Text;
column2: textbox2.Text;
column3: textbox3.Text } )
For example, you can write this formula into the OnSelect property of the SAVE button of OnTimerStart/OnTimerEnd property of the timer.
Using Collections
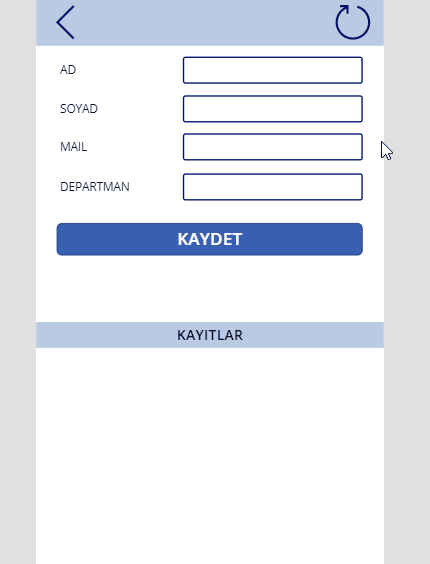
The personnel records will be written on collection in the screen of the image you see. 4 textboxes, 4 labels, button and gallery items have been used in this screen.
Item names are frequently used in formulas. So, the functional items in the screen should be named based on what they do or the data they contain.
Textbox names are: txt_name, txt_surname, txt_mail, txt_department
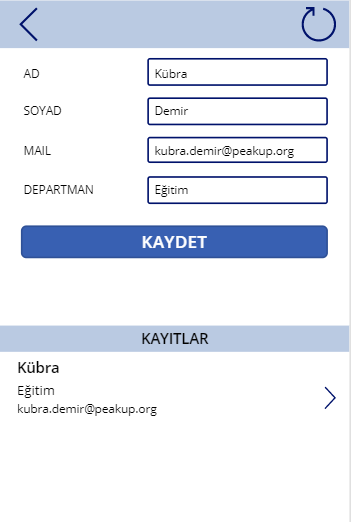
The formula below has been written into the OnSelect property of the SAVE button for the data entered in textboxes to be written to the Collection table.
*Table and columns can be named as desired.
Collect( Personnel;
{
P_name: txt_name.Text;
P_surname: txt_surname.Text;
P_mail: txt_mail.Text;
P_department: txt_department.Text } )
When you click the save button, the data will be transmitted to the collection in seconds.
How to View Collection Data
All collections and their contents can be analyzed on a single screen with the Collections button in the View tab.

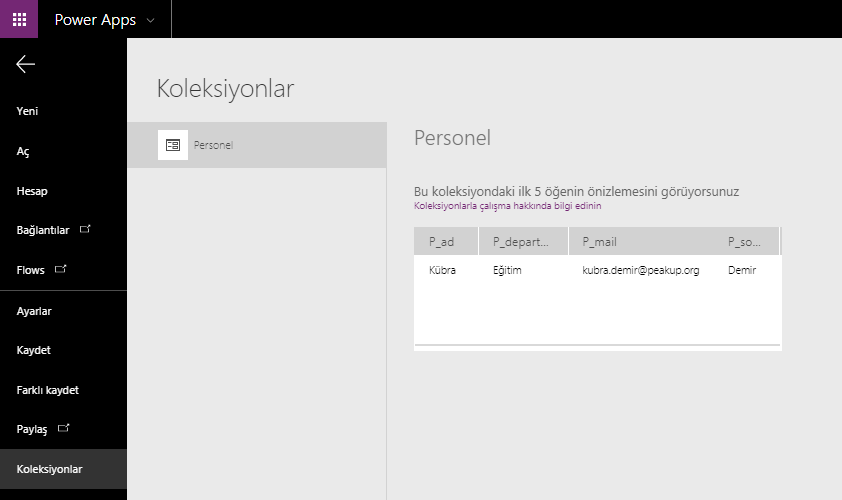
Click the gallery item to view the data in lists and choose the related Collection in the screen that opens up.
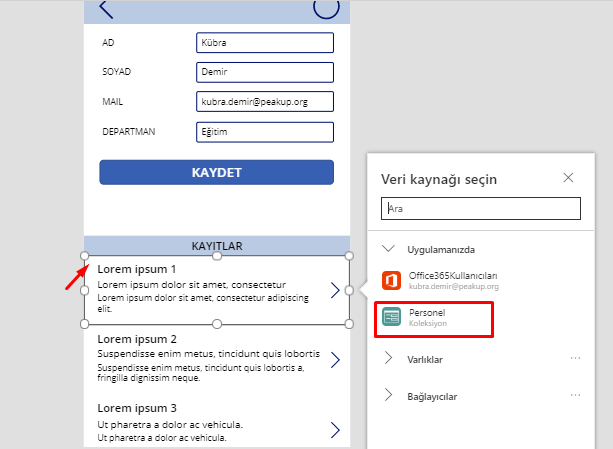
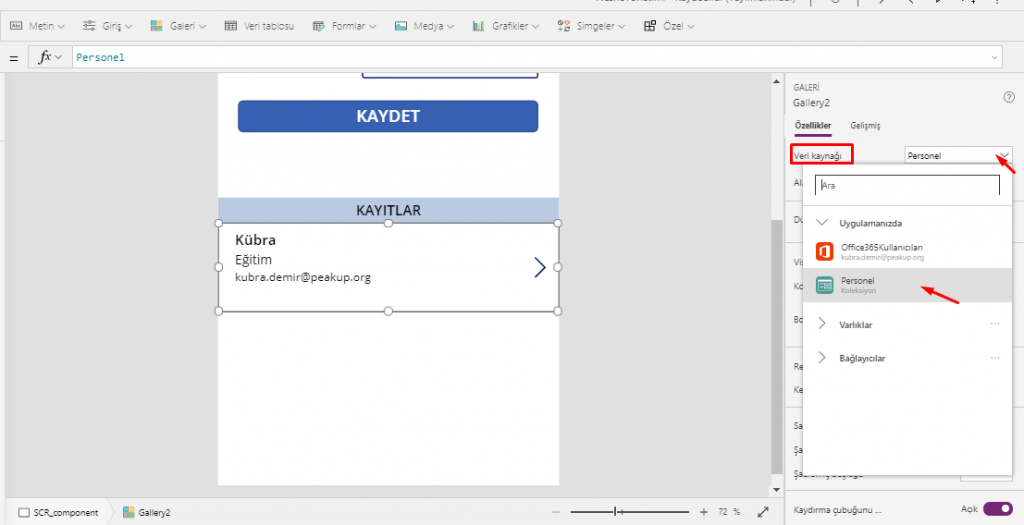
For the older versions, you can choose in the Data Source field in the Properties Window. Or you can execute the same action why writing the table name into the Items property of the gallery through formula bar.
To reset the textboxes after clicking the save button, the Reset() function is used.
*;; is used in actions that need to be executed successively.
Collect( Personnel;
{
P_name: txt_name.Text;
P_surname: txt_surname.Text;
P_mail: txt_mail.Text;
P_department: txt_department.Text } );;
Reset(txt_name);;
Reset(txt_surname);;
Reset(txt_mail);;
Reset(txt_department)