
You can design lists with a condition with the If Formula in the gallery. It is possible to control a lot of features of the objects like color, look, size and place with these conditions. You can authorize based on person/department , hide/show buttons on the screen and highlight status in tracking processes.
Designing Lists with a Condition
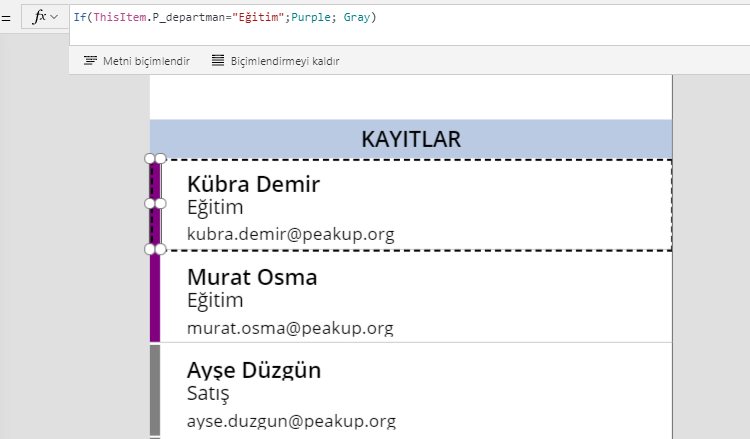
In this example, items indicated with colors depending on the information they contain. While all the items of the “Education” department are indicated with purple, the Sales department is displayed with Grey.

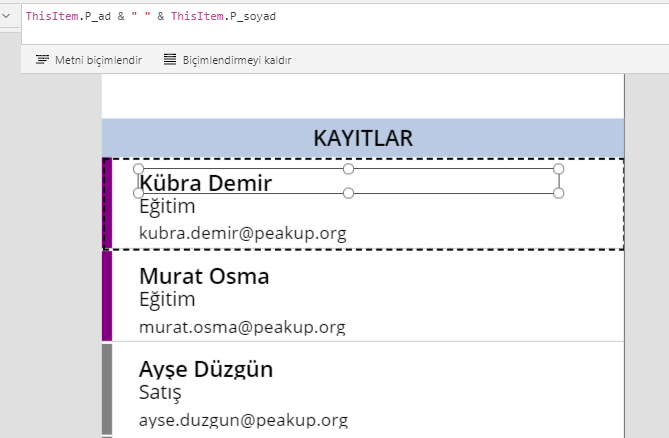
ThisItem word is used to individually evaluate each item in the gallery. This way, it is possible to access the data of a certain row among the items.
While registering, people enter their names and surnames separately. And the & concatenation operator is used to write the name and surname next to each other.
ThisItem.P_name & ” ” & ThisItem.P_surname
Adding a Condition
An empty Label is added to the gallery and placed on the left of the gallery to highlight the items.
If(ThisItem.P_departman=”Education”;Purple; Gray) is written into the Fill property of the Label.
With this syntax, each row in the gallery will be evaluated one by one and the department info will be checked. If the department is Education, it will be displayed with Purple. If it is another department, it will be displayed with Grey.
As well as you can write the color as Purple, Red, Blue; you can also write it through the RGB codes.
When you want to use a special color code, the RGBA() function is used.
This function is written as RGBA(255; 255 ; 255 ; 1) as well. The last parameter of the formula gets a value between 0 and 1 and affects the transparency of the color.
You can click here for the other Power Apps articles.
You can click here for the details of the use of the If function.