Create an Angular Component Library w/ StoryBook

Today, we are going to create an Angular library that has a couple of components in it. Then we are going to install and configure StoryBook to see our components in action and make the development phase a little bit bearable.

I’m going to assume that you have node.js and npm package manager installed. If not, you can download node.js from here.

Create An Angular Workspace And Library

First, let’s make sure you have the “@angular/cli” package and if you don’t, install it globally;
npm install -g @angular/cli
Then we will create a workspace for our library;
ng new my-lib --create-application=false
The “my-lib” part will be your library name. We also defined a parameter to our command called “–create-application” and set it to “false”. This will give us a barebone Angular application structure without the application itself. This is the recommended way of creating an Angular workspace since Angular 7.

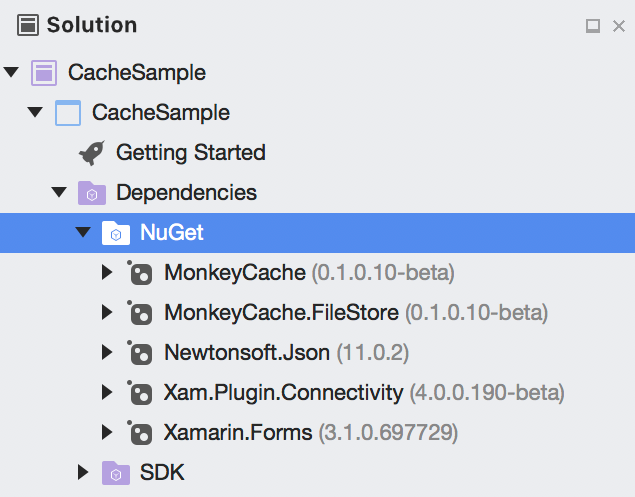
Then, we will create a library project inside our brand new Angular workspace. So let’s enter the project’s directory, install dependencies and create a new library;
cd my-lib
npm install
ng generate library my-lib --prefix=my

And then we are going to create a component with the command below;
ng generate component button --project=my-lib
Let’s make the component does what it says in the name;

https://gist.github.com/fatihdgn/68e78aa3acd9e9fb605af959f9c8ffa9

Alright, we created a library and added a component in it. Let’s look at how it goes, but wait…

When you want to create an Angular library that has a component aspect in it, you are going to discover that you can’t -and not supposed to actually “serve” your library and debug your components because the library is not an application that you can run. You have to have another application that has a reference to your library and use your library in there but this approach has its limits; You have to build the library and the application to see the results and it can become frustrating very easily, very fast. That’s why we are going to install StoryBook and create stories for each of our components and see them in action with hot-reload support.

Adding StoryBook To Your Workspace

We are going to initialize the StoryBook with the “sb init” command. To do this normally, we would have to install “@storybook/cli” package but since I’m going to use this occasionally, I decided to run this command using npx. You can install StoryBook CLI globally if you want to.
npx -p @storybook/cli sb init --type angular
After the installation, you’re going to have to make some changes to the tsconfig.json file in the recently created “.storybook” directory. You can find it in the root of your workspace. Replace the “extends” line with the line below, changing the “my-lib” with your project name;
"extends": "../projects/my-lib/tsconfig.lib.json",
After that, we are going to define a webpack configuration to be used from StoryBook because for some reason, it does not load the styles from the components. We will place the “webpack.config.js” file to the “.storybook” directory with the content below;

https://gist.github.com/fatihdgn/3037e8bf176f1e330964d4045832353e

Of course, we also have to install the necessary loaders;

npm install @storybook/addon-storysource --save-dev
npm install to-string-loader --save-dev
npm install css-loader --save-dev

And for the last step, remove all of the contents of the “src/stories/index.stories.ts” file with the contents below;
https://gist.github.com/fatihdgn/b293a25974282294f9a11e66a31246ba

Change the “my-lib” part to be the project name of yours, run the command below and voila!
npm run storybook

Go to the “http://localhost:6006” address from your favorite web browser and see your button component right on the page.

Create an Angular Component Library w/ StoryBook

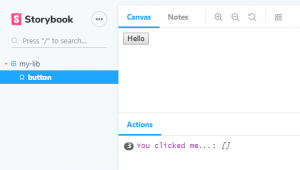
That’s all of it. After that, you can start to develop your awesome component library.

If you have any questions, comment below and see you in the next one.


See my other articles : Cloud Wars : AWS vs Azure on Serverless

Xamarin Forms Caching Strategy with Monkey Cache🐒

Today, we will learn caching technology in Xamarin.Forms as Monkey Cache.
Sometimes we need to store data in the application that we develop. For example, HTTP requests, configurations, settings, databases etc.
I need to store HTTP requests for a while during work on a project. I found Xamarin monkey cache while I search about caching strategies in that way.

What is monkey cache?

Monkey cache is a simple way to store any type of data. It supports SQLite-net, LiteDB, and a simple File Store. Monkey Cache is built against .NET Standard 2.0 and that means it is not just using with the mobile applications; it can use in any .NET projects.

How to use?

First of all, let’ s install Monkey Cache in our project from NuGet packages. You can use any file storage type in your project.

I prefer FileStore for this project. I install MonkeyCache 0.1.0.10-beta, MonkeyCache.FileStore 0.1.1.10-beta.

Data is stored in a “Barrel” or IBarrel. Don’t forget to give an application id on the barrel before storing data.

Barrel.ApplicationId = "your_unique_name_here";

If you want to do user-based cache, you can use some code like this:

Barrel.ApplicationId = "your-app-name" + UserId + DateTime.Now;

Caching a Web Request

Http request caching is very easy with Monkey Cache. We can set the expire time easily in this way:

Think like this scenario; I want to store the results of HTTP requests while if the user connected to the internet. I want to take these data from this cache if the user didn’t connect the internet and cached data didn’t expire. Now let’s take a look at the example:

https://gist.github.com/HilalSener/06f858271a13dc42b7130bd9ab3d63b5

We have seen together how to use Monkey cache today. Easy, right? You can use it over any caching scenario. Follow sample project here.

Happy Coding 🙂

You can find Monkey Cache Github source here.

You can find my previous article on Xamarin here.

Advanced Tuple Techniques in C#

Tuple in C# was introduced at C# 4 but it was nothing like what some other languages has to offer. It was clunky and hard to use. The only thing they provided us in C# was a couple of generic classes and nothing more. But it is history now because as of C# 7, they are massively improved and have a first class support in the language. Today we are going to take a look at how to use them and after that I will show you some techniques on how to use them more 🙂

First, how to use them;

https://gist.github.com/fatihdgn/4ee6f2c291d3066d03b9787ce454dc52

So, if we are on the same level now, we can get in to the juicy details.

Add deconstruct support to your classes

Actually this one is not entirely related to tuples but makes sense afterwards. You can add a method called “Deconstruct” in your classes and imitate how tuples deconstruct itself.

https://gist.github.com/fatihdgn/0390aadd6a6c70d89261a142a9100b30

Add implicit operator for that tuple to your classes

You can use your newly created tuples in your implicit operators because they are like your any other type. Let’s improve our previous example.

https://gist.github.com/fatihdgn/269e42ee85783fca17734a7d7c3a1a03

Write extension methods to or for your tuples

When you have no access to specific class or struct and want to add something but don’t want to create something new inheriting that, the answer is always writing an extension method. I heavily use them when I’m coding and I found a way to use them here too. You can write extension methods for the tuples or write something returns one.

https://gist.github.com/fatihdgn/f8fd1077aaf6ab7fa12c3a92b68e9f85

So, that’s it for now. Please let me know how you are using the new tuples in C# and I will make sure to add more if I find any other way to use them.

Thanks for tuning in and see you in the next post.

How to Setup Angular 6 Envıronment on Wındows

Hi everyone! In this article we will learn “How to setup Angular 6 Environment on Windows”!

We all know that Angular 6 is one of the best framework for developing  Single Page Applications. So how do we setup the Angular 6 environment in Windows? Let’s make it together!

  • Download & Install Node JS on your PC
  • Install Angular CLI globally
  • Choose the best text editor for you

Step 1: Download & Install Node JS on your PC

Open your browser and navigate to: https://nodejs.org/en/  than Download the current version of Node JS.

How to Setup Angular 6 Step1


If you want to make sure that you have successfully installed the Node JS;

Open your command prompt and type “node -v”. If you see the node version as below, the installation is ok!

How to Setup Angular 6 Step1-1


Step 2: Install Angular CLI globally

Angular CLI is a command line interface for Angular. To install the Angular CLI;

Open your command prompt, and type “npm install -g @angular/cli

How to Setup Angular 6 Step 2-1


If you want to make sure that you have successfully installed the Angular CLI;

Open your command prompt and type “ng -v”. If you see the cli version as below, the installation is ok!

How to Setup Angular 6 Step 2-2

Step 3: Choose the best text edıtor for you

With any text editor you can develop the Angular project. But one of them is definitely better: Visual Studio Code!

How to Setup Angular 6 Step 3


With a lot of plug-in support, you can develop Angular 6 projects much faster and more convenient with Visual Studio Code! In another article, I’ll talk about the best Visual Studio Code plug-ins. Stay on track!

You can download Visual Studio Code from https://code.visualstudio.com/

Now you can create your first Angular 6 project! Open your command prompt type “ng new my-first-project”!