

Today, we will learn caching technology in Xamarin.Forms as Monkey Cache.
Sometimes we need to store data in the application that we develop. For example, HTTP requests, configurations, settings, databases etc.
I need to store HTTP requests for a while during work on a project. I found Xamarin monkey cache while I search about caching strategies in that way.
What is monkey cache?
Monkey cache is a simple way to store any type of data. It supports SQLite-net, LiteDB, and a simple File Store. Monkey Cache is built against .NET Standard 2.0 and that means it is not just using with the mobile applications; it can use in any .NET projects.
How to use?
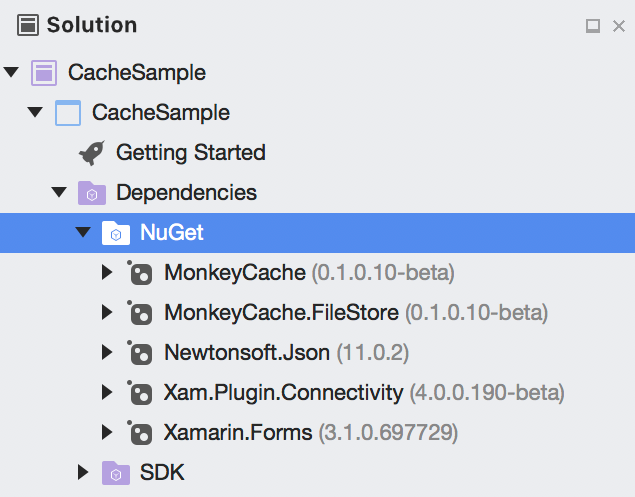
First of all, let’ s install Monkey Cache in our project from NuGet packages. You can use any file storage type in your project.
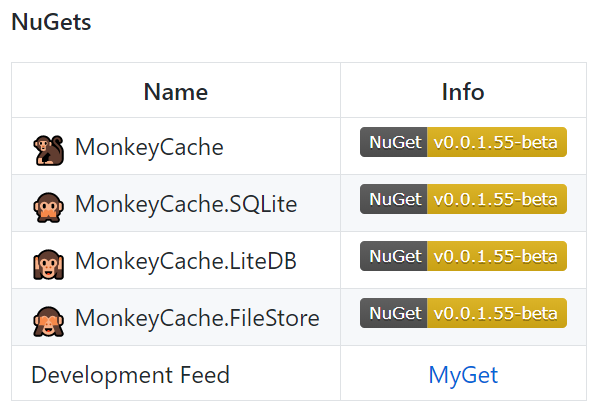
I prefer FileStore for this project. I install MonkeyCache 0.1.0.10-beta, MonkeyCache.FileStore 0.1.1.10-beta.
Data is stored in a “Barrel” or IBarrel. Don’t forget to give an application id on the barrel before storing data.
Barrel.ApplicationId = "your_unique_name_here";If you want to do user-based cache, you can use some code like this:
Barrel.ApplicationId = "your-app-name" + UserId + DateTime.Now;Caching a Web Request
Http request caching is very easy with Monkey Cache. We can set the expire time easily in this way:
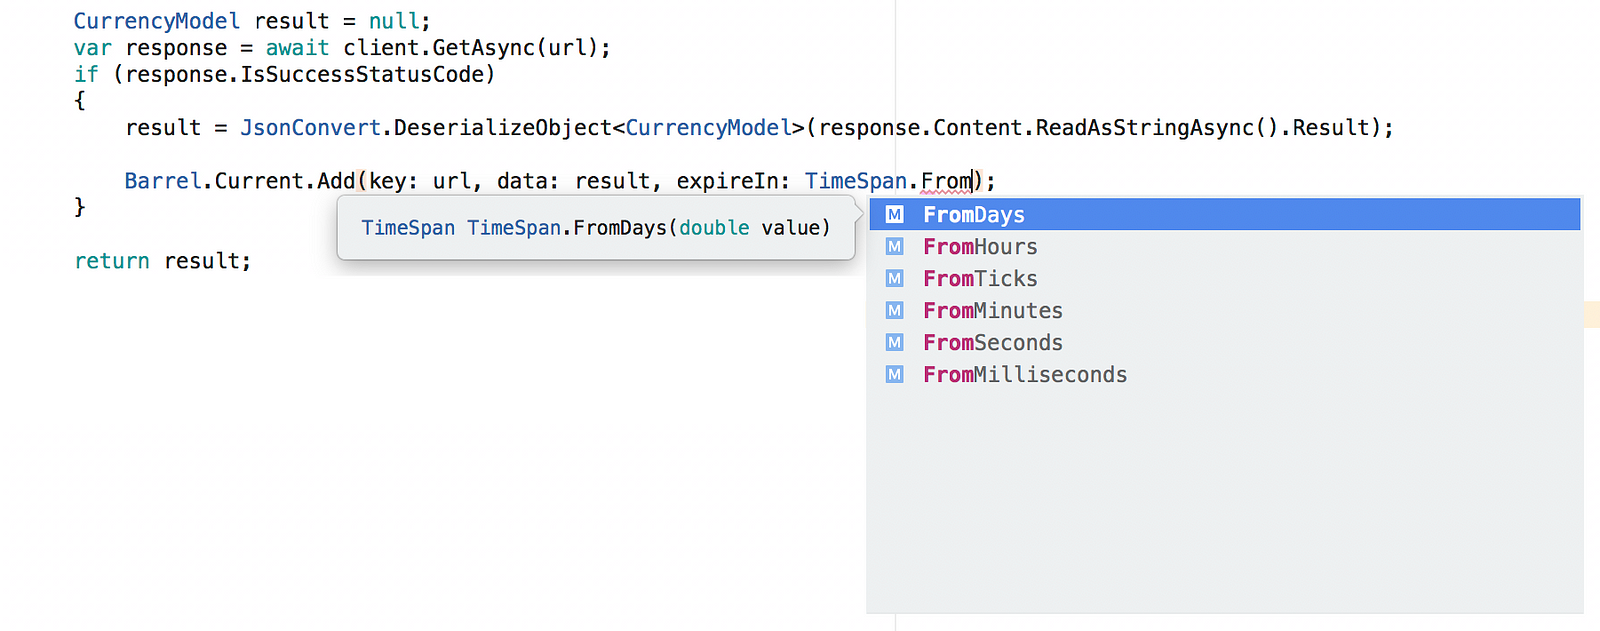
Think like this scenario; I want to store the results of HTTP requests while if the user connected to the internet. I want to take these data from this cache if the user didn’t connect the internet and cached data didn’t expire. Now let’s take a look at the example:
https://gist.github.com/HilalSener/06f858271a13dc42b7130bd9ab3d63b5
We have seen together how to use Monkey cache today. Easy, right? You can use it over any caching scenario. Follow sample project here.
Happy Coding 🙂
You can find Monkey Cache Github source here.
You can find my previous article on Xamarin here.