There is an increasing integration capacity among Microsoft products. We will start our article by talking about the integration between Power BI and OneNote. OneNote is a Microsoft product that has been released as a notebook and that has become more than a notebook with the updates it got. You can click here for general information about OneNote. You can get the text of an image with the updated (details here), and search between images (details here).
And Power BI is Microsoft’s popular reporting product. You can create interactive and impressive reports with Power BI. With the latest update, when you create a public Power BI report or come across one of those report and paste the report’s address to OneNote; OneNote automatically integrates with Power BI and show the interactive and live version of the report on itself. This way, it is not necessary for us to click the link and be directed to the website. And we don’t get to be left with the questions like which report was on this link.

So, how do we make the reports made with Power BI public?
If you will not have any problems with sharing the reports you created with Power BI, you can make your reports public. After sharing, people don’t need to have Power BI license to view the report. It is enough for them to have the link.
Let’s take a look at how we create this link:
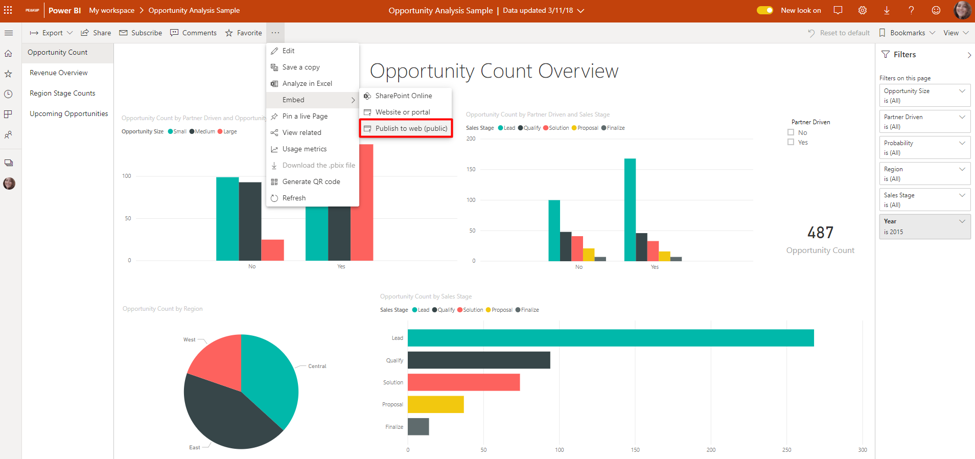
We will execute these actions on Power BI Web Portal ( app.powerbi.com). We don’t have to know with who and on which work environment this report will be shared in order to create the link. Open the report we want to share. Go to this option that was among “Export” options before through the “Embed” option on ellipsis. Click the “Publish to Web (Public)” command here.
You might come across two types of warning here:
1- Since this feature can be restricted on the Power BI Admin portal, it has to be enabled by your admin first. You might get an error message concerning this (Fig.3). If you get this error, you have to contact your admin and notify him/her.
2- When you create this link, an info message indicating that this report and its content will be public and you shouldn’t use this feature is you will share it with certain people in the company will pop up (Fig.4).
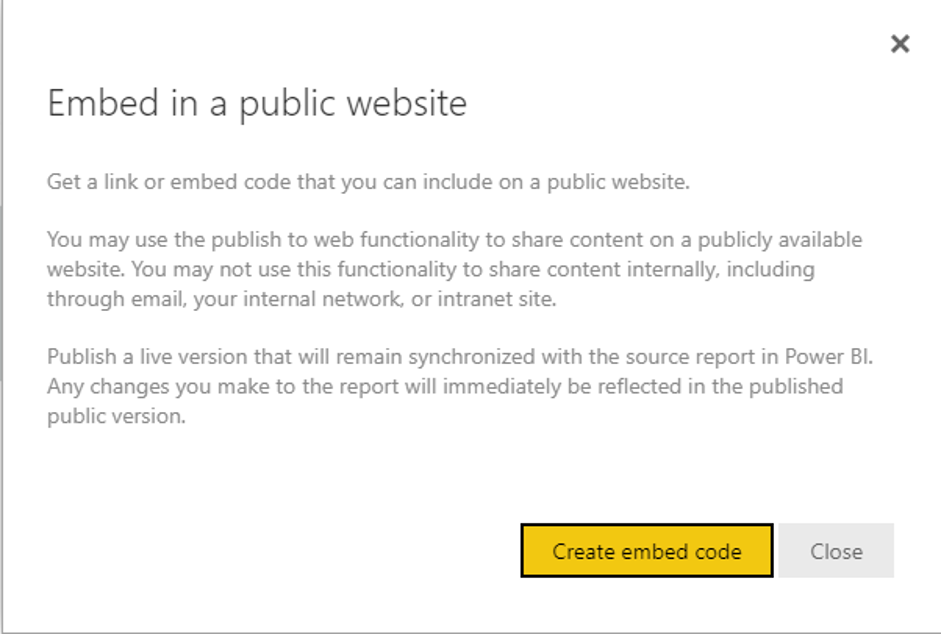
Click the “Create embed code” option to share your report publicly. When you click, another warning message pops up(Fig.5). Click “Publish” as your last decision.
After you click, a link where we can share on mail, social media etc. and people can access is created. Right below it you will find the html format to embed it on a website (Fig.6). This way, anyone who has the link will be able to view this report doesn’t matter if they have license or not.
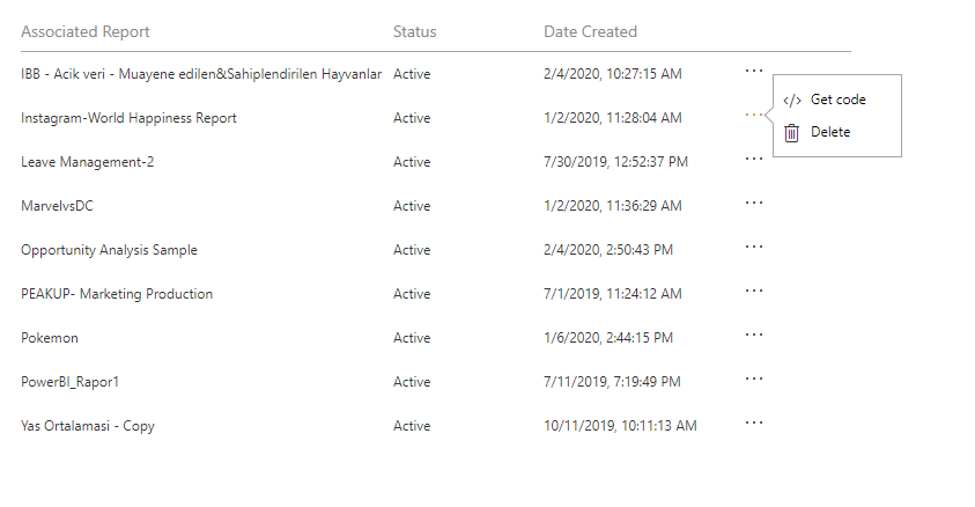
When you have multiple embed codes or want to delete a link, you need to click on the setting icon and then click the manage Embed codes option in order to go to the window where you can manage these codes. You can get the embed codes again or remove these codes on the screen that pops up.
Hope to see you in another article…

Good game well played.