We mentioned that it is possible to securely collect data in electronic environment with MS Forms. The automatic workflows are done with Power Automate flows.
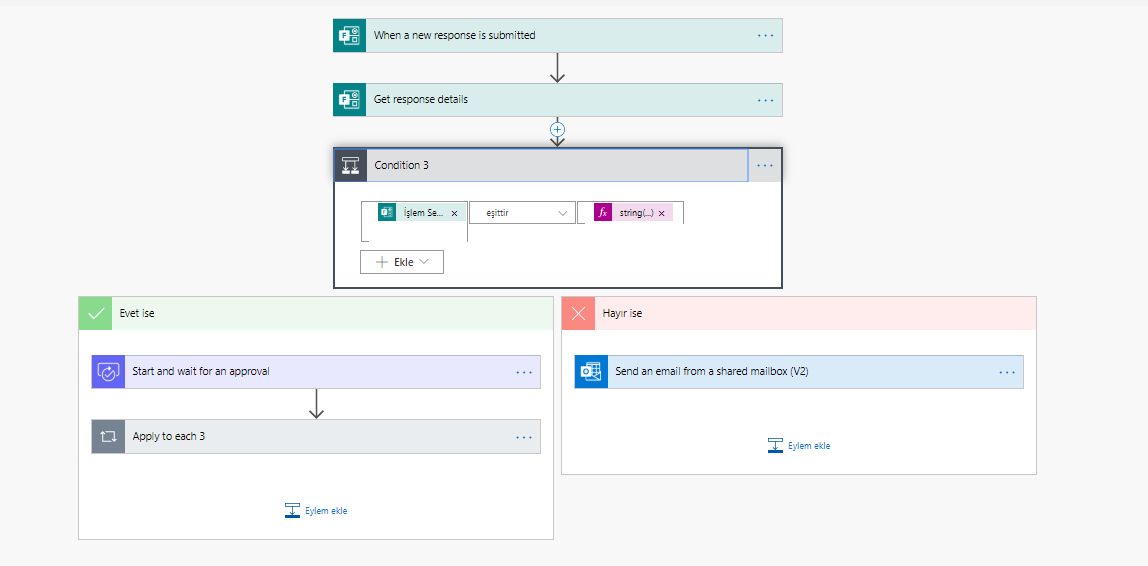
In this article, we will create a flow that will be shaped based on the choices of the user by adding the Choose Action question.

If the user chooses Send Form to Approval, the Approval process is going to start. In the other case, only an info e-mail will be send.
After you add the Choose Action question to the Form, you can start the actions with a blank flow by switching to Power Automate.
Power Automate
While creating all flows, a trigger is created in the first step. Trigger is a required step for the flow to start working and it is important to specify it correctly. The flow we will create in this article will work when the Form is responded. So, the flow will be triggered every time the form is responded and will start to work. Add the When a new response is submitted trigger. It is specified from the list of which poll is going to cause the flow to start when responded.

In the next step, we will look at the responses of the poll. Add the Get Response Details step to access the responses.
Choose the name of the poll in the Form Identity field. Choose Response Notifications List Response Identity for the Response Identity.

This step enabled us to access all question fields. This way, we can get the response of the Choose Action question.
In the new step, add Condition to test the response. Add the Choose Action question to the left with dynamic content.
And on the right, one of the responses will be written. Since we will be controlling a String, we will be using the String function.
It will be checked if the response given with the String(‘Send Form to Approval’) expression is equal to this value.
Add Approval to the Yes field of the Condition and Send an E-mail to the No field, and complete the process.
The approval mails can be sent to the person who has created the request (to the person who sent the form to approval) based on Approved/Denied condition.
Click here to read the other Power Automate articles.


