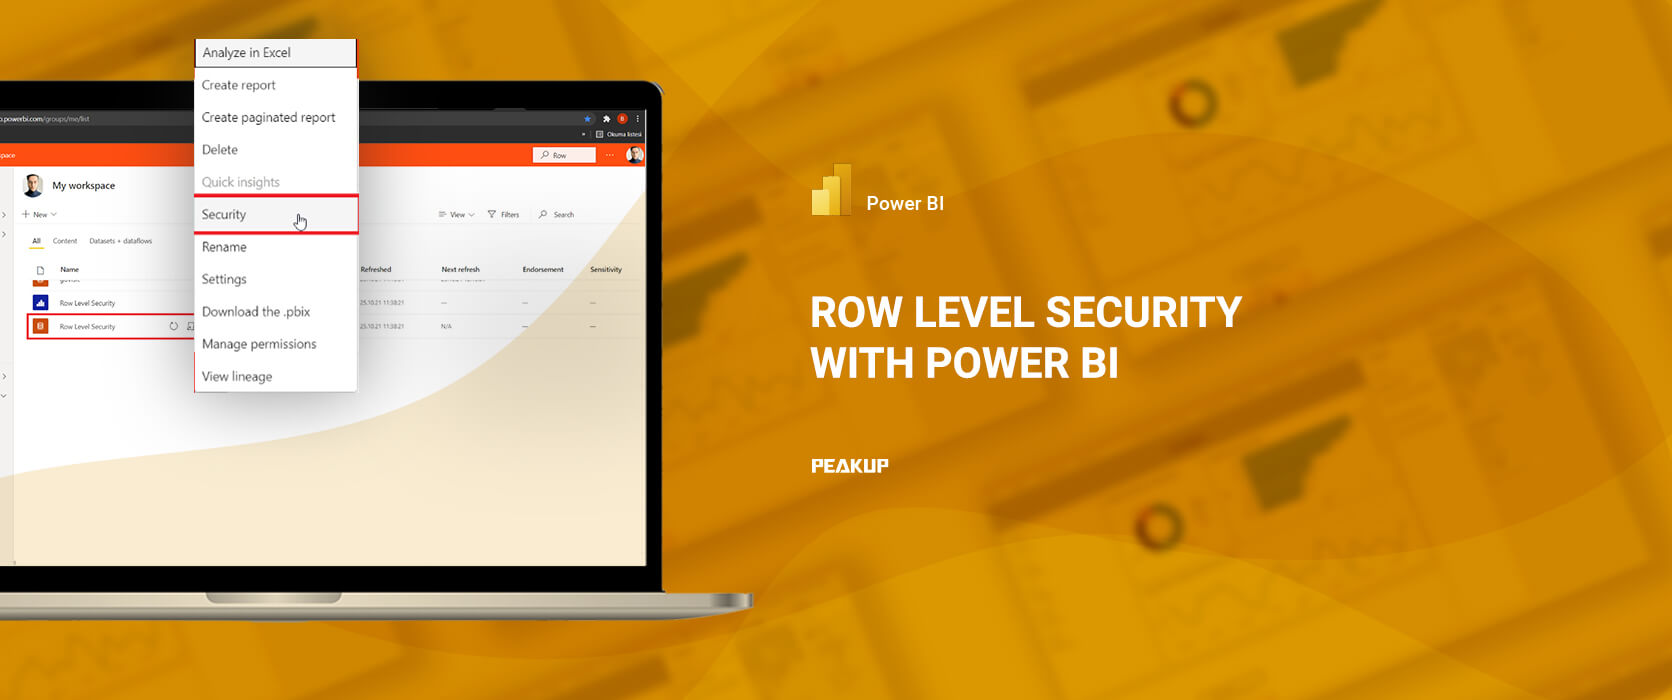
.Row-level security (RLS) with Power BI is used to ensure that the report users we have determined see the data they see on the report screen with the conditions and restrictions we have created. It is necessary to assign roles after creating these restrictions in Power BI Desktop. For example, in the data we have in Power BI, we can say that these people should see the people whose country is Turkey, and those people should see the people whose country is Germany. Users in a workspace in the Power BI service can access datasets in that workspace. Us creating an RLS for a report will not restrict this access in any way.
Now that we have given some basic information, let’s dive into the details and try it out together!

.
.
.
.
.
.
CREATING AND DEFINING ROLES IN POWER BI DESKTOP
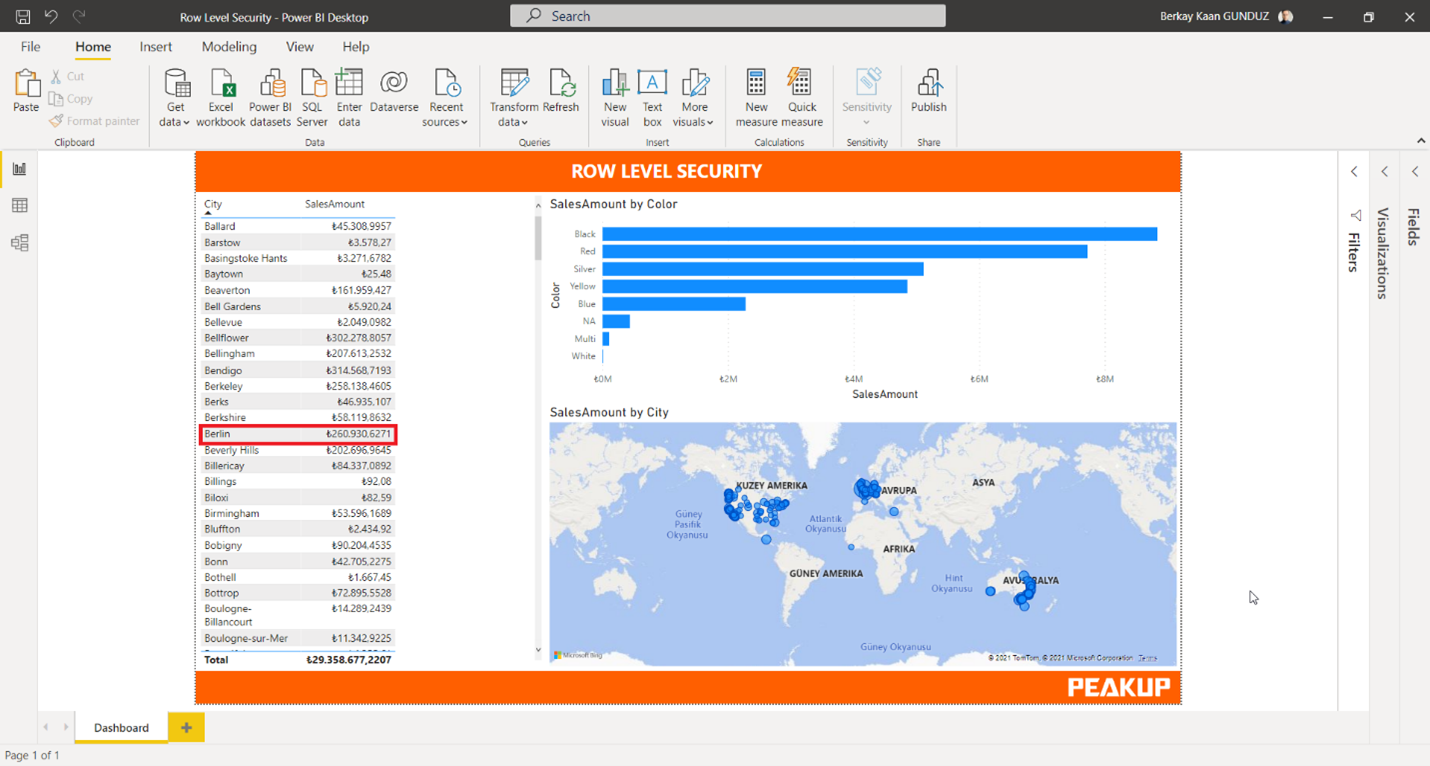
First thing first, let’s open our Power BI report and create a report that will have the users we have determined see the data whose city is Berlin.
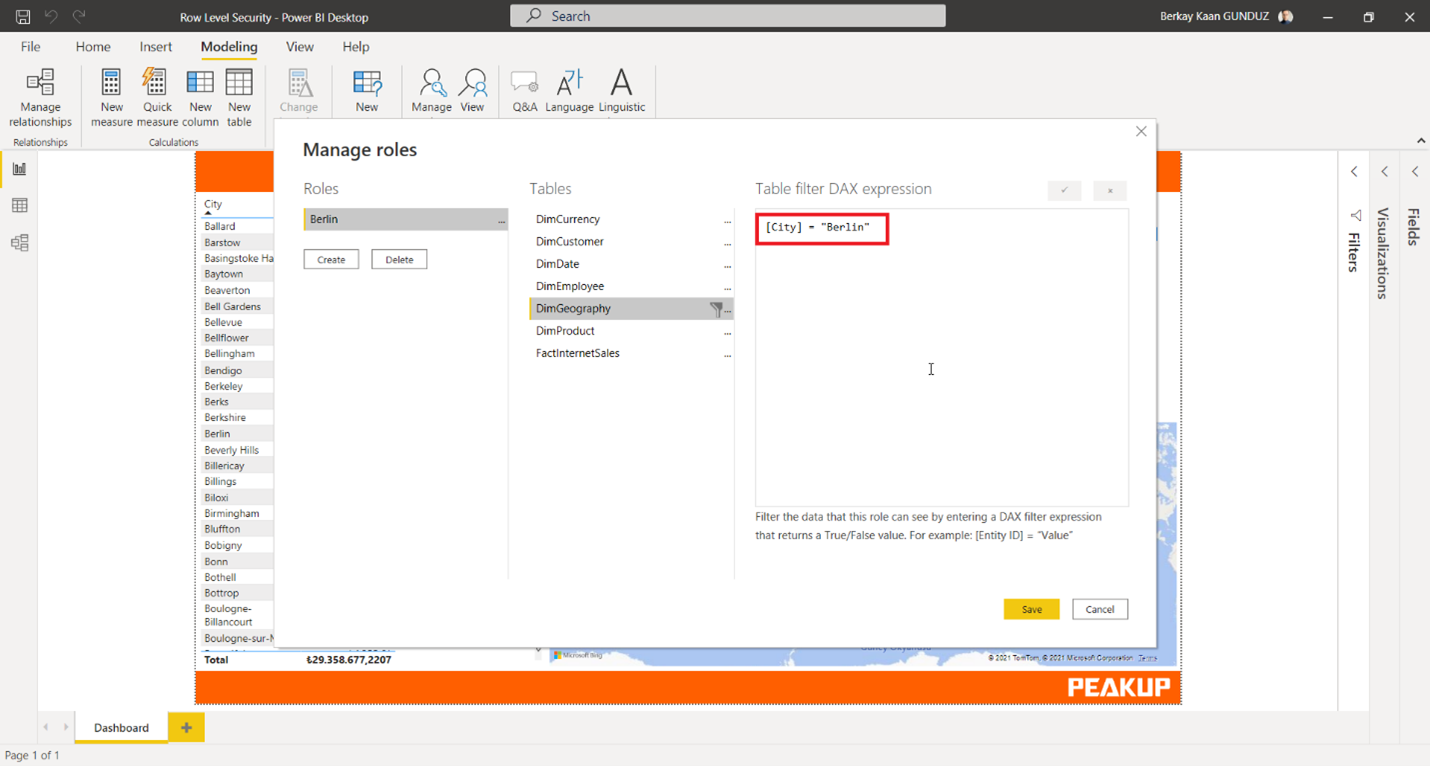
We will use the Manage Roles option in the Modeling tab.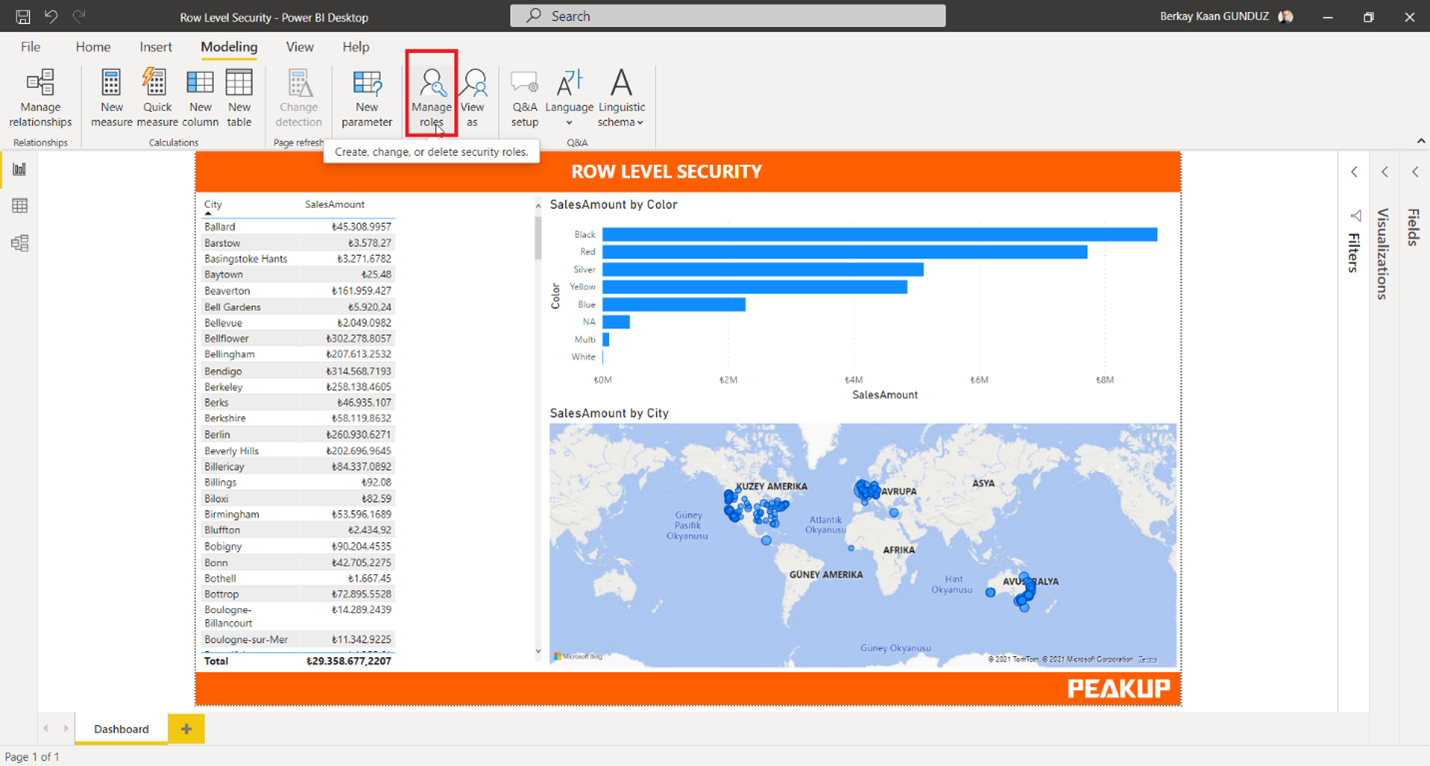
.
We will use the Create button to create a new role.
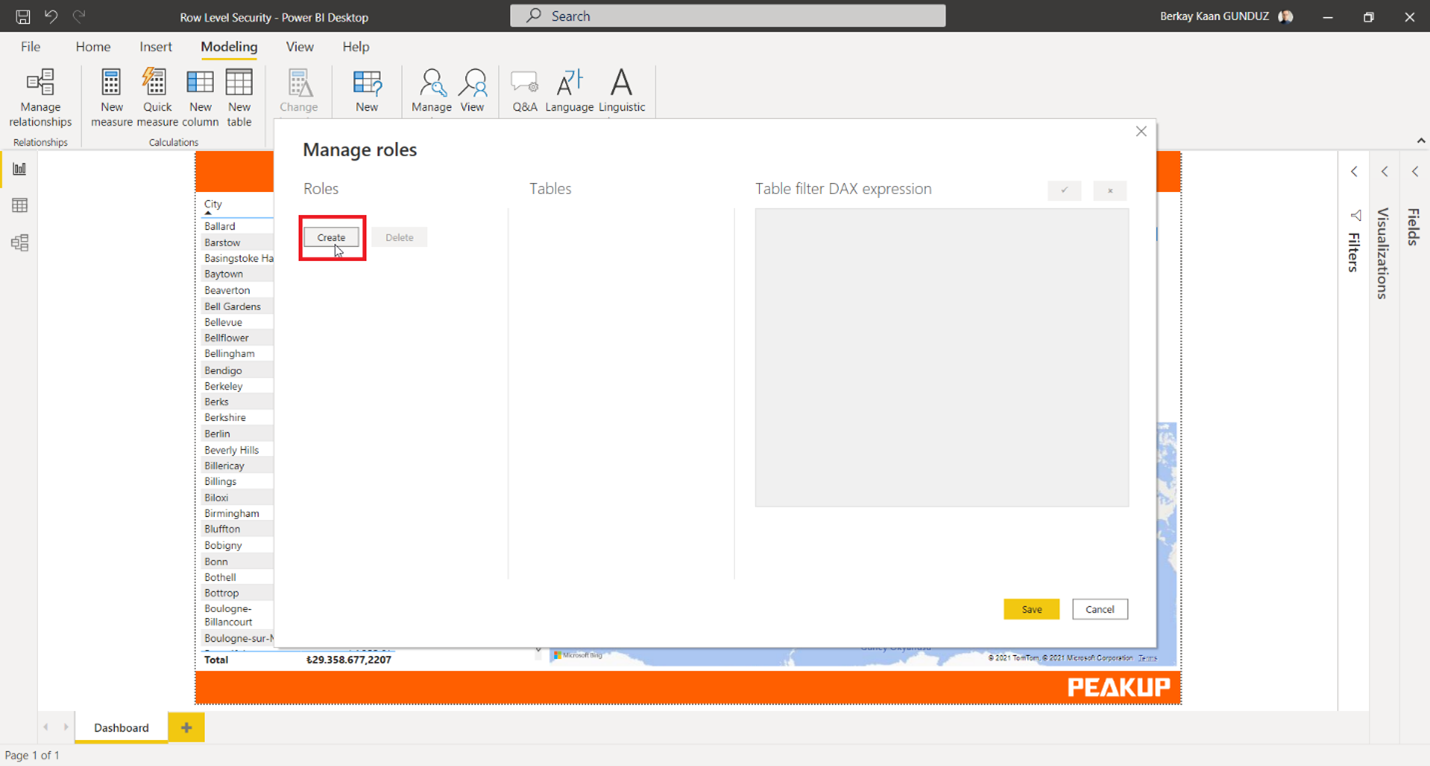
Once we use the Create button, it is time to select the table and field we will be filtering. Here, I will use the City field in the DimGeography table.
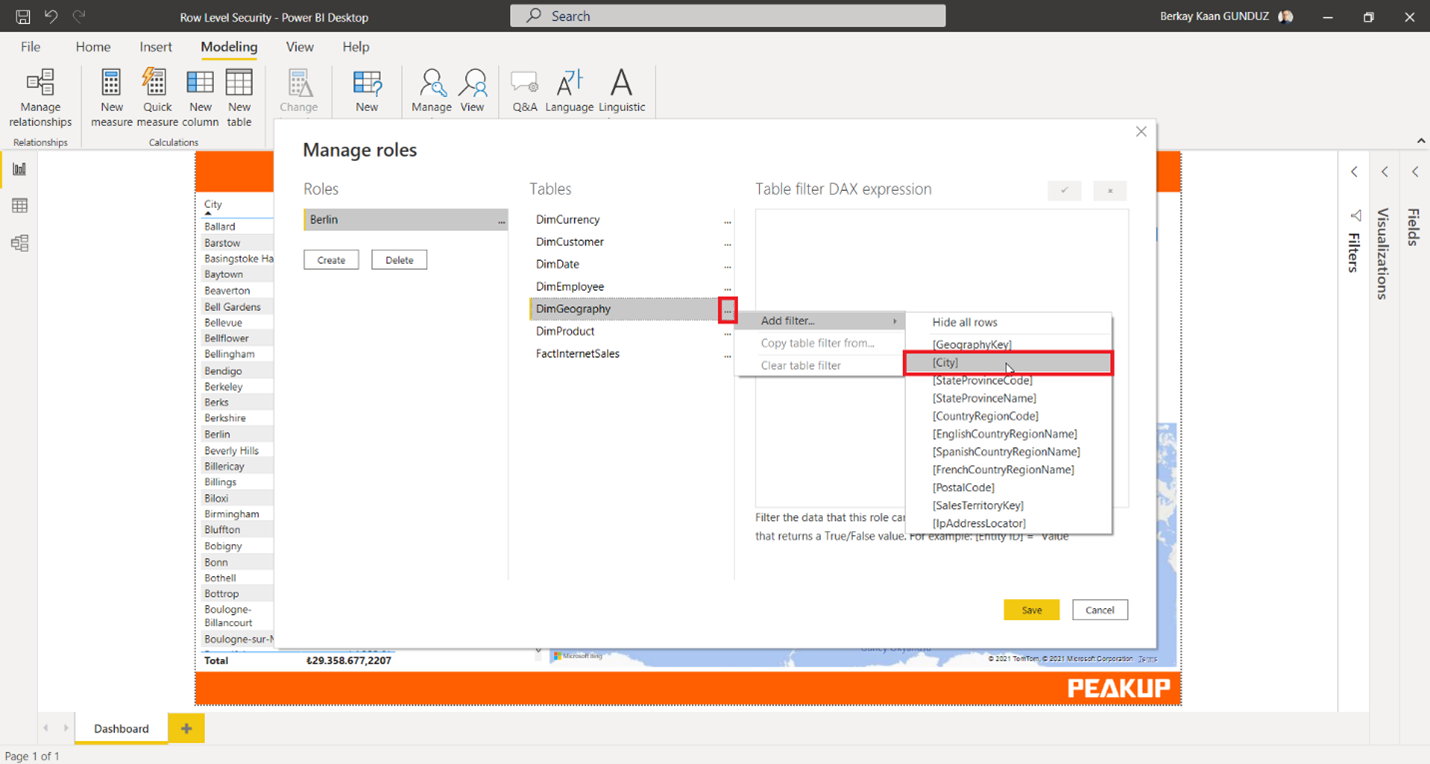
.
Now we can restrict the ones whose city is Berlin.
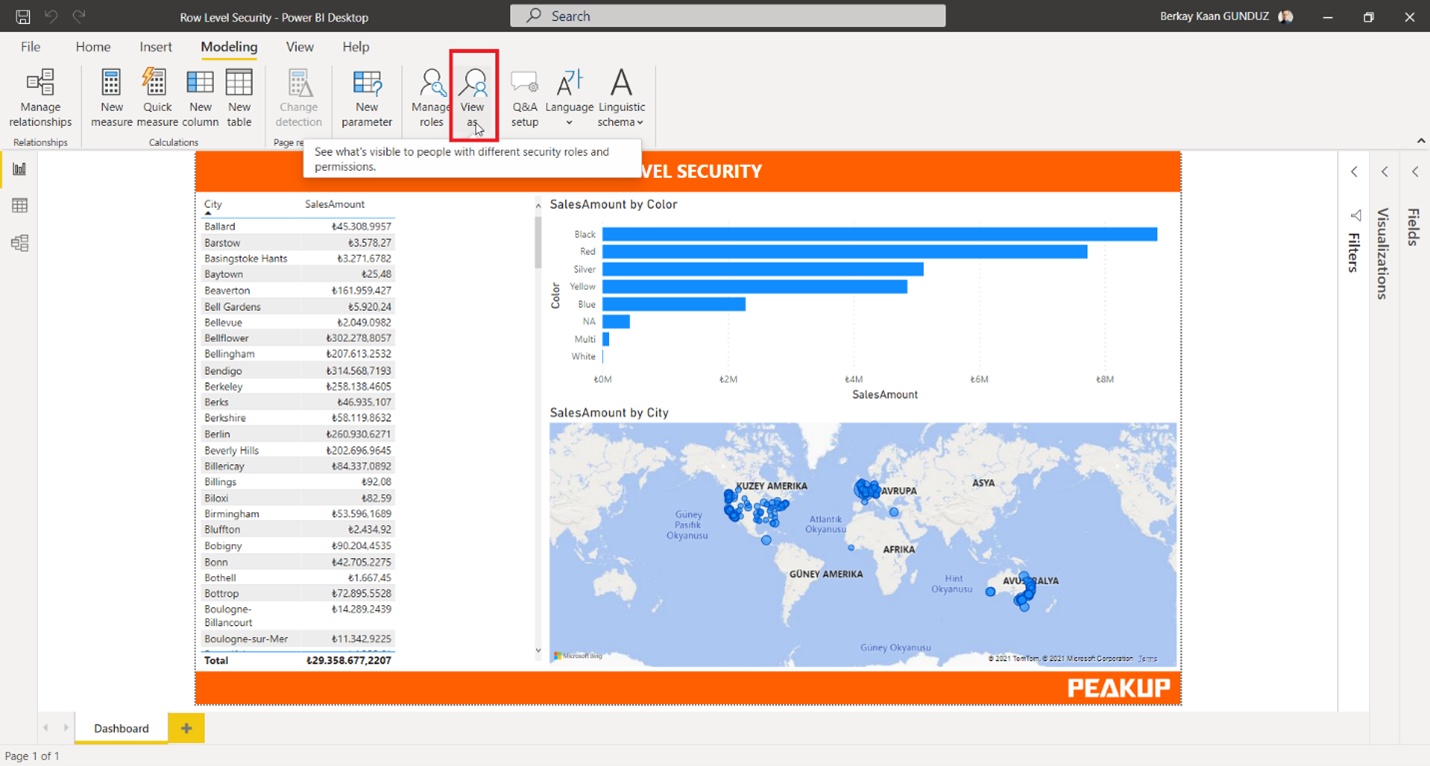
After creating our role, we will use the View As option in the Modeling tab to see how our role looks.
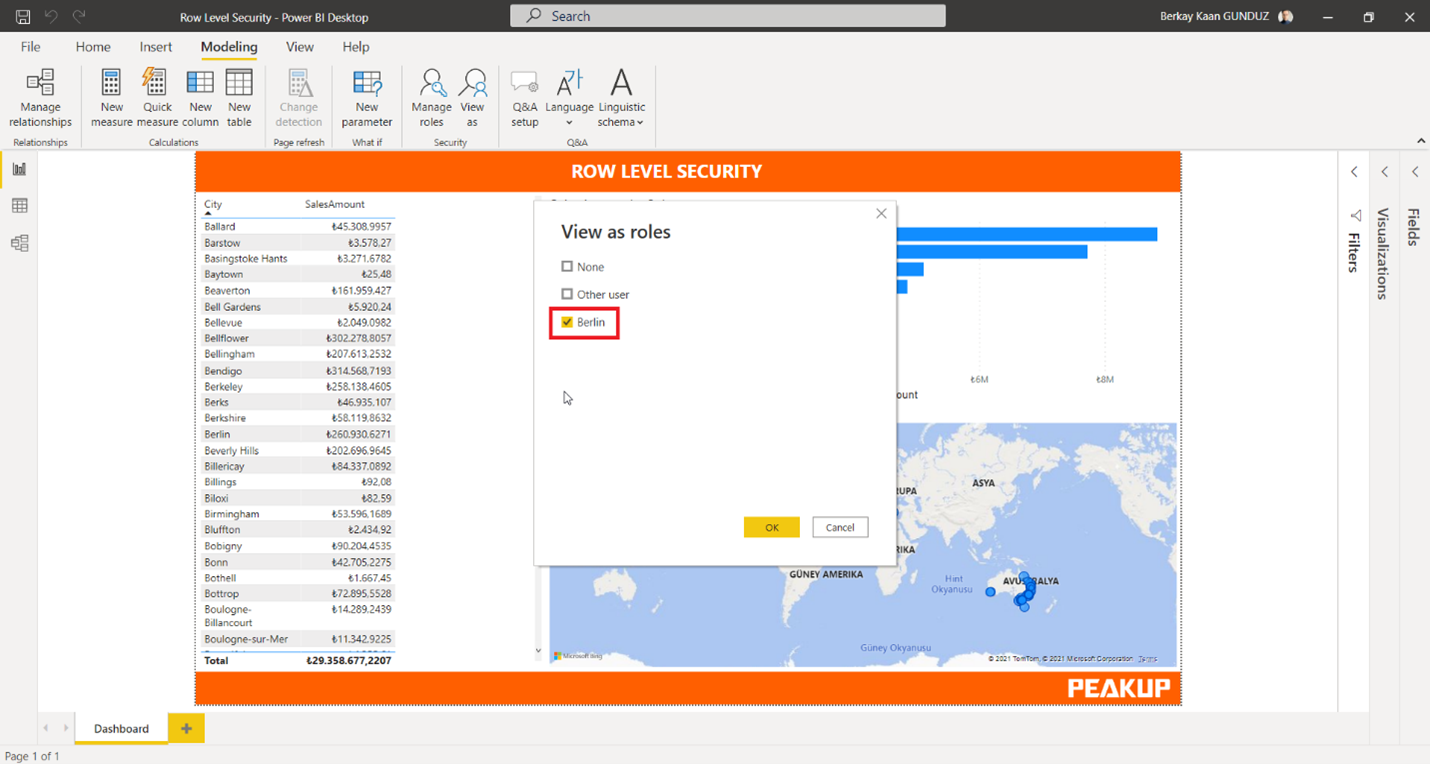
We can see all the roles we have created in this screen. Let’s select Berlin and see how this role looks.
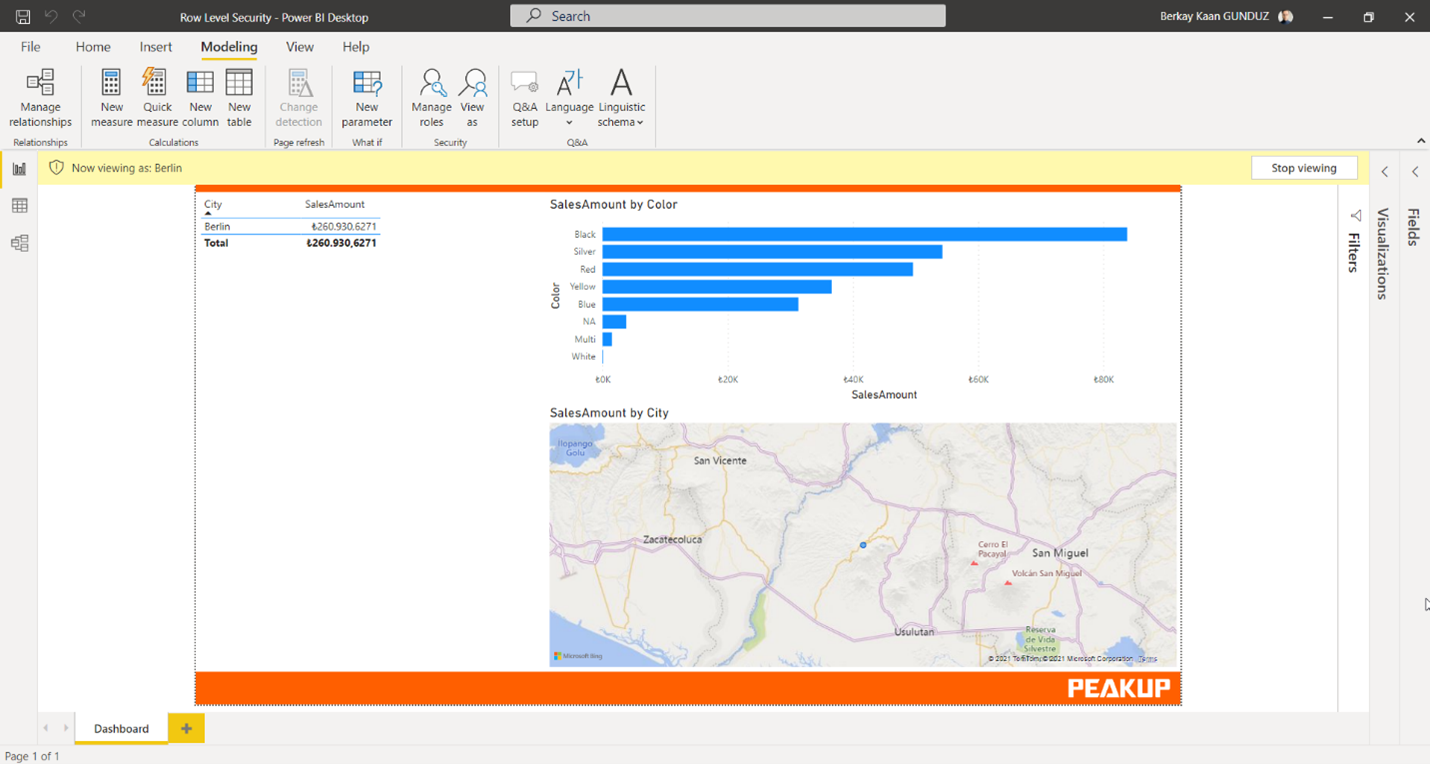
We see that all the report Data consists of the city of Berlin.
.
.Now, we will assign users to the roles we have created. Let’s go to the security settings through the dataset that has our report in Power BI web.
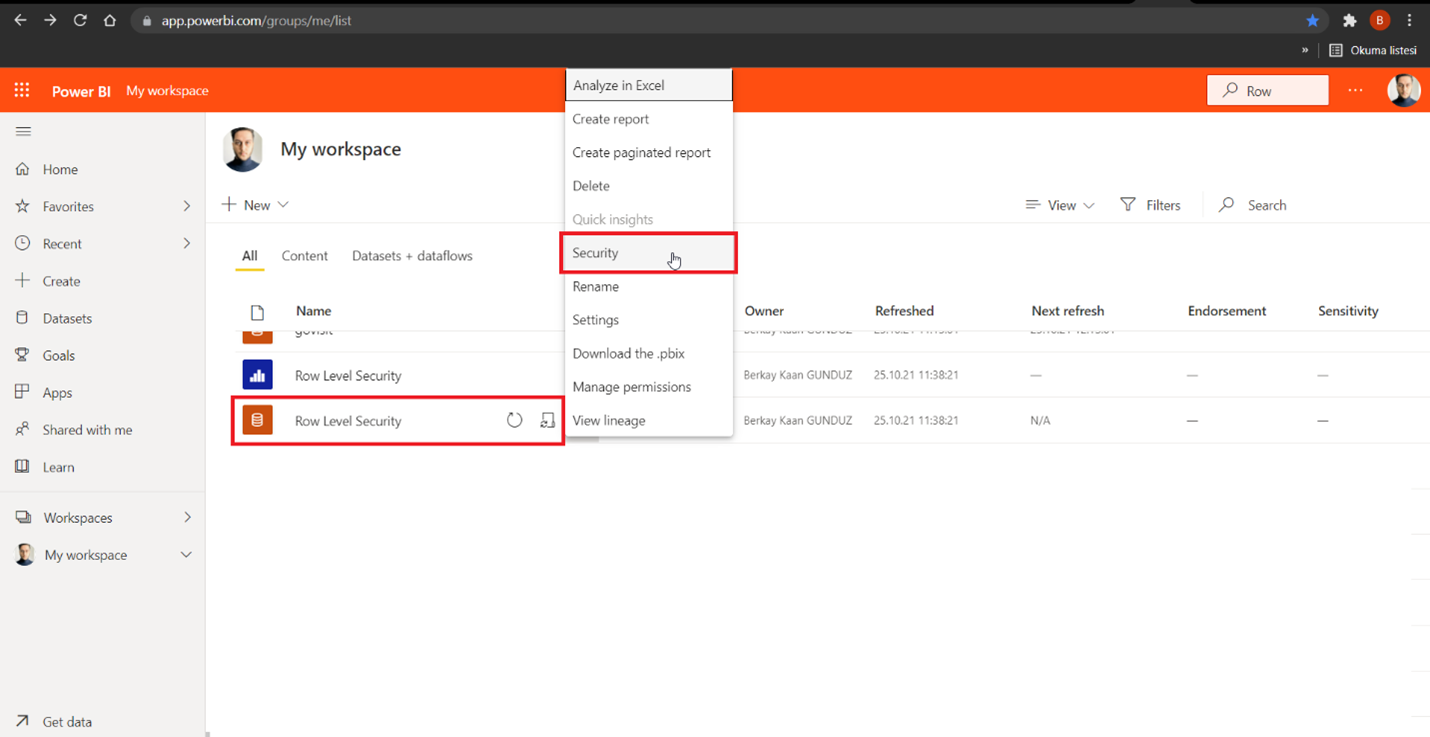
Here, we can write the e-mail address of the relative user into the role we have created and that is called Berlin.
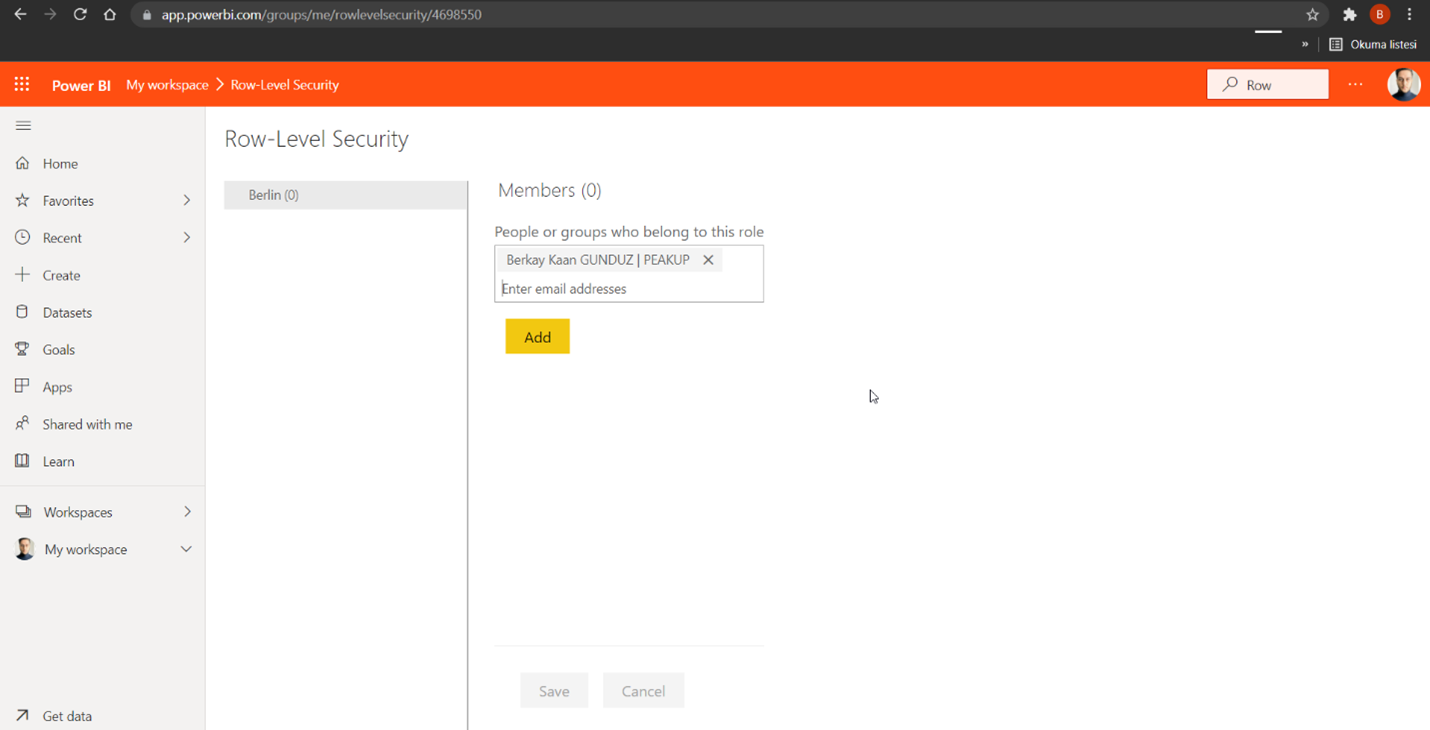
Now we know how to restrict our report data to the users we want with Row Level Security!
Don’t forget to take a look at our blog.
See you later, have a great day!

