Send the File added to OneDrive in Mail Attachment

Hello! In this article, we will be sending the file added to OneDrive in mail attachments. Of course, as you might have guessed, we will be using Power Automate.

Before we start the flow, there are some files we need to create on OneDrive.

OneDrive for Business

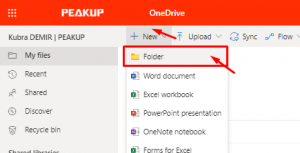
Go to OneDrive–> New–>Folder and create a folder named Mail Folder.

Create another folder named Attachments in the Mail Folder. We will add the mail attachments into this folder.

OneDrıve'a Eklenen Dosyayı oluşturma

Now we can move on to Power Automate.

Power Automate

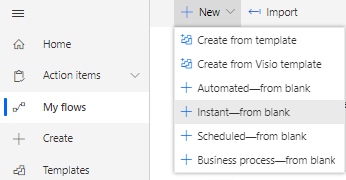
Go My flows –>New–> Automated- from blank and create the process with a blank flow.

Power Automate

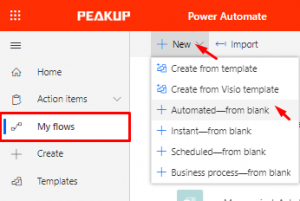
You don’t have to choose anything in the window that opens up. You can skip to the flow window directly with the Skip button.

Atla (Skip) butonu

Flow Actions

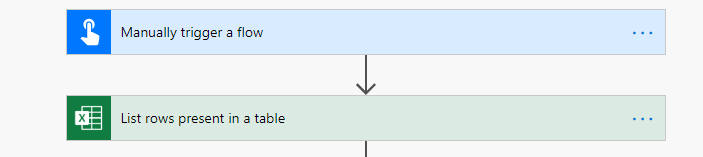
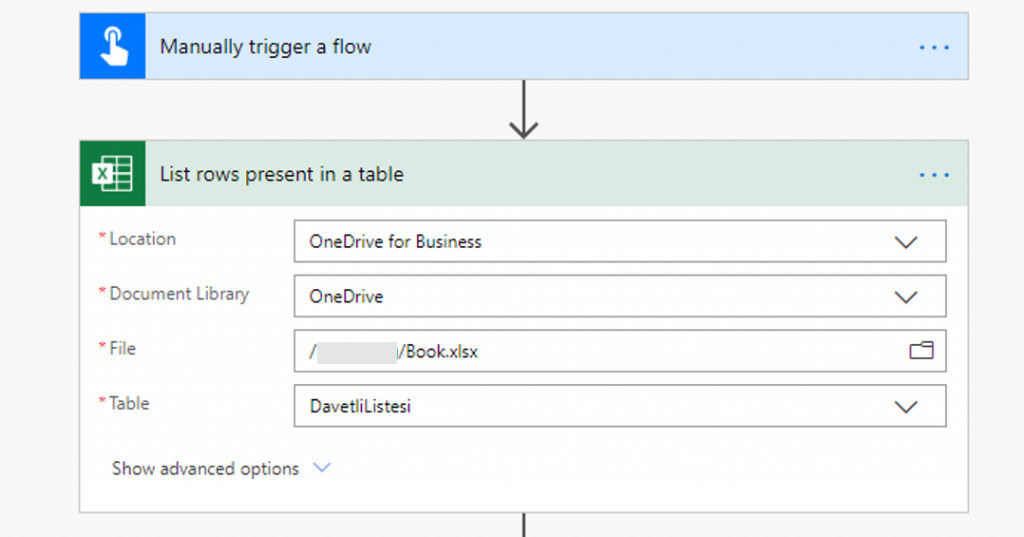
Our flow will run when the file added to OneDrive is added. So, we start by choosing OneDrive for Business –> When a file is created (properties only).
When a file is created (properties only)
contains details like the name and root of the file that has been added to Drive.

Akış İşlemleri

After adding this item, we will indicate the file into which attachments will be uploaded.

Choose Root–>Mail Folder–> Attachments.

Dosya yolu seçim alanı

In the new step, we add the Get File Content item to use the file added to the folder in a tangible way.

We need to give the unique identifier info to this item to detect the file that has been added to the folder.

Click Add dynamic content and choose List of Files Id.

Dinamik içerik ekle

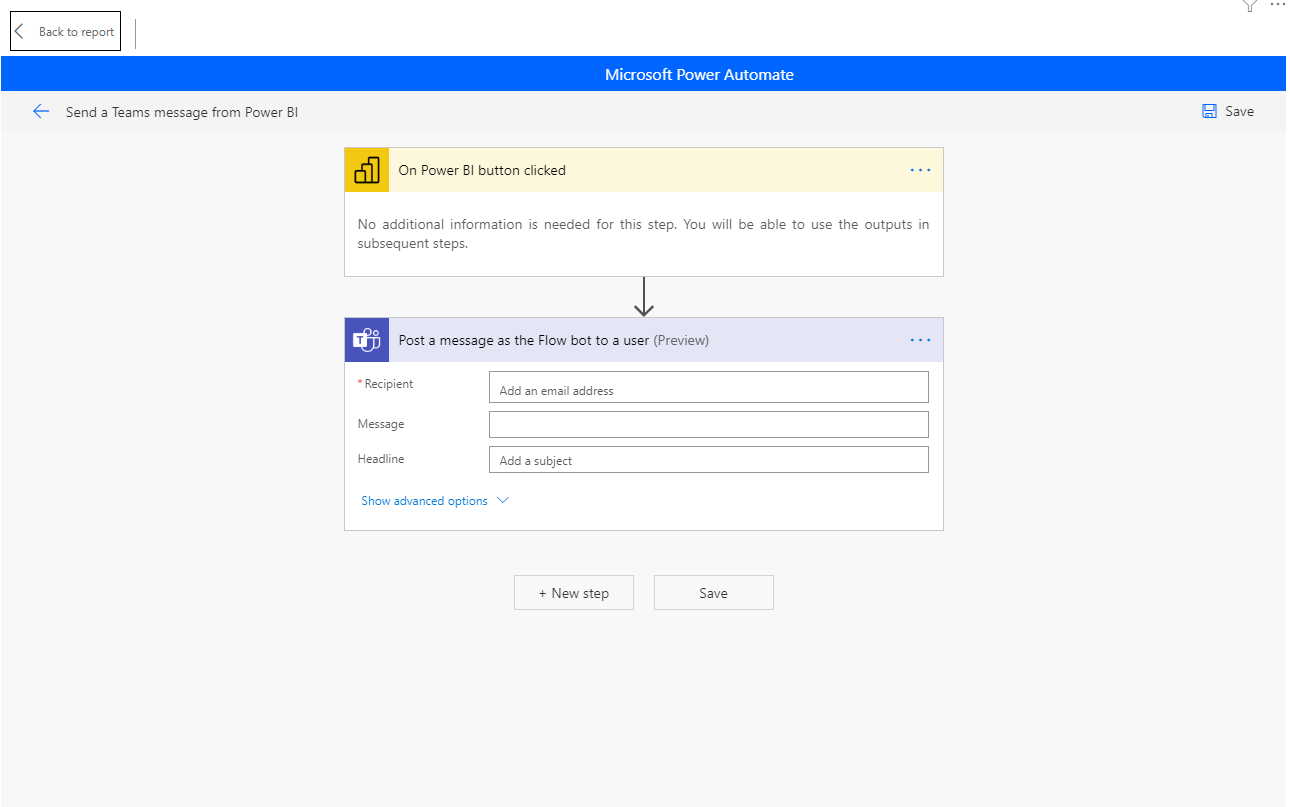
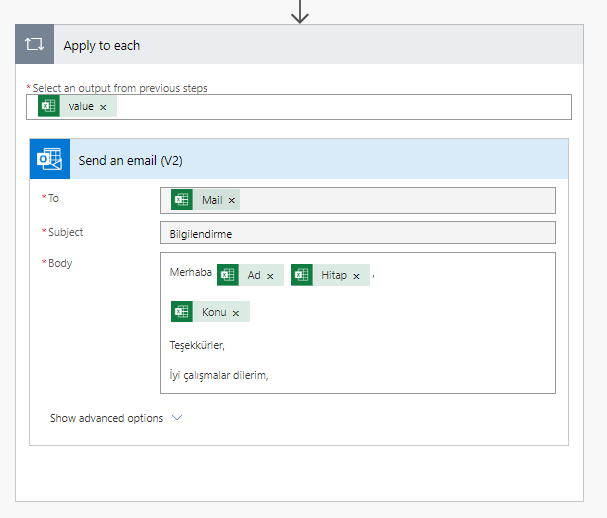
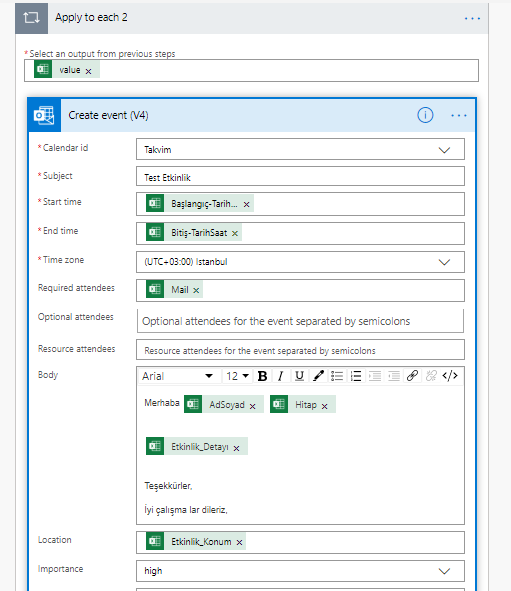
In the next step, add the Send an Email(V2) item.

In this item:

To: The mail address of the person you’ll send the mail to.

Subject: Mail’s subject (optional)

Body: Mail content (optional)

Open mail sending details with Show advanced options that is located on left bottom corner to add the mails to the flow.

Add File Attachments to the Mail

Choose Attachments name: List of Files Name.

File Content that has been gotten with the Attachments Content: Get File Content object is added to this field.

Maıle Dosya Eklerini Ekleyin

And the flow is complete.

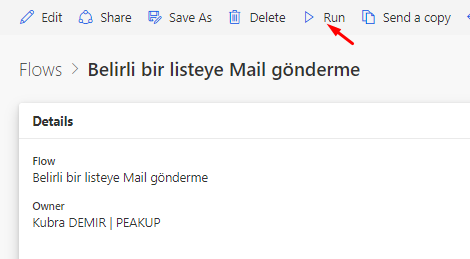
You can name the flow on top left corners and then save it by clicking the save button on top right corner.

Now when you add any file into the Attachments folder, it will be sent as an e-mail with attachment automatically.

You can click here for the other Power Apps articles.

Send Mass E-mails with Power Automate

You can send the mails with custom subject and content in which you address people specially in cases like congratulating, events, special day celebrations. This is something that especially the HR needs.

This way, you don’t deal with sending mails one by one. You only need to indicate the mail list and details.

Create a Table

Open en Excel in OneDrive. Add a Table from the Insert tab.

Write Mail, Name Surname and mail details into the columns of this table like below.

Each row of this table will be sent as separate e-mails by the flow.

Flow Process with Power Automate

Start a new blank flow.

After the data in the table is filled, flow will be run by being triggered individually. For this reason, start the flow with Manually trigger a flow.

In the next step, add Excel for Business (List rows present in a table) to be able to add the data in the Excel table. Add the table you’ve just created into this item.

In the next step, add Outlook (Send an e-mail).

In this step, the columns of the Excel table is added to the related fields. With you choosing the Excel fields (mail, name, etc.) the Apply to each item will be added to the flow automatically. An event will be created for each row in the Excel file thanks to the Apply to each item.


After filling the related fields, name the flow on top left corner. For example: Send Mails to a Certain List. You can save and close the flow on top right corner.

You can verify the data in the Excel table and run the flow.

You can take a look at here for the Power Automate Outlook Connector.

Using Collections

Usually it is necessary to store the data in temporary storage while calculation or processing. Then, the processed data is transmitted to the data source by saving permanently as ultimate data. Temporary records are stored in the variable tables called Collection. In this method, the data is calculated, processed and quickly written to the cache memory on the app screen only.

These tables are created virtually. Tables and columns can be named however wanted. Columns’ data types are automatically shaped based on the data they contain or the data source that will be saved tı later.

The Collect formula is used to create the collection tables. It is written as (table name ; { columns}) like below:

Collect(name_of_table;
{ column1:   textbox1.Text;
column2:   textbox2.Text;
column3:   textbox3.Text    } )

For example, you can write this formula into the OnSelect property of the SAVE button of OnTimerStart/OnTimerEnd property of the timer.

Using Collections

The personnel records will be written on collection in the screen of the image you see. 4 textboxes, 4 labels, button and gallery items have been used in this screen.

Item names are frequently used in formulas. So, the functional items in the screen should be named based on what they do or the data they contain.

Textbox names are: txt_name, txt_surname, txt_mail, txt_department

The formula below has been written into the OnSelect property of the SAVE button for the data entered in textboxes to be written to the Collection table.

*Table and columns can be named as desired.

Collect( Personnel;
{
P_name:    txt_name.Text;
P_surname:    txt_surname.Text;
P_mail:    txt_mail.Text;
P_department:    txt_department.Text   } )

When you click the save button, the data will be transmitted to the collection in seconds.

How to View Collection Data

All collections and their contents can be analyzed on a single screen with the Collections button in the View tab.

Click the gallery item to view the data in lists and choose the related Collection in the screen that opens up.

For the older versions, you can choose in the Data Source field in the Properties Window. Or you can execute the same action why writing the table name into the Items property of the gallery through formula bar.

To reset the textboxes after clicking the save button, the Reset() function is used.

*;; is used in actions that need to be executed successively.

Collect( Personnel;
{
P_name:    txt_name.Text;
P_surname:    txt_surname.Text;
P_mail:    txt_mail.Text;
P_department:    txt_department.Text   } );;

Reset(txt_name);;
Reset(txt_surname);;
Reset(txt_mail);;
Reset(txt_department)


Send Calendar to a Guest List with Power Automate

You can send meeting calendars with customized data like addressing each person, event content and location for all your event invitations through Power Automate.

This way, you don’t have to deal with creating calendars one by one. You only need to indicate the guest list and event details.

Create a Table

Open en Excel in OneDrive. Add a Table from the Insert tab.

Write Mail, Name Surname and mail details into the columns of this table like below.

For each row of this table, e-mails will be sent separately by the flow.

The event date and hour was written as 2020-03-23T13:00:00 in order for it to be in the format Power Automate expects. The time format is 24-hours and the event will be created for the exact hour you determine.

Flow Process with Power Automate

Start a new blank flow.

After the data in the table is filled, flow will be run by being triggered individually. For this reason, start the flow with Manually trigger a flow.

In the next step, add Excel for Business (List rows present in a table) to be able to add the data in the Excel table. Add the table you’ve just created into this item.

In the next step, add Outlook (Send an e-mail).

In this step, the columns of the Excel table is added to the related fields. With you choosing the Excel fields (mail, name, etc.) the Apply to each item will be added to the flow automatically. An event will be created for each row in the Excel file thanks to the Apply to each item.


After filling the related fields, name the flow on top left corner. For example: Send Mails to a Certain List. You can save and close the flow on top right corner.

You can verify the data in the Excel table and run the flow.


You can take a look at this link for the Power Automate Outlook Connector.

Gebze University“7th Science and Technology Days”

Our CEO Ahmet Toprakçı attended the “7th Science and Technology Days” event that took place in Gebze University as a guest. In this event where “C level” managers of leading and innovative companies and scientist that create a hopeful future with their scientific studies were guests, we talked about a lot op topics like our experiences, development road map, business and social environment.

Guide to Working from Home During Corona Days / Hürriyet

During these working-from-home days, employers have started to take a lot of actions to bring all the work to the online. The changes can be mainly grouped as: management of the work of the employees, digitization of the company and customer meetings, documents being accessed from everywhere, securely accessing accounting and HR applications outside the company. Of course, the first and most important one of these topics to be taken action upon is common working platforms that provide the employees with a continuous communication.

You can read our interview where we talked about what to do during these times and recommendations for those who have a hard time concentrating at work or while working from home.


Conditional Formatting Lists

You can design lists with a condition with the If Formula in the gallery. It is possible to control a lot of features of the objects like color, look, size and place with these conditions. You can authorize based on person/department , hide/show buttons on the screen and highlight status in tracking processes.

Designing Lists with a Condition

In this example, items indicated with colors depending on the information they contain. While all the items of the “Education” department are indicated with purple, the Sales department is displayed with Grey.

ThisItem word is used to individually evaluate each item in the gallery. This way, it is possible to access the data of a certain row among the items.

While registering, people enter their names and surnames separately. And the & concatenation operator is used to write the name and surname next to each other.

ThisItem.P_name & ” ” & ThisItem.P_surname

Adding a Condition

An empty Label is added to the gallery and placed on the left of the gallery to highlight the items.

If(ThisItem.P_departman=”Education”;Purple; Gray) is written into the Fill property of the Label.

With this syntax, each row in the gallery will be evaluated one by one and the department info will be checked. If the department is Education, it will be displayed with Purple. If it is another department, it will be displayed with Grey.

As well as you can write the color as Purple, Red, Blue; you can also write it through the RGB codes.

When you want to use a special color code, the RGBA() function is used.
This function is written as RGBA(255; 255 ; 255 ; 1) as well. The last parameter of the formula gets a value between 0 and 1 and affects the transparency of the color.

You can click here for the other Power Apps articles.

You can click here for the details of the use of the If function.

Demand Burst for Digital Workplace / Platin Dergisi

The Coronavirus pandemic caused the demand in digital workplace platforms to burst with the start of the working-from-home era. While transforming business life to home requires a compulsory digital transformation for employers, hard times await institutions that do not have the necessary technological infrastructure. In a very short time, the demands of companies operating in the retail and logistics sector for digital workplace platforms and services in this direction increased by 70%.

Within the framework of the measures taken against the epidemic risk, many companies decided to work from home. On the other hand, business processes need to be continued without interruption. Due to competitive global markets, generational change in human resources and digital transformation requirements, in the near future, almost all companies, large and small, will have to adapt to this change and quickly move to digital workplace platforms.

“We will adapt quickly to the digital workplace; our work culture will change”

PEAKUP COO Kadircan Toprakçı evaluated many firms starting to work from home and the digital workplace notion it brought together in Turkey said: “There is a great interest and demand for the digital workplace notion by companies at the moment. Because it has been seen that internet connection and computer alone do not mean sufficient hardware to work from home.

We are not talking about one or two people or one or two departments who must work outside because of their duties. All company employees transitioning to the digital working environment revealed many measures and infrastructure supplies. The biggest concern of employers in this environment is the disruption of team unity and work processes among employees, and the decrease in employee motivation. This situation will bring a forced digital transformation and rapid adaptation, especially for employees who are not used to digital work culture. However, very soon, all companies will start using digital workplaces and they will continue to renew their way of working after the pandemic.”

Retail and logistics industries are more demanding

“We receive high demand from all sectors including manufacturing, especially retail and logistics sectors,” said Toprakçı. “As the virus pandemic leads everyone to work from their homes, it is a very important responsibility for employers to ensure the continuity of the economy, to ensure that they work in a focused manner as if they are in an office, and to continue routine business processes.

Especially companies with many employees, branches and sales networks, and that has more than one office show great interest in the digital workplace platforms. The demand for our digital workplace platform Velocity, which was developed by Turkish engineers, increased by 70% in 3 days. Our entire sales team working from home focused on informing companies on this issue. We predict that these demands will intensify even more in the coming days.”

Impact of the Coronavirus on the digital workplace platforms

PEAKUP COO KadirCan Toprakçı emphasized that running business on digital platforms is easier and more effective contrary to the popular belief. “The fact that we are currently working from home has shown us that we can advance our business processes through digital platforms without disrupting them. This is actually the first stage for both employers and employees who are not used to the situation. In the next period, both sides will develop themselves more in this field, and will create new demands and new services. Being able to carry out our business processes digitally enables us to work more efficiently and to use our time more effectively. Of course, like everything else, this situation has its negative sides.

When we look at it from the perspective of human resources, it negatively affects the motivation to work, especially in pluralist societies like ours. However, when the adaptation process is completed, digital workplaces will be used more effectively and productively. Upon the requests from our customers who use Velocity effectively, we created a special module about the Coronavirus. A special application card was developed for companies to share the measures and decisions they took regarding the pandemic with their employees. Thus, information about all the measures taken, new implementation procedures and working conditions that have been changed can be provided quickly. This new module acts like an online crisis desk.

Office Insider – What happened in August?

NEW FEATURES/FIXES


You can find and follow all monthly Office insider new features and fixes (updates) on our blog. 👍🏻  Officer insider gets updates and new features regularly. It is important to follow these Office insider updates and use them in terms of increasing your knowledge. Now let’s take a look at what kind of changes happened in Office insider in the month of August.


📅August 07, 2020


PowerPoint 

Notable fixes

  • We fixed an issue where users were seeing the ribbon/title bar not being displayed under certain conditions.

outlook new iconOutlook

Notable fixes

  • We fixed an issue where the user account attributes in Active Directory for “otherTelephone” and “otherHomePhone” were not mapped to the corresponding Outlook LDAP attributes.


📅August 11, 2020


word new iconWord

Explore modern comments

Add comments to objects, @mention colleagues, and resolve comment threads for a better collaboration experience.

Word’de modern açıklama ekleme

Learn more > 


outlook new iconOutlook

Delete messages

Delete messages and conversations in CML view.


📅August 14, 2020


Excel

Notable fixes

  • We fixed an issue where if a user typed a formula name including the parenthesis and invoked help via F1, the help topic specific to that formula would not be displayed.
  • We fixed an issue where macro links to buttons were broken after restoring the file to an older version of Excel.

word new iconWord

Notable fixes

  • We fixed an issue where the bullet picture icon didn’t display correctly.

outlook new iconOutlook

Notable fixes

  • We fixed an issue where the Meeting page would continue to be displayed after the user switched tabs from the Meeting page to the Scheduling Assistant page.


We compiled all the new features and fixes in August in Office insider. Hope to see you in our other articles, bye bye. 🙋🏻‍♂️
You can share this article with your friends and family to help them get information about Office insider updates released in the month of August. 👍🏻